Another 120 Gallon Compressor Tank RF Build. Appreciate any help.

  • Some of the links on this forum allow SMF, at no cost to you, to earn a small commission when you click through and make a purchase. Let me know if you have any questions about this.
SMF is reader-supported. When you buy through links on our site, we may earn an affiliate commission.
Looking pretty good !!     Frozen pipes  Bummer 

Gary
 
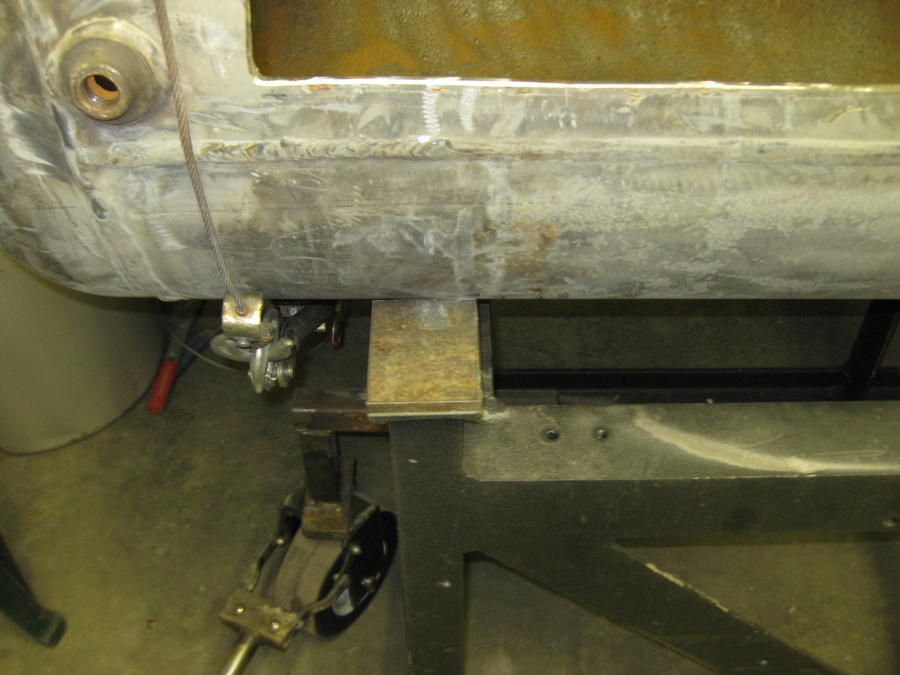
Some comments to accompany pictures.  Tires are 10" airless from Northern Tool.  I turned a piece of 7/8" rod down to 1/2" or 5/8" (can't remember which)  at the ends to form an axle.  Drilled through the 3/8" thick  aluminum frame to insert axle and mounted plates on outside edges to prevent axle shifting.


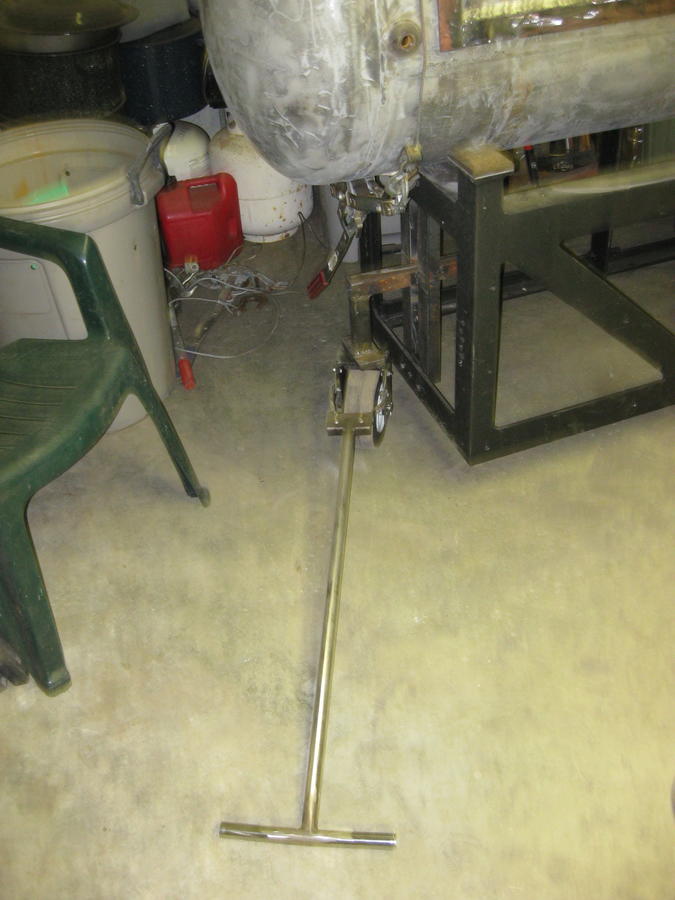
Fabricated a front steering wheel so I have a tricycle arrangement to make easy sharp turns,  This is also an air-free wheel from NT, I believe 8".  Made a handle from some stainless tubing I had with a "T" handle, kind of like a toy wagon handle so it can be pulled and maneuvered.  Wheel pivots on 2 pieces of 1/2" steel.  No bearing between the flats, just some white grease.  Axel is 3/4" turned down from my 7/8" bar stock.


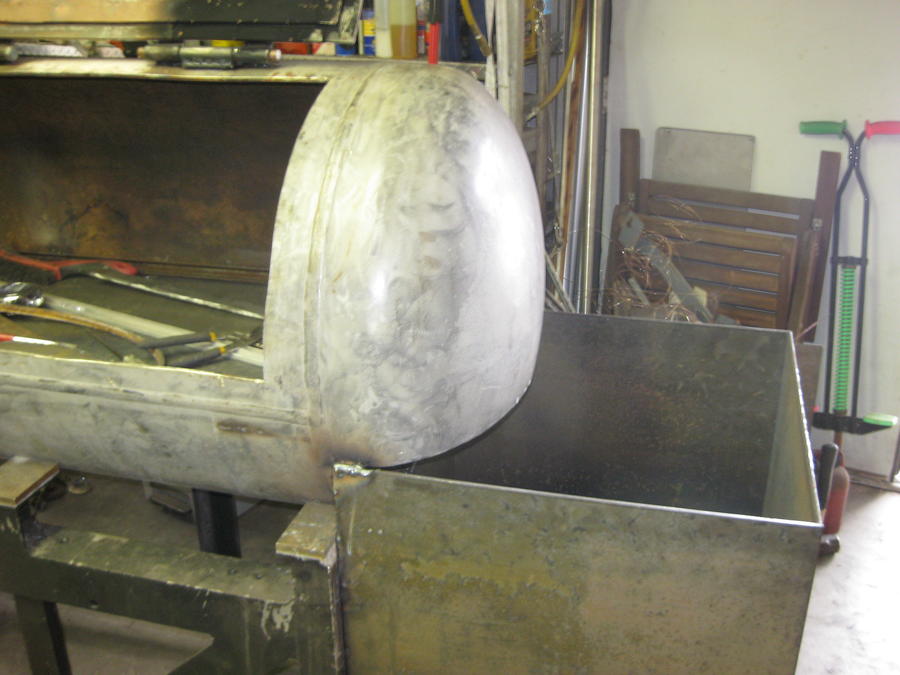
Tank is not yet welded to the frame and won't be until I no longer need to manipulate it to enable easier welding.  I'll likely roll it upside down to deal with the firebox and the cut out to the CC.  I'm neither experienced nor flexible enough to be down low welding.  Rear of the firebox will be bolted to the frame and welded to the CC.


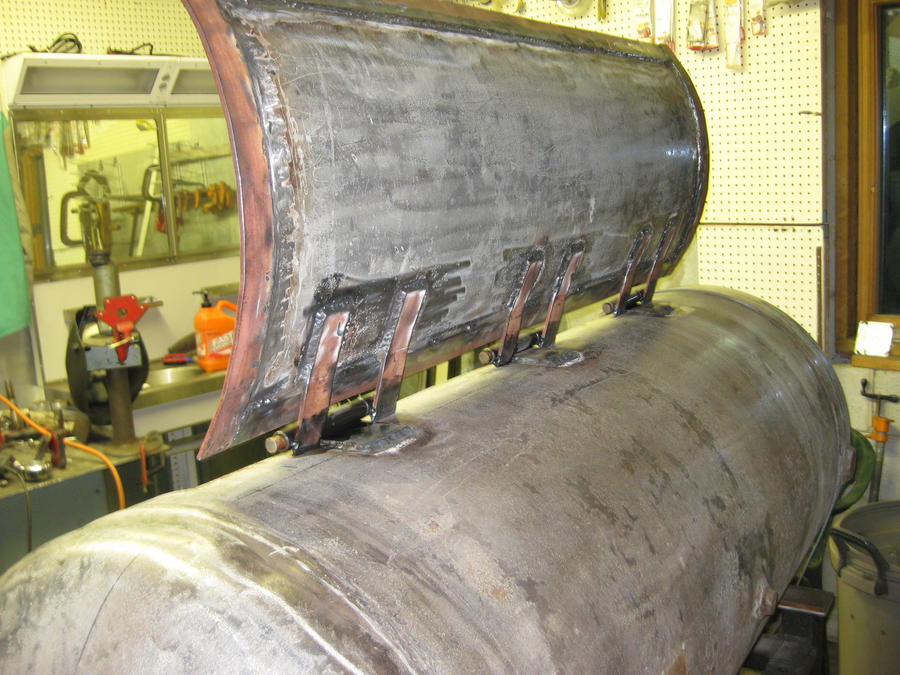
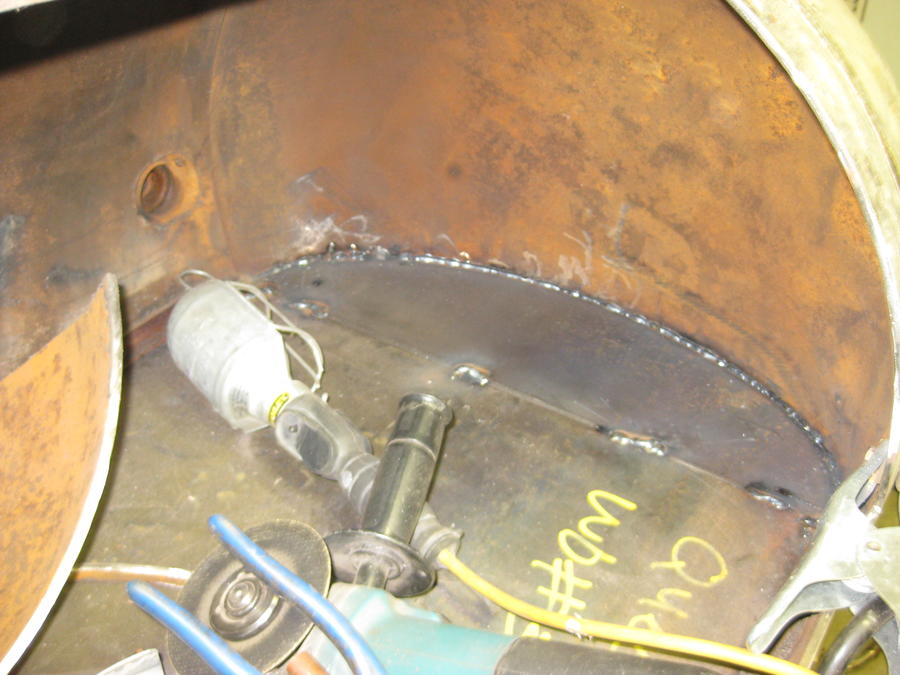
Door is 48" wide and is edged with 1 3/4" wide 3/32" flat stock.  Tank is 3/32" thick.  End opening for firebox has been cut right at the weld seam.  Will use the seam rise as the dam against possible back-flow of grease into the firebox.  Not likely.


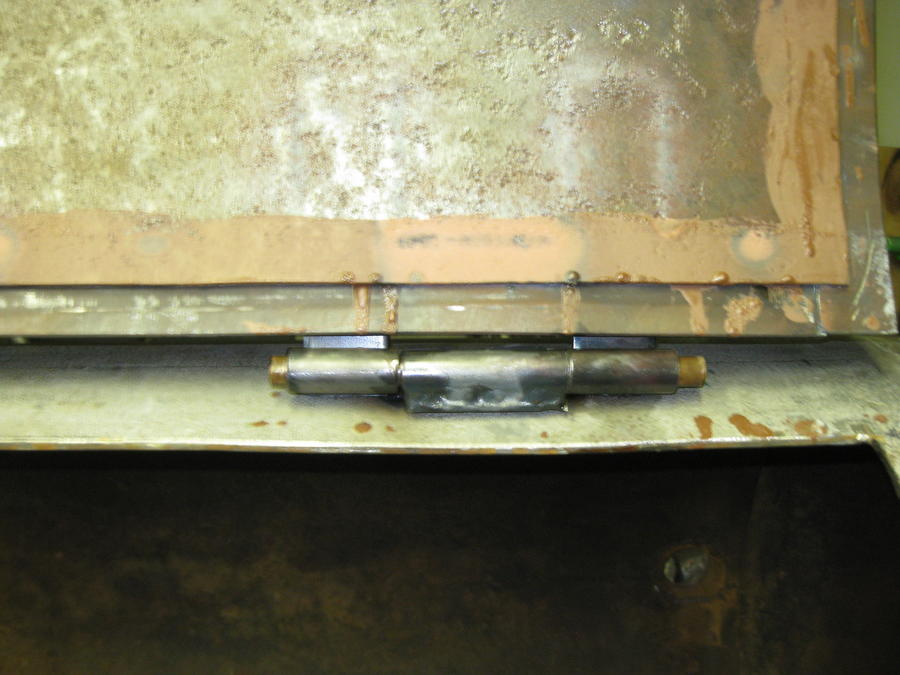
Hinges are home-made from 1/2" black pipe, the 1 3/4" flat stock and 9/16" rod.  The 3" center section is welded to some 3" flat stock 3/32.


All the welds are TIG other than the very sloppy ones on the bottom and sides of the door edge where I demonstrated that I forgot everything I thought I knew about stick welding.  Am having problems with my MIG machine and hope to solve them before it is time to weld the firebox late this week.  Not looking forward to tigging that much weld....but will, if necessary.  Will run a few pads with stick and MIG later this week to see if I can do a decent job with either/both.

Used a rosebud tip on my O/A today and a couple of pipe clamps to get the door curve back under control.

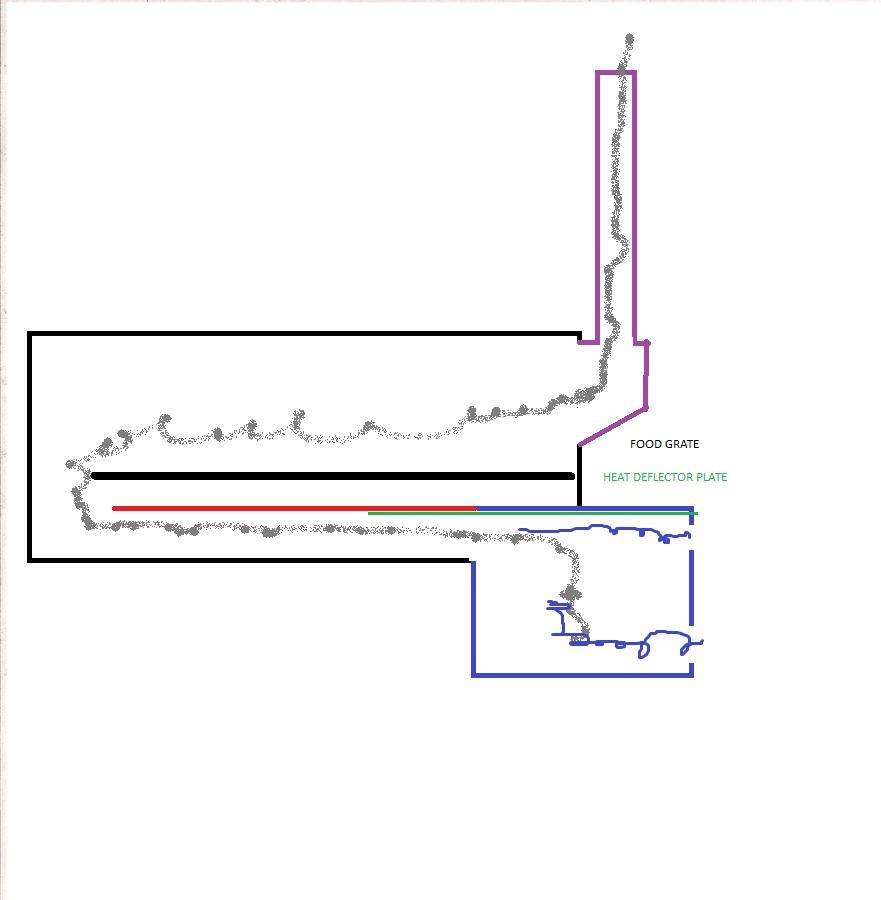
Am trying to decide whether to just cut the chimney pipe into the tank and carry it down to a 45 or 60 degree birds-mouth opening at cooking level or build the exterior stand-off and mount the 5" pipe on there.

Regarding my earlier post about possibly creating 5" circular vent openings at the bottom and one at the top of the firebox door, to get figh temps in the cooking area when desired, any thoughts from you Dave?

Hopefully will have my steel order Friday. Other than drilling and mounting a drain, have about run out of what can be done without more materials.   I work Saturdays, so Sunday will be my next big day.  Sorry for being so long winded.

Please comments/advice wanted.

Jerry
 
Last edited:
71 years old... and still get'n after it !!!!
77.gif


This is gonna be great ...
icon14.gif
Thanks.  Get'n up and get'n after it is get'n harder.............but I'm having fun!  That is what matters now.

beercheer.gif


Jerry
 
Made some progress the last couple of days....until the lid fell edge-first on my left foot yesterday.  Finished up the welding and cutting I was going to do for the day, but foot is sure swollen and sore today.  Guess I'll have to take some time off.   My calculations were off 1/4" for space needed to mate up with CC opening so I had to re-cut the half-football by 1/4" to accommodate the lid.  Welded up that joint from the inside of the tank.  Awkward welding for a beginner but came out okay, so no exposed weld on that end.  Used a floor jack inside the fire box to get a tight fit-up with the lid to the mouth of the tank opening.


Last edited:
Nice    Gunna be a very nice smoker

Gary
 
Thanks Gary, Well, at insistence of Wifey, just got back from urgent care.  X-ray shows one cracked and chipped bone.  Not too much can be done about it so will boot up tomorrow and work through it.

Jerry
 
Last edited:
Added flanges to the door today and fabricated handles and friction locks.  FB door seals to less than 1/32" on 3 sides. Am trying to figure out something for the hinged side.  About a 1/16" space there; may not be enough to be concerned  about..    Anyone"s thoughts?

Also tested and vetoed the idea of circular vents after ruining a 2.25" bi-metal hole saw on the first hole.  Will opt for square holes instead.  Just can't do the circular cuts steady enough, even with a BIG hand-held  drill.  Should have drilled them before assembly but too late now.  No pictures tonight.  Worn out.

Jerry
 
The hinge pin should have been back from the opening at least the width of the door seal... Hard to get a door seal with that configuration....
 
Dave,

I agree, but it is done now and am looking for ways to possibly fix after the fact.  Given the space and size of the door, I'm guessing about 1 square inch of total leakage along the hinge side.  Given that I need 31 square inches of available vent, will it matter?

Jerry
 
Weld the seal to the inside of the CC so the door closes on it.... Use a blind weld.... Drill holes in the CC about 1/2" from the door opening.... Place the door seal inside the CC... Clamp and weld.... Drill 3/8" holes about every 6" should do.... I would use DC-.... Put the heat in the CC and flange... keep the electrode cool..... 3/32" 6013 rod if that's what you are welding with... It will weld through the puddle.....
 
Dave,

Was able to mig spot-weld a scrap piece if 1/4" plate from the front into the fillet angle and cut the welds back enough to eliminate interference with the door.  Got a 3/4" seal.  I cut the vents above the door at 2.25" square and made and mounted their slide damper today.  Also cut the vents near the bottom of the sides, four on each side approx 2.25" square.  Made damper slides but am not happy with them.  Will remake tomorrow and take some pictures.

Chimney is the next step (5" pipe).

Regarding the plenum for the chimney,  in a post I read recently, (I think by you, but can't find it)  I understood the recommendation to be starting the plenum frame on top of the fire box to capture max heat and improve draft. Haven't seen one like that and would like some clarification.  I had assumed the opening in the tank from the plenum to the CC would start at about the cook grate level.  If the plenum housing started at the top of the FB, would the cut out to feed the chimney start at that level or at the cook grate level?    If at the higher level, as I'm accustomed to seeing,  the plenum housing/frame would be dead space below the cook grate.  Wouldn't that dead space be a trap for debris/moisture?  I'm thinking I may misunderstanding  the advice.  Can you clarify?  My return plate mates up with the top of the fire box and is about 5" below the cook grate.

Thanks,

Jerry
 
Dave,

Yes, your drawing is what I plan to do.  Somewhere I saw advice to extend the base of  the plenum all the way to  the fire box,  Kind of confused me.  Thanks.

Jerry
 
Dave,
Yes, your drawing is what I plan to do.  Somewhere I saw advice to extend the base of  the plenum all the way to  the fire box,  Kind of confused me.  Thanks.
Jerry

That should give you some ideas as to what is possible in your design.....
 
All said and done you will have a very nice smoker, can't wait to see TBS coming out the stack

Gary
 
I wondered about doing the plenum all the way down to the top of the firebox like jerry mentioned but wasn't sure if there were any drawbacks to having that large of an open space inside to the chimney. Jerry do you remember where you saw it mentioned and has any one seen one done that way? 
 
 
I wondered about doing the plenum all the way down to the top of the firebox like jerry mentioned but wasn't sure if there were any drawbacks to having that large of an open space inside to the chimney. Jerry do you remember where you saw it mentioned and has any one seen one done that way? 
No Danny,

I'm sorry I can't find that post.  Dave kind of left it wide open on flexibility of design of the plenum.  I wimped out and cut mine at conventional height today.  Not a problem to continue it downward.  That was the advice I was seeking but apparently I did not communicate well.  I cut a three pieces of steel for the outside of the plenum housing but need to cut the top and bottom tomorrow and have not welded anything yet.  As mine is,  I'll have about 5-6" under the plenum and above the surface of the firebox to use for a deep skillet as well as remaining space for a warming pan/pot.

I seem to have trouble communicating clearly here.  At 71, its likely my brain. 
help.gif


Jerry
 
Last edited:
SmokingMeatForums.com is reader supported and as an Amazon Associate, we may earn commissions from qualifying purchases.

Hot Threads

Clicky