Another 120 Gallon Compressor Tank RF Build. Appreciate any help.

  • Some of the links on this forum allow SMF, at no cost to you, to earn a small commission when you click through and make a purchase. Let me know if you have any questions about this.
SMF is reader-supported. When you buy through links on our site, we may earn an affiliate commission.
My smoker looks like a robot with what I did today. Retired engineer friend could not come up with foolproof specs so I started winging it. Okay, here is what I did. Can't say I understand the math so I just winged it.

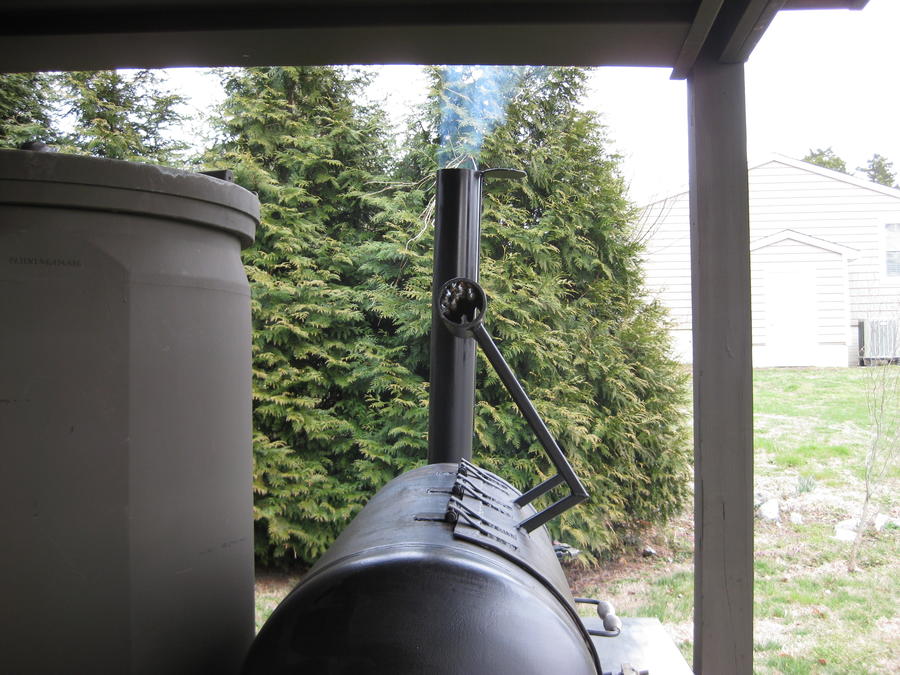
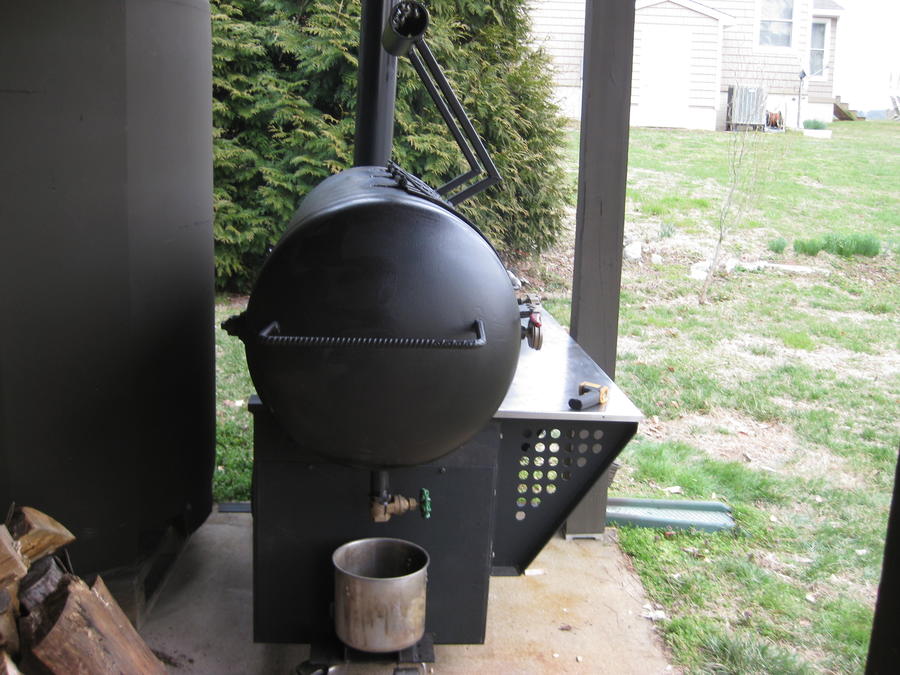
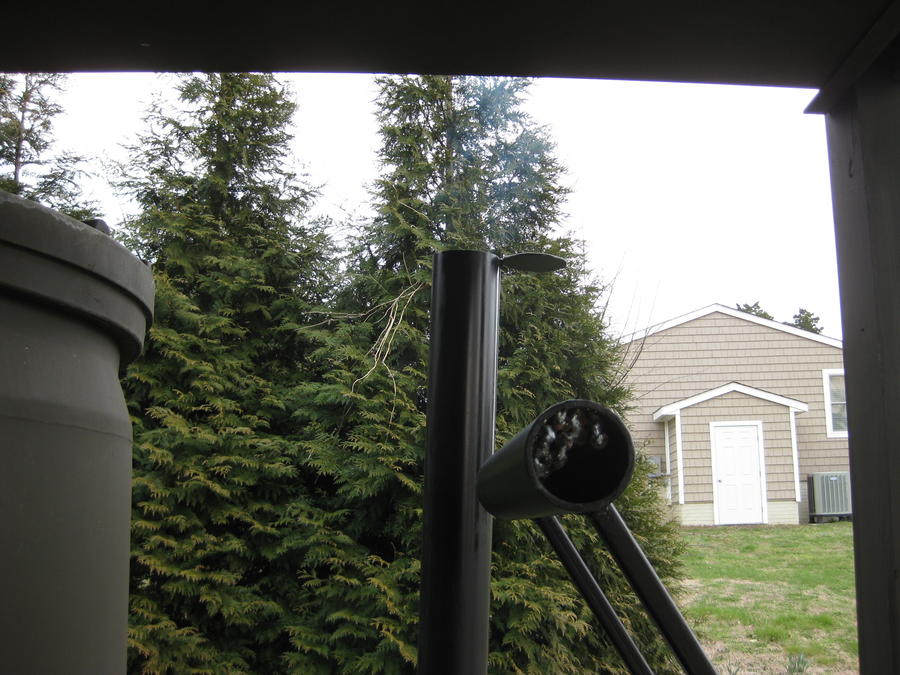
The forward edge of the 1" box tube is at 7" from the fulcrum and angled outward about 30 degrees to clear the tank. Right angle at 6" height arms extend 26" to 4" OD tube, 23" long. I tried to mock up something but due to weights could not do so. In current config I have about 5-7 lbs handle weight with the 4" OD tube empty but the damned thing looks like a robot. Its not a big deal to cut and grind. So the question is how short can I make the arms with adding weight to the pipe/tube and keep the lift weight at 10 lbs or less? I'm working tomorrow. Back at it on Sunday.. Given the arm contact with the tank when open, the key thing in my mind is, if I put a 2" spacer between the arms and the tank, and if the door is still open enough to allow the smoker to function, I suspect that is the point I'll shorten the arms to.

Jerry


Did you come up with a new steering wheel yet? Will be "borrowing" some of your ideas when I get to mine...
 
Drop it down till the pipe just touches the tank but tack in in place and see how that looks. If you want to do more, it isn't a problem but you will begin to get interference with the door opening size when the large diameter of your pipe hits the tank, you will have to add weight the shorter you get. It won't hurt to have a little extra weight keeping the door closed since the balance will come in once the main weight passes the hinge line.
 
Yes, I worked on it at the end of the day.  Rained all damned day so the counterweight welding was challenging in the wind and blowing rain.  No pictures of the wheel effort because my welds are so ugly (and I just crashed at about 6 pm  ....wife is AWOl so I have more time-flex) but tend to go until I drop.

I tried an experiment in welding two stainless framed 6" swivel casters rated at 500 lbs each to a rectangular piece of 1/4" steel plate.  It seemed to work using a stick rod of little note (347-15 stainless).  I hammered the flux off it, sanded it and used the rod as TIG filler rod.  Ugly welds but only because of my skill level, not the rod.  Will figure out how to sub the 2 swivel casters for the single wheel on Sunday.  Thanks for asking.

Jerry
 
Last edited:
 
Drop it down till the pipe just touches the tank but tack in in place and see how that looks. If you want to do more, it isn't a problem but you will begin to get interference with the door opening size when the large diameter of your pipe hits the tank, you will have to add weight the shorter you get. It won't hurt to have a little extra weight keeping the door closed since the balance will come in once the main weight passes the hinge line.
That is the plan.  I want full opening so I expect the tank touch point will be the final length.  Will see once I put a dummy to rep the tube and see the expected door opening.  I don't want a door edge hitting me in the head when I want the look or reach deep.  Already got enough head issues.

Jerry
beercheer.gif
 
Update..Trying again.  Am not a typist so this is a pain.  When I entered high school in the late 50s, only girls took typing and in a graduating class of 38, it was tough to be manly, play football and sneak into typing class.  Wish now I'd have seen the future, skipped all the sports and took typing. 
hit.gif


To retrace steps for those following, I had to replace the steering wheel as it was over its rated capacity and developed flat spots when sitting which made moving the beast tough.  My wagon-like steering arm  helped maneuvering inside my small basement shop room and was always intended to be temporary.

 
Replaced the single semi-pneumatic "flat free" wheel with a pair of SS 6" swivel casters I've had for several years.  They are either 400 or 500# casters.  Keep in ing that the supporting frame is aluminum so anything steel I add is bolted.  Anyway, tig welded the SS casters to a piece of 1/4" plate and mig welded it to two 1.5" angles and from there to matching 1.5" vertical angles which I bolted in place.  Remember the base is from an Navy ships desk which was never installed.  I used the end of the desk to dress up the end of the cooker.


New steering mechanism needed.  #5 rebar to the rescue.


Counterbalance had to be cut shorter.  17" was supposedly the magic length so did that.  Lifting weight went from 12 to 20+ lbs.  Added rebar but it really had little effect.  Perhaps 18 or 19" would have worked better. Too late now.  I did tack weld the rebar to the rear of the pipe which took a couple of lbs off.  Door is 61 lbs plus whatever weight the 40# counterbalance puts on it, so 20# is not a bad lifting weight.


Continued in next post.

Jerry
 
Last edited:
Cut caps today for the counterbalance but have not yet welded them in place.

I tried a burn yesterday after painting the inside and the grates with a pint of bacon grease.  Couldn't get temp above 150 degrees in 45 degree ambient.  Today I cleaned out the firebox and eventually got a big fire going and got the temp above 300 degrees for a couple of hours.  Am burning damp pithy maple from a long down big tree so am not getting much heat value.  Need to get some oak.


Last edited:
Also added a couple of stiffeners to the #9 expanded metal wood storage grate using 1x1 angle.  Had to make some wierd cuts to the grate to get it in place around the fixed aluminum frame.


Next is a couple of coats of paint and more burn in with more bacon grease and better wood.  Overall, I'm pretty happy but this thing does eat some wood.  Am not sure how to control vents.  Guess that will only come with practice.  A piece of good news today is that the thermometers shipped today and should be here end of week.  More welding ahead.

My current versions of TBS:


Have seen the bacon grease coating mentioned in a few places....what is the deal with it?
 
Some people coat grills, etc with cooking oil.  Others use olive oil or lard, others bacon grease.  To my way of thinking, bacon grease is best because it leaves a longer lasting coating/curing on items that would otherwise rust quickly.  Also adds a better smell to the interior of the cooker.

Jerry
 
SmokingMeatForums.com is reader supported and as an Amazon Associate, we may earn commissions from qualifying purchases.

Latest posts

Hot Threads

Clicky