- Oct 2, 2013
- 28
- 11
I'm a new guy to the forum, but have been an amateur fabricator/tinkerer/DIY guy for awhile, so i decided to build a double barrel horizontal stainless smoker from scratch (not a kit build)I will document my progress here and give tips on how i figured things out and also let you know what i did wrong or could have done better to help those out and save them the trouble.
So far in the build, I have $219/55 gal drum and $175 in misc stainless parts (duct, angle, rods for the grate, etc). carbon steel would have much less expensive, but I wanted it to match my other outdoor projects and i like the idea of a lifetime of no maintenance.
My equipment includes:
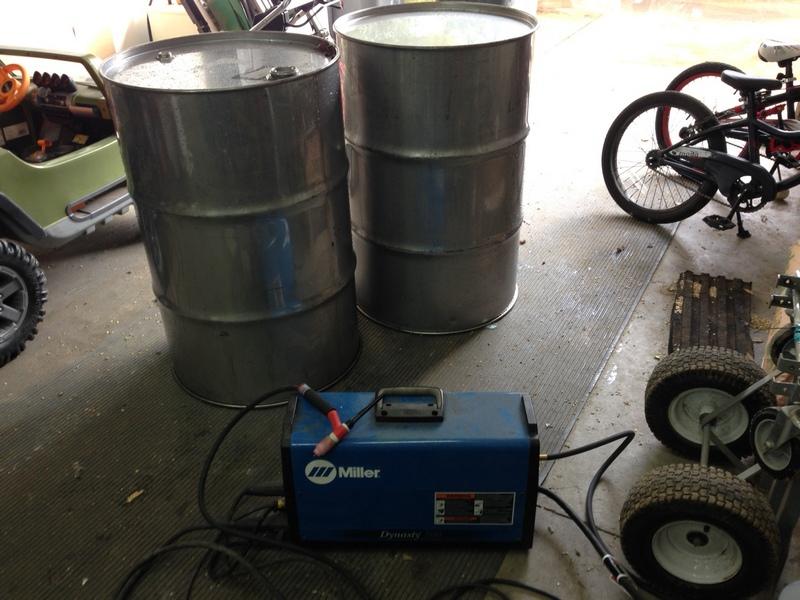
Miller Dynasty 200DX TIG welder
Plasma cutter
Band saw
Angle grinder
Circular saw with abrasive blades
Level
Sharpie
6 pack of Coors Light
Here we go!!!!
Drums and welder
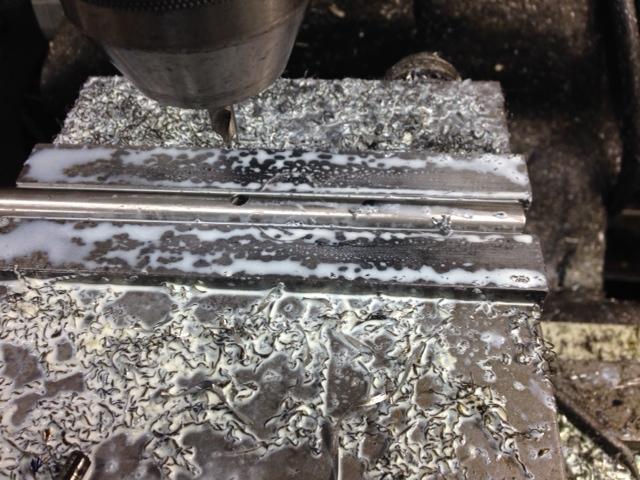
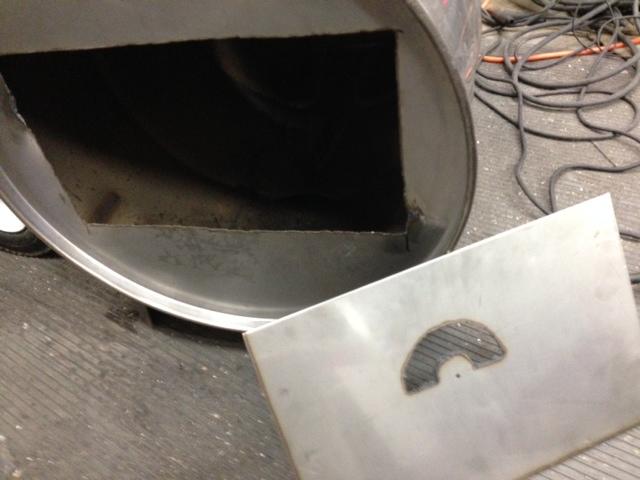
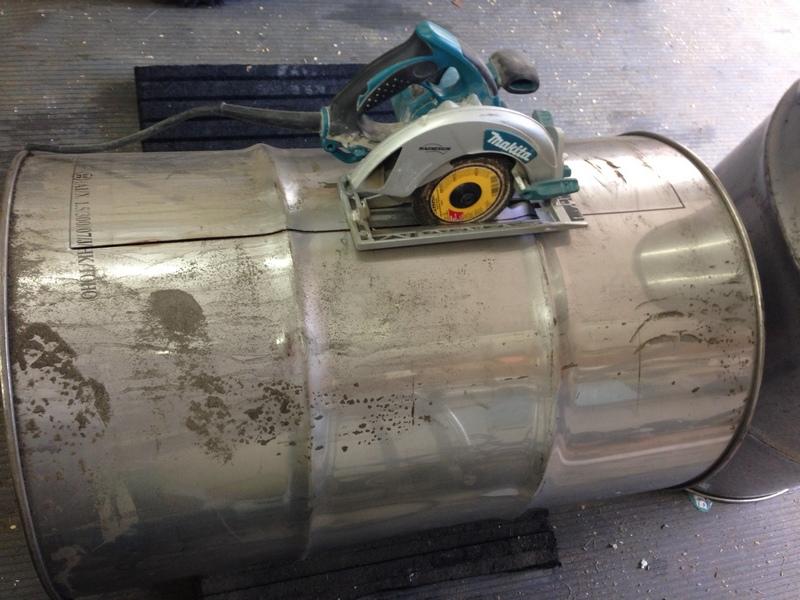
Cut out the opening. Circular saw is the way to go if you can. straight lines and easier to control than an angle grinder.
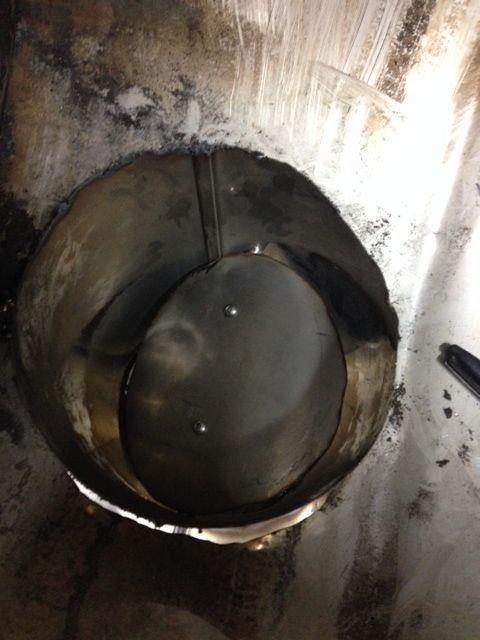
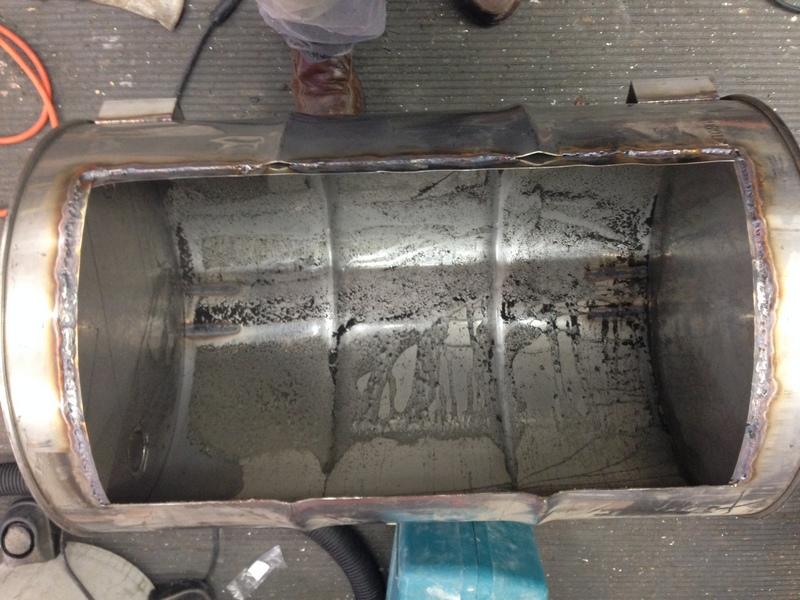
Lip welded around the opening
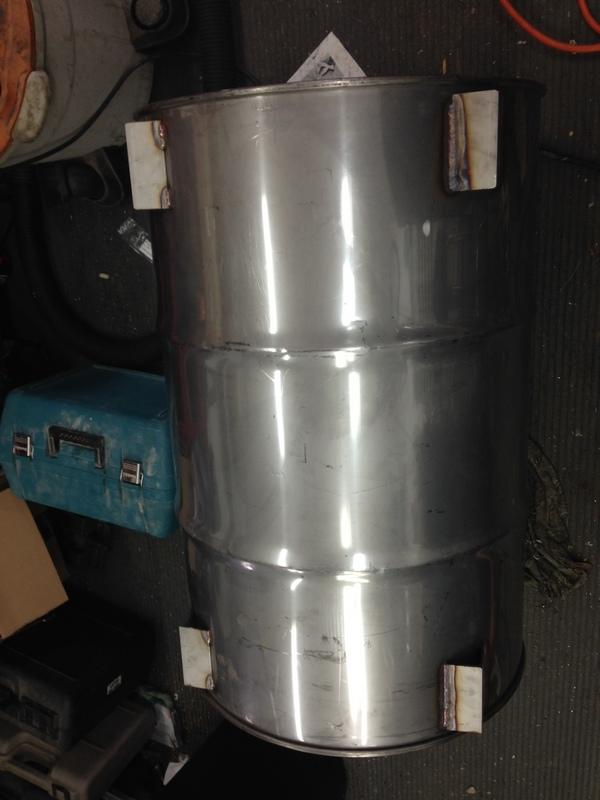
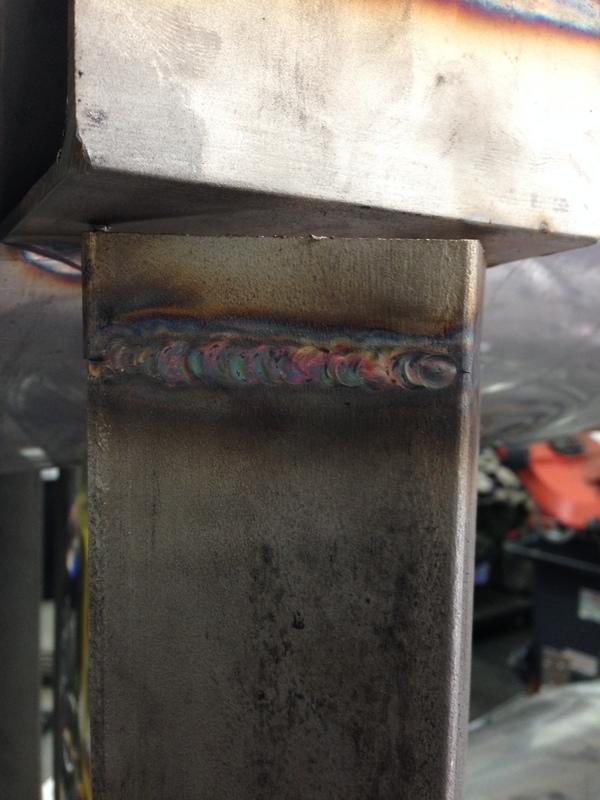
Brackets welded on for attaching the drums.
For the top drum, you will need 4 brackets. I used 2" x 1/8" angle. It doesn't really matter where you put these on if they are the first ones you put on. The next set will have to line up. We'll get to that. You will weld one bracket in place. Used a level to figure out where to put the corresponding one that goes on the same side. NOTE: Be sure your drum is level also. Once you have one side done, you will use your level to figure out where to put the ones on the opposite side. To do this, I put a rod through the brackets on the completed side and placed my level on the rod and marked the opposite side. NOTE: The rod is NOT the top of the bracket, it is the center of the bracket, so you will have to take that in account when measuring and marking.
When doing the second drum, you will have to be sure the brackets line up. To do this, I used the rod technique again and marked with the sharpie a line across the top of the drum. I used this to measure the drop for the second drum. Bracket installation was done as with the first drum (level and rods). Once again, remember that the rods are NOT the top of the bracket. I can't stress this enough. I had to remind myself and triple check that I did it right. It's easy to get in a rush and mess it up.
Now for the feet. The feet brackets went on the same as the others. NOTE: I did NOT cut out the firebox opening yet. That would be one more thing to have to bring in alignment and one more headache.
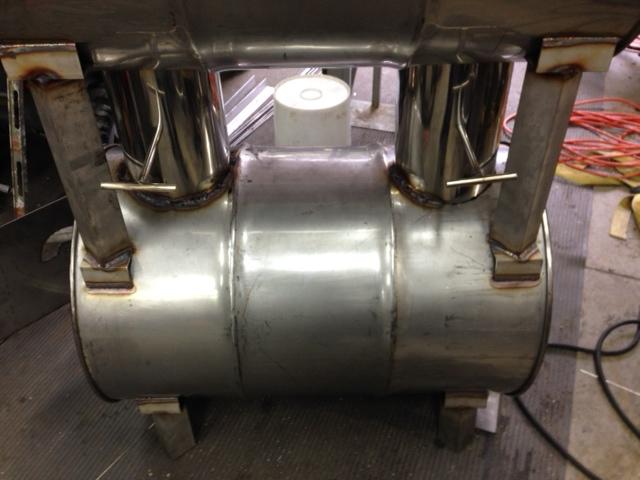
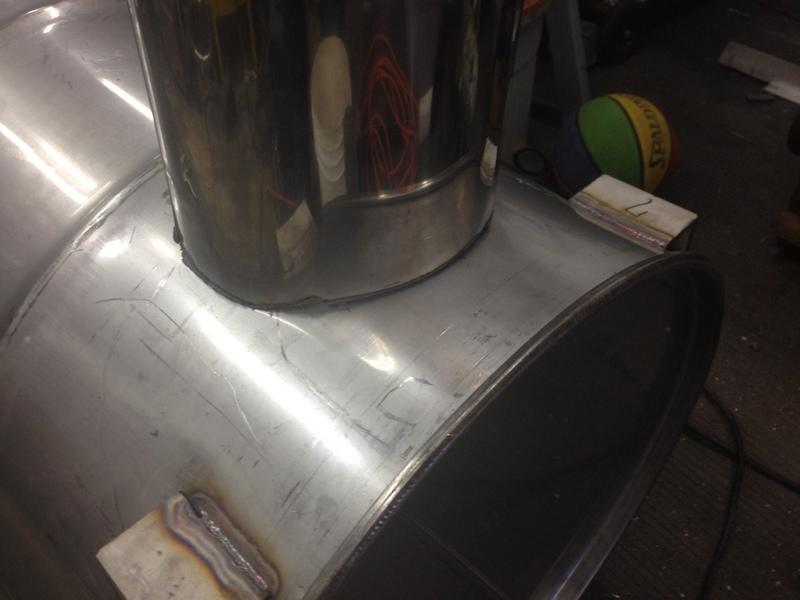
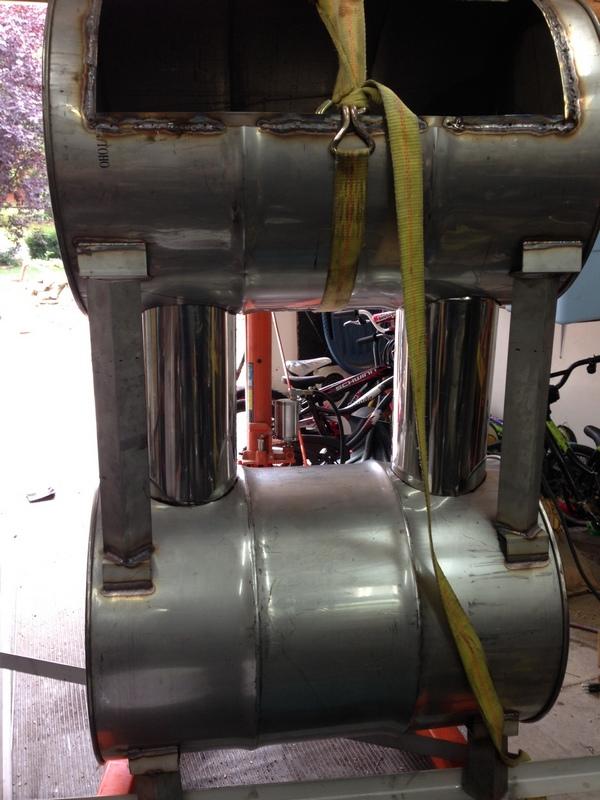
Now it's time to install the duct work between the drums. I used 8" duct since my metal supplier didn't have any 6" stainless in stock. I figured that with a damper, it doesn't really matter how big the opening is. I hope that isn't a mistake. Since the surfaces are rounded, i couldn't simply trace the 8" duct onto the surface of the drum. I coped out one end of the duct work so that I could use it to trace.
That is all for now. I ran out of gas last night...literally. My welder ran out of gas. Plus I ran out of beer.

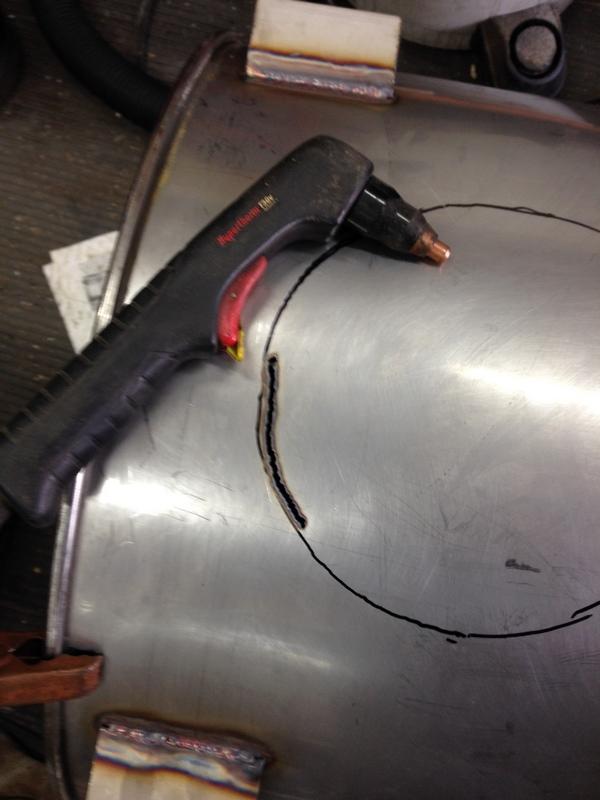
Got more gas and went to work. I cut out the holes with a plasma cutter. cuts like butter.
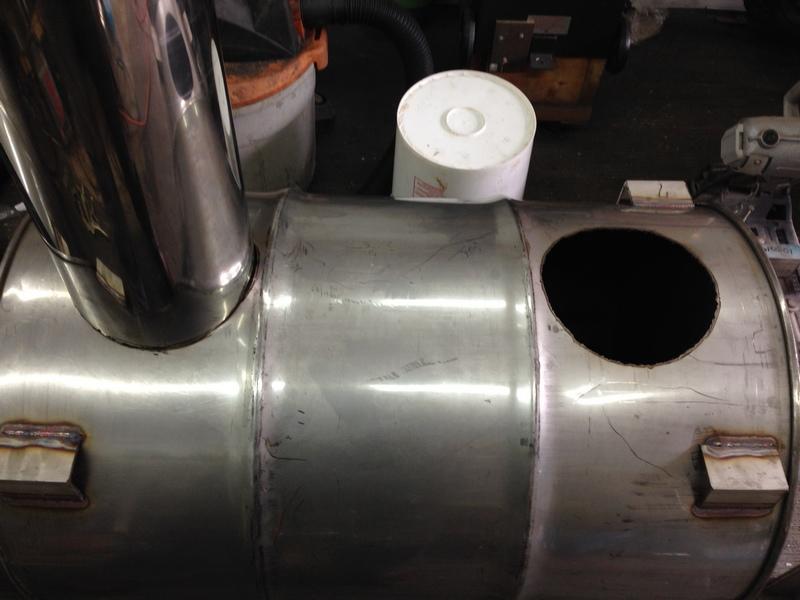
Cleaned up the edges with an angle grinder and fit the tubes.
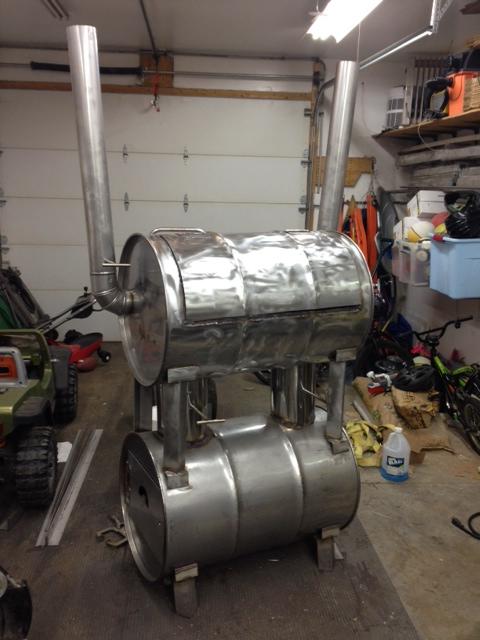
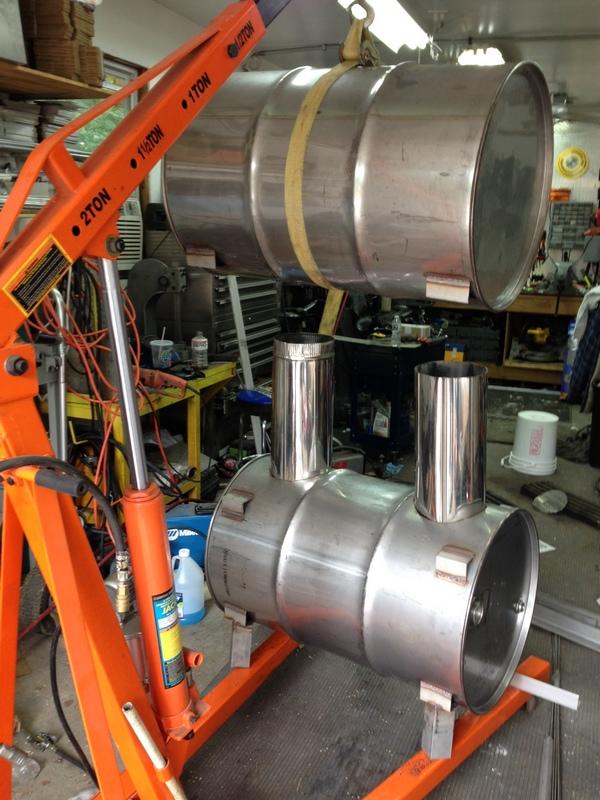
Now to fit the two parts together. Since i'm working alone and couldn't find two people that wanted to hold the drums for 2 hours, I used an engine lift.
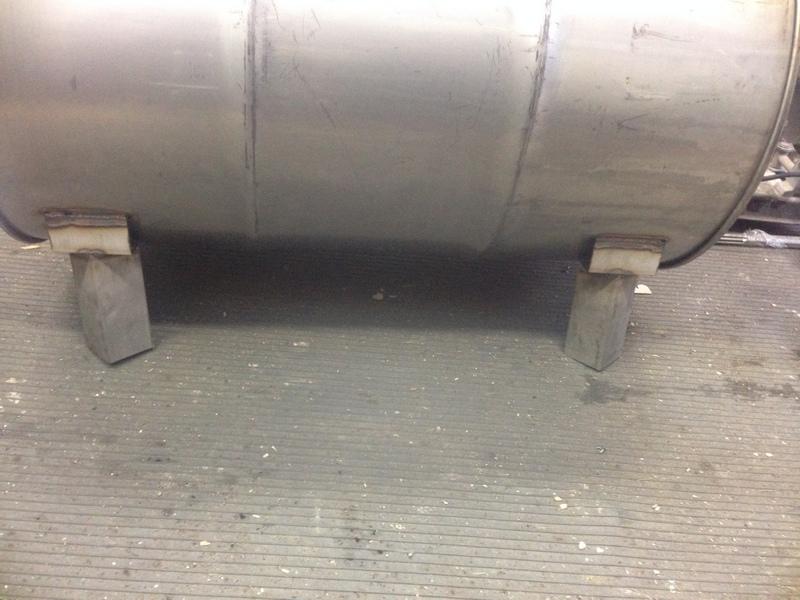
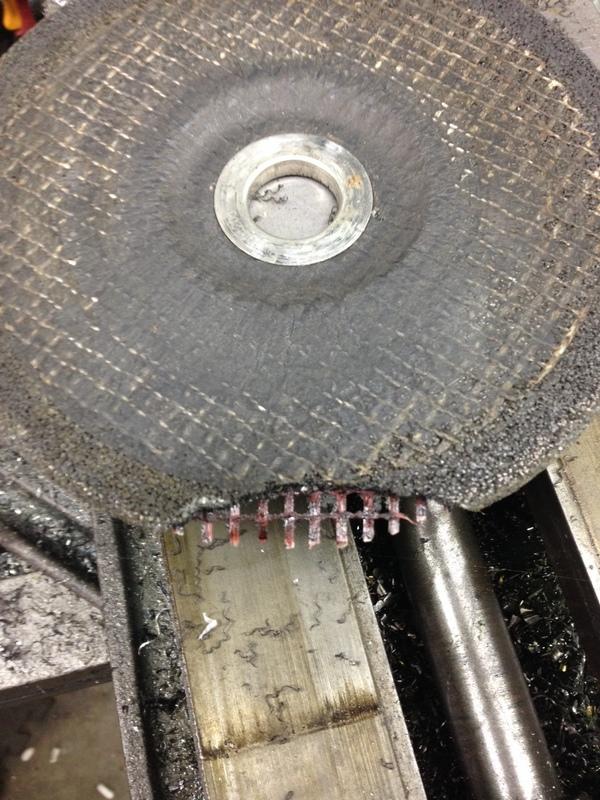
Now to weld on the supports. You are about to see mistake #1. I welded on the bottom of the supports and realized that the unit would be too tall. I used an angle grinder and cut the supports down 5". I cut the unwelded ones (rear) on the bandsaw.
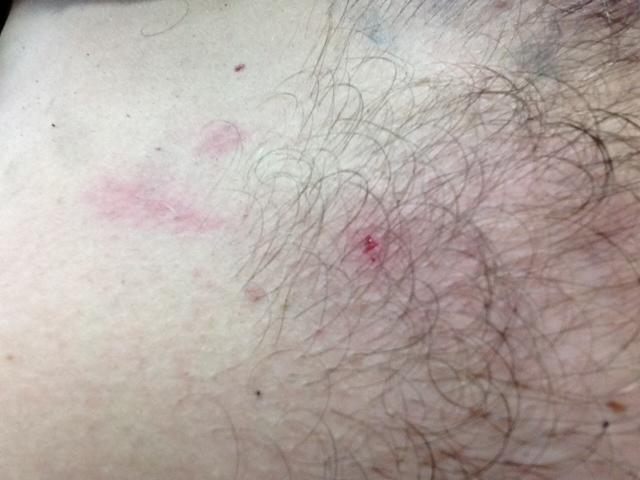
SAFETY WARNING Always wear safety glasses. The angle grinder broke loose while cutting the support and flew off into my stomach. Had it been my eye, things would have gone bad real quick if i didn't have glasses.
Now i attached the other two supports and i run into mistake #2. Even though I thought i measured 3x and cut/welded once, i ended up with one support being 1/2" too short. So i added a little more metal.
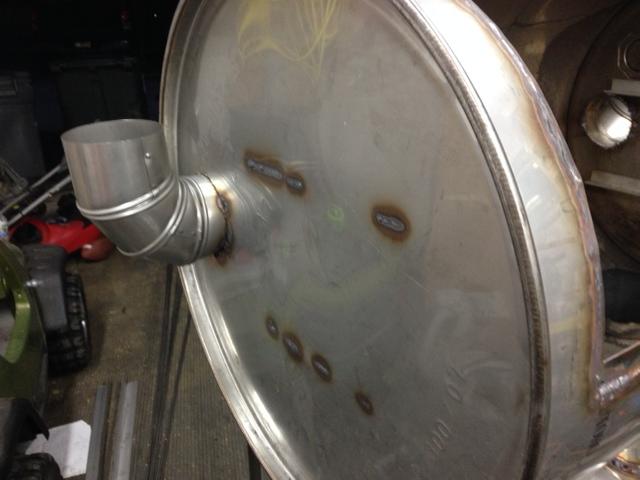
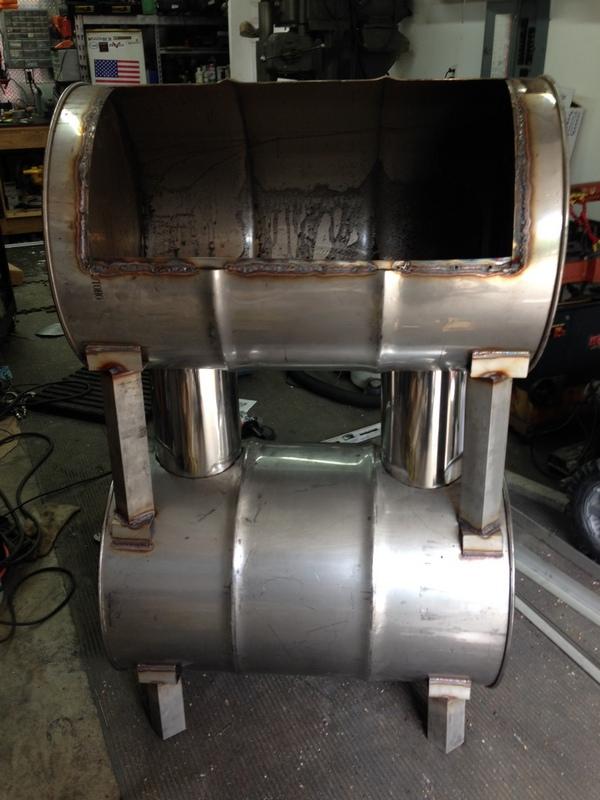
So far, here is what i have.
So far in the build, I have $219/55 gal drum and $175 in misc stainless parts (duct, angle, rods for the grate, etc). carbon steel would have much less expensive, but I wanted it to match my other outdoor projects and i like the idea of a lifetime of no maintenance.
My equipment includes:
Miller Dynasty 200DX TIG welder
Plasma cutter
Band saw
Angle grinder
Circular saw with abrasive blades
Level
Sharpie
6 pack of Coors Light
Here we go!!!!
Drums and welder
Cut out the opening. Circular saw is the way to go if you can. straight lines and easier to control than an angle grinder.
Lip welded around the opening
Brackets welded on for attaching the drums.
For the top drum, you will need 4 brackets. I used 2" x 1/8" angle. It doesn't really matter where you put these on if they are the first ones you put on. The next set will have to line up. We'll get to that. You will weld one bracket in place. Used a level to figure out where to put the corresponding one that goes on the same side. NOTE: Be sure your drum is level also. Once you have one side done, you will use your level to figure out where to put the ones on the opposite side. To do this, I put a rod through the brackets on the completed side and placed my level on the rod and marked the opposite side. NOTE: The rod is NOT the top of the bracket, it is the center of the bracket, so you will have to take that in account when measuring and marking.
When doing the second drum, you will have to be sure the brackets line up. To do this, I used the rod technique again and marked with the sharpie a line across the top of the drum. I used this to measure the drop for the second drum. Bracket installation was done as with the first drum (level and rods). Once again, remember that the rods are NOT the top of the bracket. I can't stress this enough. I had to remind myself and triple check that I did it right. It's easy to get in a rush and mess it up.
Now for the feet. The feet brackets went on the same as the others. NOTE: I did NOT cut out the firebox opening yet. That would be one more thing to have to bring in alignment and one more headache.
Now it's time to install the duct work between the drums. I used 8" duct since my metal supplier didn't have any 6" stainless in stock. I figured that with a damper, it doesn't really matter how big the opening is. I hope that isn't a mistake. Since the surfaces are rounded, i couldn't simply trace the 8" duct onto the surface of the drum. I coped out one end of the duct work so that I could use it to trace.
That is all for now. I ran out of gas last night...literally. My welder ran out of gas. Plus I ran out of beer.

Got more gas and went to work. I cut out the holes with a plasma cutter. cuts like butter.
Cleaned up the edges with an angle grinder and fit the tubes.
Now to fit the two parts together. Since i'm working alone and couldn't find two people that wanted to hold the drums for 2 hours, I used an engine lift.
Now to weld on the supports. You are about to see mistake #1. I welded on the bottom of the supports and realized that the unit would be too tall. I used an angle grinder and cut the supports down 5". I cut the unwelded ones (rear) on the bandsaw.
SAFETY WARNING Always wear safety glasses. The angle grinder broke loose while cutting the support and flew off into my stomach. Had it been my eye, things would have gone bad real quick if i didn't have glasses.
Now i attached the other two supports and i run into mistake #2. Even though I thought i measured 3x and cut/welded once, i ended up with one support being 1/2" too short. So i added a little more metal.
So far, here is what i have.
Last edited: