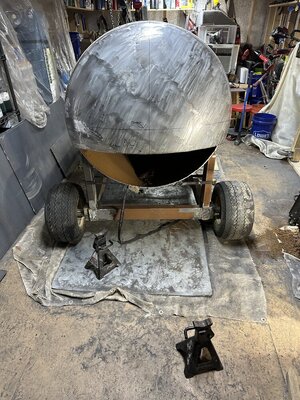
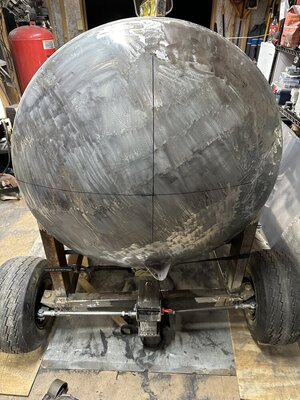
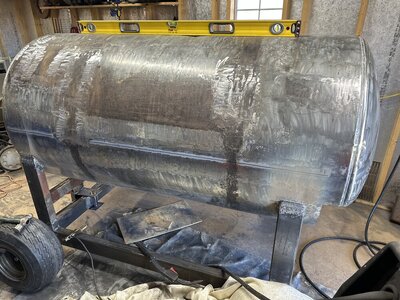
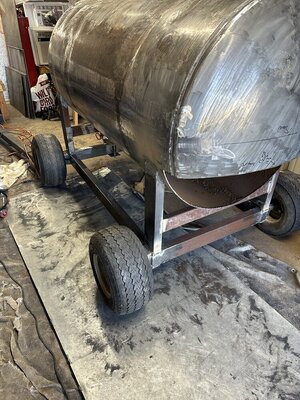
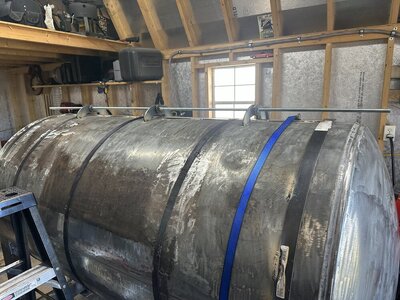
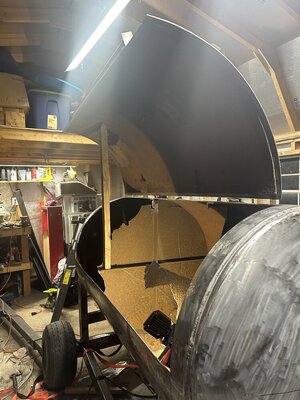
Added pic My first reverse flow smoker build

  • Some of the links on this forum allow SMF, at no cost to you, to earn a small commission when you click through and make a purchase. Let me know if you have any questions about this.
SMF is reader-supported. When you buy through links on our site, we may earn an affiliate commission.
I am going to need to name it. Maybe Miss Piggy. 🐷 
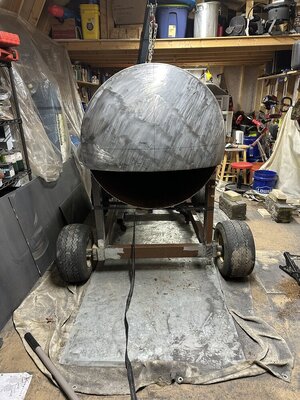
she’s a big beast . lol Hmmmmmmm.
 
Last edited:
  • Like
Reactions: JLeonard
Been following silently until now

Did I read the door correct? Michigan City ND?
That's about an hour from my Minnesota home. Didn't think their was any industry there.
I think it’s IND
 

Attachments

  • IMG_3929.png
    IMG_3929.png
    700.9 KB · Views: 42
Test fit on the base. Needs some adjustments yet. The angle where the legs meet the tank need tweaked. First tho it needs dropped about 4-5” also. I know it’s extra work but I made them intentionally longer just Incase my measurements would be off for some reason. As it sits this it’s running exactly level with my floor by the 4’ level bubble on the tank, base, and floor. The shed has settled a little over the years so the one end just touches the line on all the checks of each spot. I will block the base up perfectly level before final welding ect… I am getting more and more excited about it as its progress moves forward.
 

Attachments

  • IMG_3931.jpeg
    IMG_3931.jpeg
    231 KB · Views: 28
  • IMG_3932.jpeg
    IMG_3932.jpeg
    207.5 KB · Views: 21
  • IMG_3933.jpeg
    IMG_3933.jpeg
    191.8 KB · Views: 25
Tank is set to its final height and tacked to the base. Took a few tries and some trimming on the base uprights. I wanted it that way tho so I could get the height just right for me. Tomorrow I will double check the back plate of FB to tank to be sure height is ok. Then I will make a few cross braces and weld tank for good. After that some clean up in the shed is in order and onto the CC door I hope.
 

Attachments

  • IMG_3949.jpeg
    IMG_3949.jpeg
    234.2 KB · Views: 22
  • IMG_3950.jpeg
    IMG_3950.jpeg
    200.2 KB · Views: 21
  • IMG_3948.jpeg
    IMG_3948.jpeg
    156.4 KB · Views: 19
  • Like
Reactions: seenred
Yesterday I got the braces on and tank welded solid. Except for the upside down stuff. I am not good at that at all considering I am still learning welding that doesn’t help. I have a buddy that’s a welder he’s gonna give me a hand with that especially when the FB gets attached. Also smoked a brisket flat on the old smoker and made patty melt sandwiches.
 

Attachments

  • IMG_3954.jpeg
    IMG_3954.jpeg
    205.5 KB · Views: 19
  • IMG_3955.jpeg
    IMG_3955.jpeg
    236.1 KB · Views: 24
  • IMG_3956.jpeg
    IMG_3956.jpeg
    215 KB · Views: 24
  • IMG_3958.jpeg
    IMG_3958.jpeg
    210 KB · Views: 26
  • IMG_3960.jpeg
    IMG_3960.jpeg
    179.7 KB · Views: 36
That smoker is coming along nicely...It's gonna be nice!

I can relate to your struggle with overhead welds. As an amateur myself, I always do everything I can to plan for as many easy, horizontal weld positions as possible. But sometimes it's just necessary to run a weld over your head.

And the brisket and sammies look terrific!

Red
 
  • Like
Reactions: JLeonard
That smoker is coming along nicely...It's gonna be nice!

I can relate to your struggle with overhead welds. As an amateur myself, I always do everything I can to plan for as many easy, horizontal weld positions as possible. But sometimes it's just necessary to run a weld over your head.

And the brisket and sammies look terrific!

Red
Thanks and it is coming along. Few oops along the way but for my first build I am happy so far. Tank is level so as long as FB is level I will be good lol. I will certainly need more practice at that. I have been trying to do the same when welding but it’s at the point I can’t flip it. Don’t have the room or hoist big enough lol.
The food came out perfect thanks also on that.
 
  • Like
Reactions: JLeonard
I agree with Red, it’s coming together rather nicely….

Vertical and upside down welding is all about welder tuning, puddle control, and clean surfaces….and practice practice….. when I was taking classes….welding vertical and upside down for 2-3 hours a day for 3-4 weeks will make you appreciate the learning…….and get a few new sets of coveralls….lol
lol. Yes gonna have to do a lot of practicing after I am done with this build. I want to be able to do it on my own if I ever build another smoker. Thank u it is getting there for sure.
 
Well didn’t get much done today as I would have liked. Had to make the girlfriend happy. The new washer, dryer, and dishwasher came in. So I got that all installed. I did get 3 of the 4 sides of the CC door cut and the steel to cover the cuts tacked on also. I will be at it again tomorrow maybe get the door finished, handle for it and hinges on. If I get time I will start on the handle to pull it around so it’s easier to move. Sorry no pics. Will get some tomorrow
 
Got the door cut open and the flat steel all welded in. I used ratchet straps to try to keep the door from warping during welding. It’s didn’t turn out to bad as far as warping but it does have a few slight warps. I did have to climb in through the FB/CC opening to cut up more of the baffles inside to get the door to open. lol sorry nobody was around to take a pic of that. Maybe next time. Hinges are on and working. The all thread is removed and replaced with regular bolts. I used the all thread to try to keep them in line with each other durning install. Installed the handle. Everything needs some fine tuning. Grinding a little bending ect….. The flat steel on the top catches when closing the lid. Need to sort that out also. It’s a heavy door so I will be building a counter balance for it. After all the work I need to do some cleanup again of tools and scraps metal ect….. now that the door is operational I can also get the CC and frame over to one side of the shed while I work out a few of the bugs I need to. Then onto the FB build.
 

Attachments

  • IMG_3964.jpeg
    IMG_3964.jpeg
    182 KB · Views: 26
  • IMG_3967.jpeg
    IMG_3967.jpeg
    187.7 KB · Views: 28
  • IMG_3969.jpeg
    IMG_3969.jpeg
    150.1 KB · Views: 30
New question. Since I have some warping on the tank, door and the tank flexes a little bit at the hinges when working the door. I was thinking of putting ratchet straps back on the tank and door getting it all snugged back up. Then I would put angle iron on the tank and doors. Similar too the picture. I whipped it up in my vehicle when I got to parking lot at work this morning. lol The question is 1” 1.5” or 2” it would probably be 1/8” thick angle iron? I will be added a few extra braces inside when I get the track installed for the grates also when I get to that point. So what size? Good idea or waste of time? Thanks
 

Attachments

  • image.jpg
    image.jpg
    81.3 KB · Views: 23
  • Like
Reactions: JLeonard
Nothing fancy for working on the build last night. I just cleaned up the shed some. Put tools away and stuff like that. Had a few beers while doing it. Gonna be a cold windy one in PA today so I doubt I will do anything on it after work.
 
Last edited:
SmokingMeatForums.com is reader supported and as an Amazon Associate, we may earn commissions from qualifying purchases.

Hot Threads

Clicky