Lower gas smoker temperature

  • Some of the links on this forum allow SMF, at no cost to you, to earn a small commission when you click through and make a purchase. Let me know if you have any questions about this.
SMF is reader-supported. When you buy through links on our site, we may earn an affiliate commission.

Nefarious

Master of the Pit
Original poster
Oct 10, 2021
1,618
1,310
Seattle WA
I have a gas Smoke Vault 18 that I intend to repurpose into a smoker for low temperature sausage, bacon, etc. I just bought a GMG ledge to smoke higher temp meats, its a pellet grill so will be much easier and has most of the bells and whistles. All they have to do is replace the one I bought that came with the leg receptacle bent so the leg wouldn't attach. They promise my by monday, we will see.

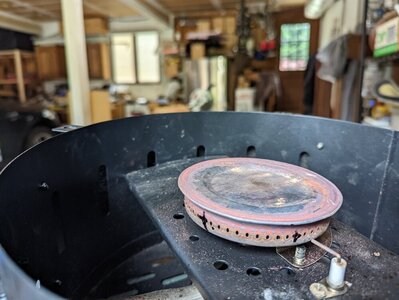
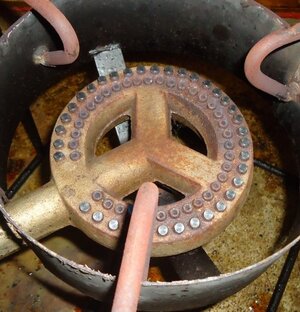
I took the gas burner off of the smoke vault and counted the holes for the burner at 55. The diameter of the holes are a little under 1/16 of an inch. A 1/16" drill bit will screw in on the frill side but will not push in from the chuck side. This makes me believe that's the size sheet metal screw I need. I remember seeing a pic here but for some reason I didn't book mark it, I think it was daveomak daveomak but not sure.

My thought was to put the screws in in steps. The current low end is 140* if I use the valve that comes on the unit. I can get it down to 120* using the needle valve I added for the gas manifold. I want it to be safe down to say 90*. First attempt I will add 5 screws at every 11th hole. Depending on the result of this spacing put in 5 more, as evenly spaced as possible. I will be sure to leave the area around the igniter free of screws for better ignition.

Does this sound close? I can always add or remove to get closer to where I feel comfortable with the gas not blowing out.

PXL_20220514_213430547.jpg
 
 
Wind will always be a factor when trying to reduce temps, that's why I gave up as I didn't want to spend the $$ to buy a valve with a pilot light control on mine
 
  • Like
Reactions: JLeonard
Wind will always be a factor when trying to reduce temps, that's why I gave up as I didn't want to spend the $$ to buy a valve with a pilot light control on mine
That is true, which is why I want to close some of the burner holes. That way the flame on the open holes can be higher and not blow out as easily.

Only problem I can't sort out here is where to fine #0 screws.
 
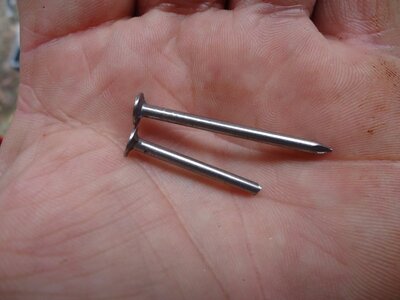
daveomak daveomak in looking at the burners you have modified, do the nails fit in the burner holes tightly, or is the weight of the nail sufficient to hold back the pressure?
 
The weight of the nail "should" hold the nails to seal off the gas flow....
The pressure in gas systems runs from 4" to11" water column.. A low pressure regulator should be used.... BTUs for the orifice is shown...


1652653969445.png
 
Last edited:
The weight of the nail "should" hold the nails to seal off the gas flow....
The pressure in gas systems runs from 4" to11" water column.. A low pressure regulator should be used.... BTUs for the orifice is shown...


View attachment 631964
Thanks dave, i assume this chart is for the opening in the valve between the gas line and the burner assembly. My smoker has a conversion to natural gas and they specify drilling with a #51 drill bit. Assuming the conversion is for equal Btu then the current value of the burner is slightly lower then 13300 Btu.
 
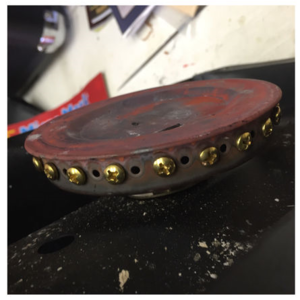
Since my burner holes.are.on the side I will have to use screws to hold.them in as gravity will be working against me and the nails will just fall out. Kinda like your top pic.

I have never seen a #0 or a #1 screw, so that will be the next quest. If I don't find any would you recommend drilling the holes where i want screws to go to a size I can find a screw for. I will go to Tacoma Screw tomorrow to look.I

I appreciate your assistance, thank you.
 
If the burner is sheet metal no drilling necessary if you size the screws properly, if a cast iron it would have to be threaded don't skip holes and then plug you need to keep the flames side by side , raw gas can cause issues if not burning
 
If the burner is sheet metal no drilling necessary if you size the screws properly.
The current holes are less then 1/16", I suggested drilling if I couldn't find the screw that will fit. Only the holes that will have screws would be drilled.

don't skip holes and then plug you need to keep the flames side by side , raw gas can cause issues if not burning
I was just looking at the screwed in picture from daveomak daveomak and his has every other hole filled. I don't think it matters from the heat perspective if I plug all of the holes in one place or if I skip one every so often. Is there a problem with plugging one between a set of unplugged. I could see a problem is a series of holes was blocked?
 
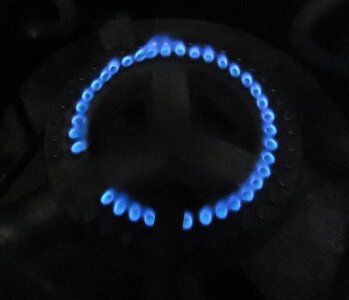
Look for even heat distribution.... AND.... continuous holes to facilitate all holes igniting during light-up..
 
I look for all the holes to light and not be skipped, im a old heat and ac guy and go with safety first
 
I look for all the holes to light and not be skipped, im a old heat and ac guy and go with safety first
Well, it looks like I have to look into options as no one makes a #1 screw. We have a place that only sells fasteners, Tacoma Screw, and the lowest they go is #4. So, I will either have to drill the holes for a #4 or find something that has smaller screws.

The holes are smaller then 1/16" and I'm afraid if the head of the screw is too big I won't be able to close consecutive holes. Not sure I want to do that either.

Maybe I just need a burner with bigger holes.
 
you may have to resort to fleabay or amazon for #1 screws. If you know someone that works in manufacuring, maybe you could get them to add a box to their next fastener order.
You won't find them in hardware stores but they are used all the time. Watches, clocks, scopes, fishing reels ect.
Possibly try a gunsmithing supply like Numrich.
 
Thanks dave, i assume this chart is for the opening in the valve between the gas line and the burner assembly...
Yes, that great chart of Dave's was for the orifice, not the holes in the burner. If you're going down in BTU's, you plug the burner holes until you visually get nice blue flames from the existing holes as he showed.
 
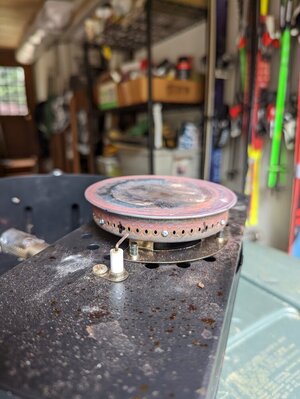
My screws came in this morning and put in 7. Three are 56 holes so that's 1/8th reduction.

Some screws were right fit where they stopped turning when all the way in, not too much pressure. Some screws felt tight but would continue to turn when installed. Do they need to have enough pressure where they stop turning?

I will not get to test it until tomorrow, I need some bolts to mount the burner.

PXL_20220523_172332186.jpg
 
SmokingMeatForums.com is reader supported and as an Amazon Associate, we may earn commissions from qualifying purchases.

Latest posts

Hot Threads

Clicky