WSM Mini build and a few questions

  • Some of the links on this forum allow SMF, at no cost to you, to earn a small commission when you click through and make a purchase. Let me know if you have any questions about this.
SMF is reader-supported. When you buy through links on our site, we may earn an affiliate commission.

browneyesvictim

Master of the Pit
Original poster
OTBS Member
★ Lifetime Premier ★
Aug 16, 2016
2,643
1,116
Creswell OR
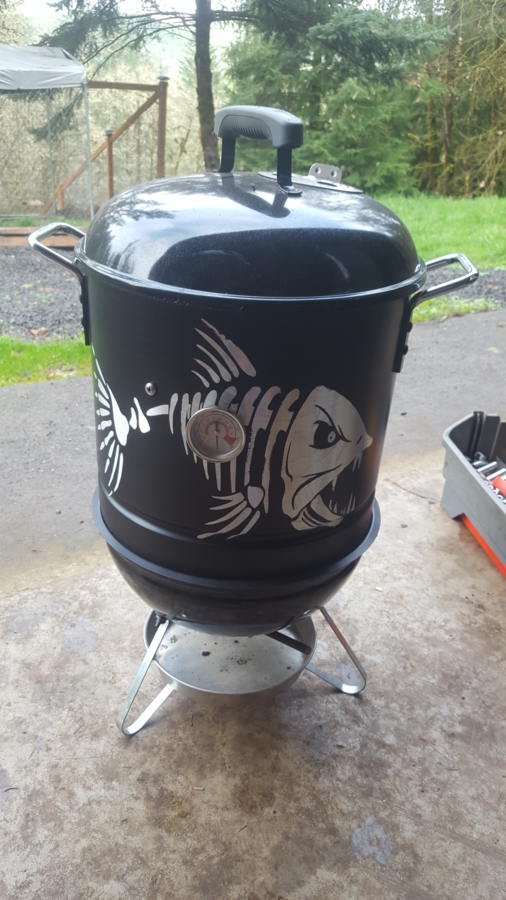
I've about got my WSM mini build completed and I have a couple of questions that I cant quite get my head wrapped around. The intent of this mini is for the portability to take camping, in which it will be left unattended while I am off fishing, hunting or doing other activities.

I see many of you have added ball valves for added air vents on the bottom (and even for getting coals started with a torch). Is 3/4" the right size X2? Do you find you are able to dial in temps consistently and reliably with just ball valves and vents? I am considering a BBQ Guru PartyQ instead of adding any ball valves. If I go this route, (as I likely will) I will likely drill a new hole for the Guru where a ball valve would go instead of going through the vent. The vent is on the bottom anyway... Which adapter should be used if just going through a hole? Would you still use the BBQ Guru draft inducer and deflector plate as if you were going through the vent??

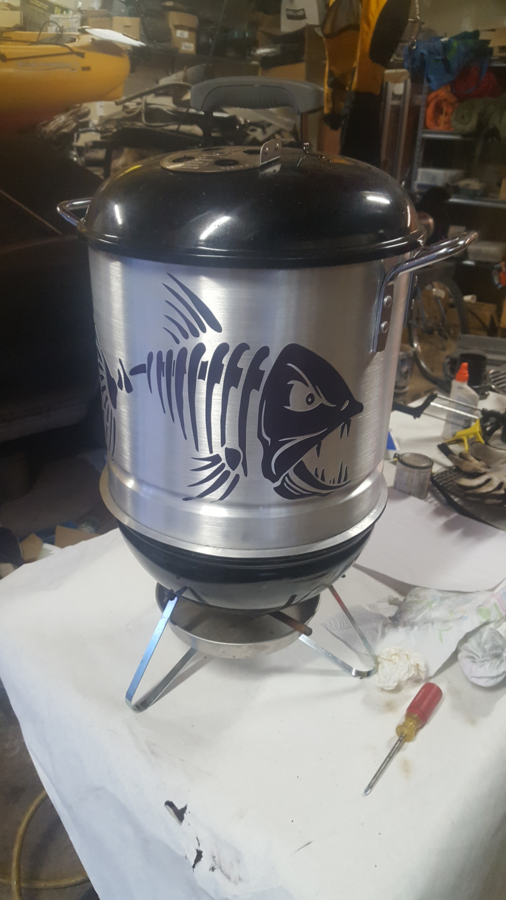
Anyway I have all the grates, hardware and what-not... Here it is ready for paint.


By the way, I found this Winco steamer pot for $24, and it fits perfectly!
 
I don't like to rely on powered equipment when camping and smoking. So I have two 3/4" ball valves on all of my mini builds. Yes I can get the smoker right where I want it with just the balls valves and lower vent. The sweet spot I've found for low temps is 265°. Higher temps are no problem either. The lower vents also will allow you to use the "side light" method. Best method to light a mini, or any charcoal smoker.

One more note, if you camp in animal infested areas, don't leave your smoker smoking unattended. A hot smoker will not keep animals from tearing into it stealing your food, and possibly causing a fire.
Just for clarity... "unattended" meaning I wont be around to make adjustments, but others (family and friends) are in holding down camp. I'm not that stupid.
 
Last edited:
Finally got 'er done! I probably still  need to add more bottom vents.  Still waffling on getting the bbq Guru. I like the idea of the side light but might do something a bit more low profile than having the ball valves sticking out. Thinking I will probably make my own teardrop shaped slide damper on a short pipe nipple.


I run the BBQ Guro PartyQ on my mini. Mine is the gold with the side vents, but a 1" hole in the side of yours would be perfect for the Weber adapter. I just put all the charcoal I'll need in the basket with a couple wood chunks buried in it, take about 15 briquettes or so out of the middle, light those in the chimney, pour them back in the middle, close it up, set my temp and I'm good. I could hold temperature pretty well without the PartyQ, but with it I don't even have to think about it.
 
Thanks MDB. I seasoned it in last night. In fact I did about exactly what you just described, and started with both the top and bottom vent wide open. The temp on the thermometer came up to 235' within about 1/2 hour and stayed there. How fast does it come up to temp like that with the Party-Q? I let it go for a couple of hours to burn off the fumes then threw a couple of pork chops on for dinner. To my delight, there wasn't so much as a whisper of smoke leakage! The chops got done in less than an hour which was a lot sooner than I was expecting. This is when I checked them with a meat probe and they were overcooked a bit (but still tasty) at 180' IT! Makes me question the mechanical temp gauge is even remotely close! I will go by the Maverick from now on. But either way I will need more venting for sure for hotter cooks, and definitely for when at higher elevations here.

I pulled the trigger on a Party-Q, not because I need it (so I am convinced) but mostly because I like toys and I like the idea of consistency. I have plenty of rechargeable AA batteries.
 
When I first got the party q I'd open up the vents and let it come up to temperature, then insert the party q and close the other vents. Then I tried it with all closed (except lid vent, which is always open) and it takes maybe 15 minutes to get to 300°, and another 10 or fifteen for the smoke to settle down from white to clear blue. This is based on a 70° calm day. Weather and wind will have an effect.

Battery life has been great. I've gotten through a 6 hour cook on a chilly, windy day on one set of batteries.
 
The Mrs. wanted a beer can chicken, so after thawing, I unwrapped it, cleaned it, patted it dry and put it in the fridge to dry out a little further. Last night I rubbed it with butter under the skin and all over, then liberally applied Montreal Chicken seasoning. I set up the mini with a basket full of Kingsford Original with 6 briquette sized cherry chunks buried in. Started 8 or 10 briquettes in the chimney and put them on top in the middle. I immediately assembled the rest of the mini with the bird in it with Maverick probes and all the vents open.

To my delight, shock and amazement. I have achieved enlightenment, I realized I was watching the Celsius range on the thermometer with the burn-in and chops a couple days ago!!! No wonder I thought the temps were off! Anyway, now know I have plenty of higher temperature range to work with when both vents are open! No need for additional vents! The temps came up to cruise as fast as I could possibly expect. Temps hit 300' in probably 20 minutes I would guess, before I started messing with the vents. I found I could easily dial in the desired 325' cook temp with both vents closed 1/2 way. Slight adjustments made very responsive temperature changes! Easy-Peasy! In hind sight, I should have left the top vent open and just did the regulating with the bottom one. But I was having fun experimenting and getting a feel for it. After all the years I have ran charcoal and wood grills and BBQ's this set-up was by far the easiest! Even without the BBQ Guru. I can see how the Guru will make it even more "set it and forget it" like an electric. ...but not necessary either.

I had the bird sitting on the lower rack over a pie pan to catch the drips with the diffuser (steamer tray) in covered in foil. The Maverick Pit Probe  was clipped to the lower rack as well and the meat probe in the breast. Both the mechanical and Maverick pit probes stayed real close to each other. I forgot to drill a pass through grommet hole for the digital probes! So they just went under the lid for now.


Pulled the bird at 165" IT and it coasted another to 170'! After it came back down a little bit I placed it in a warming oven at 150' until dinner time.


The bird was scrumptious and moist and cooked perfectly, but wanted the skin to crisp up a little more than it was. I presume that had a lot to do with the top vent  being half way closed and retained moisture. Next time I will probably cook at 350' and leave the top vent open. By then, I may have the Guru installed though.

Oh... and I think I probably only burnt less than 1/4 of the coals that were in the basket. Amazing. I snuffed it out easily by closing it all up with the vents. I will re-use the charcoal for the next run.

Thank you mdboatbum for your insight. Thanks for watching.

Erik
 
Last edited:
Nice smoke! Leave that top vet open all the time! Beer can chicken is more than likely the culprit. The moisture introduced from the liquid in the can likes to make the skin rubbery. At 325° an a dry pit you should have crisp skin.

Shake the charcoal basket and dump the ash, add new charcoal to the old and you will be set for another cook.
 
Heehee... (Shhh....) don't tell my wife, but there is no beer in that beer can! I only use it for a prop to roast the bird vertically to get 360 degrees of crisp skin.  She only eats the legs and thighs, and they are always moist anyway. She believes the beer can method is better than the spatchcocked birds I have done, so I cook them this way too. I don't argue. I agree with you Case. No need for liquid, or a beer can in the butt either for that matter.

And thank you for your input as well.
 
Last edited:
SmokingMeatForums.com is reader supported and as an Amazon Associate, we may earn commissions from qualifying purchases.

Hot Threads

Clicky