
Well after using Ribwizzards flange thread to remake my door flanges on my smoker and realizing how much help it was I decided I would make a thread on how I make my grate frames with only 1 weld.
First I start out by figuring out the size of the grate I want. (outside dimensions)
For this example I will use 24 3/4 x 29 7/8 grate size (one of the two sizes pictured)
So first thing I do is decide on the size of the angle I want to use for this example I am using (2) 1x1x1/8 steel angle 20' long so I can get (2) grates out of each stick.
Now my method bases the bends off the inside of the angle leg. That means when we go to lay out bend centers we need to take the angles thickness off of each side of that particular measurement.
So to lay out bend centers I lay then angle with one of the "legs" facing up. The side that is horizontal will be the side I mark up for my notches.
My first notch will start at the end of the angle so I will make a 45° from the inside of the vertical leg (corner of the angle) to the edge of the horizontal leg. In this example the horizontal width of the leg happens to be 7/8". So if you don't have a combo square around you can simply measure over 7/8" in from the end to make a "box" then draw a diagonal line from the dot to the edge corner to make your 45° angle. Then my first leg I want to be 29 7/8 so I will take away 1/8" from both sides of the bend to get 29 5/8" long (center of bend to center of bend)
Then I will make a mark 7/8" on either side of the center line I just made and draw them back the center line diagonally and connect on the center line. This will make a 90° notch that will collapse on itself and form a "mitered" corner after bent. The next center measured from that center would be my short leg (they alternate). So I want an outside measurement of 24 3/4" so taking away an 1/8" from both sides will leave me with a measurement of 24 1/2". Again I make the 90° notch that is coming 45° off the center line. I then measure the second side of the 29 7/8" outside leg which from before we know to be 29 5/8" and mark the notch again. And the final leg will be the second short side that is 24 3/4" long outside so that makes it 24 1/2" long.
I then go and notch them out with a cut wheel, don't cut all the way through only go to the corner on the inside edge so that you have a full 1/8" on the vertical leg of the grate. I then mark out the second grate on the other have of the angle iron to so that I can just notch them all at one time.
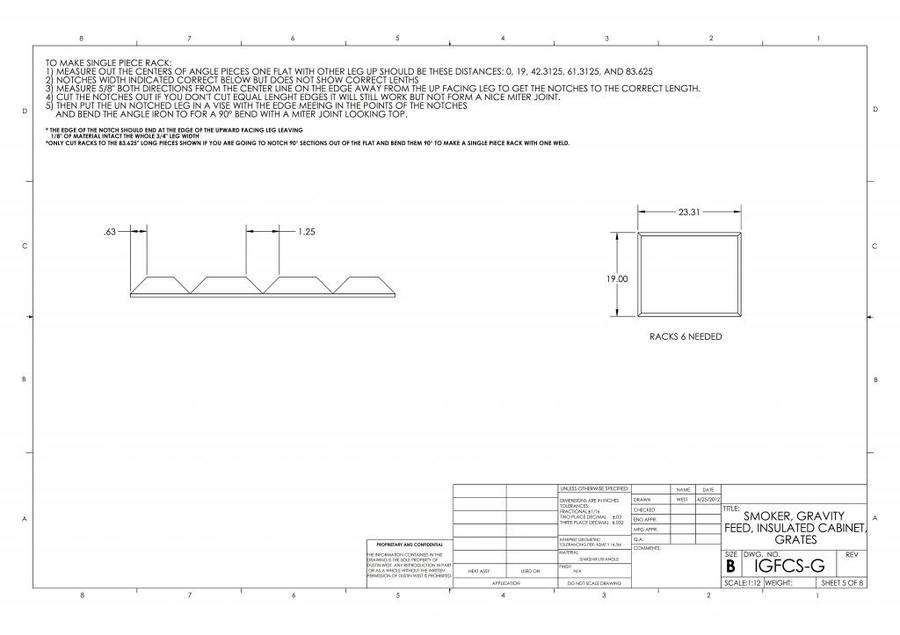
This picture will illustrate what I am talking about (uses a different size grate and angle, its a print from the clone cooker print packet I made up for others, so it will be a little redundant, really just trying to show what your angle will look like)
After they are notched you will have something that looks like this. There are 4 grates pictured in this, and only one of the notches so you get the idea.
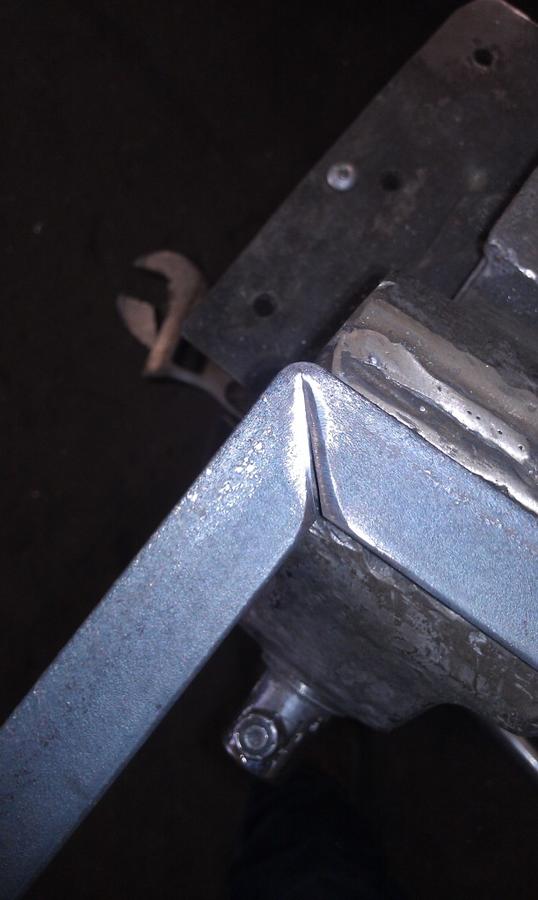
We are now ready to bend them, I like to use a vise for this but you don't need to use one if you don't want. They will bend by hand pretty easy, but it just requires less tweaking to get them square and level. I load them up so that the center of the bend line is at the edge of the vise so I have a good corner to "wrap" around.
Then you simply give a firm pull and the metal will bend 90°. I then continue the on like this with the other 2 bends needing to be made (3 total bends).
Once done they will look like this, they may not be 100% level yet and definitely won't want to close all the way, that is normal don't panic you haven't done anything wrong.
The toughest part of the whole frame is next you have to hold those two corners together and weld that one vertical leg.
Now you are ready to do any last minute tweaks to get them to sit level and square them up. If you measure diagonally and have one diagonal that is long just take a hammer and stand that diagonal vertical so you can "squish" that diagonal down a little which in turn pushes the other one out. Do this with one firm hit and then recheck it is real easy to go past square during this step.
Here they are all square and level.
Once adjusted you are ready to weld in your grate metal I prefer to use #9 flat ground expanded metal myself. This leaves a very nice looking grate, that looks mitered, but without all the extra welds. I was able to make these (4) grate frames in 30 min this morning.
I hope at least one person finds this as helpful as I have found Ribwizzard's flange thread to be.
First I start out by figuring out the size of the grate I want. (outside dimensions)
For this example I will use 24 3/4 x 29 7/8 grate size (one of the two sizes pictured)
So first thing I do is decide on the size of the angle I want to use for this example I am using (2) 1x1x1/8 steel angle 20' long so I can get (2) grates out of each stick.
Now my method bases the bends off the inside of the angle leg. That means when we go to lay out bend centers we need to take the angles thickness off of each side of that particular measurement.
So to lay out bend centers I lay then angle with one of the "legs" facing up. The side that is horizontal will be the side I mark up for my notches.
My first notch will start at the end of the angle so I will make a 45° from the inside of the vertical leg (corner of the angle) to the edge of the horizontal leg. In this example the horizontal width of the leg happens to be 7/8". So if you don't have a combo square around you can simply measure over 7/8" in from the end to make a "box" then draw a diagonal line from the dot to the edge corner to make your 45° angle. Then my first leg I want to be 29 7/8 so I will take away 1/8" from both sides of the bend to get 29 5/8" long (center of bend to center of bend)
Then I will make a mark 7/8" on either side of the center line I just made and draw them back the center line diagonally and connect on the center line. This will make a 90° notch that will collapse on itself and form a "mitered" corner after bent. The next center measured from that center would be my short leg (they alternate). So I want an outside measurement of 24 3/4" so taking away an 1/8" from both sides will leave me with a measurement of 24 1/2". Again I make the 90° notch that is coming 45° off the center line. I then measure the second side of the 29 7/8" outside leg which from before we know to be 29 5/8" and mark the notch again. And the final leg will be the second short side that is 24 3/4" long outside so that makes it 24 1/2" long.
I then go and notch them out with a cut wheel, don't cut all the way through only go to the corner on the inside edge so that you have a full 1/8" on the vertical leg of the grate. I then mark out the second grate on the other have of the angle iron to so that I can just notch them all at one time.
This picture will illustrate what I am talking about (uses a different size grate and angle, its a print from the clone cooker print packet I made up for others, so it will be a little redundant, really just trying to show what your angle will look like)
After they are notched you will have something that looks like this. There are 4 grates pictured in this, and only one of the notches so you get the idea.

We are now ready to bend them, I like to use a vise for this but you don't need to use one if you don't want. They will bend by hand pretty easy, but it just requires less tweaking to get them square and level. I load them up so that the center of the bend line is at the edge of the vise so I have a good corner to "wrap" around.

Then you simply give a firm pull and the metal will bend 90°. I then continue the on like this with the other 2 bends needing to be made (3 total bends).
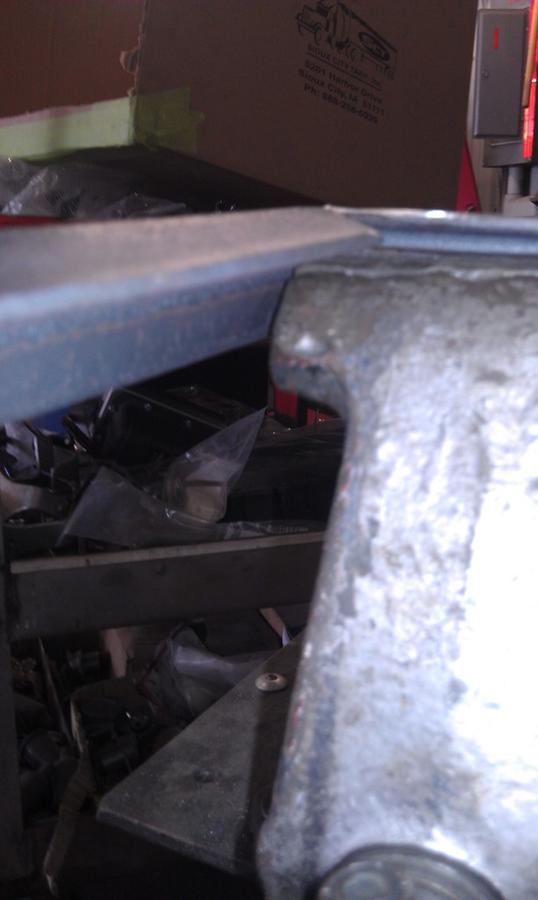
Once done they will look like this, they may not be 100% level yet and definitely won't want to close all the way, that is normal don't panic you haven't done anything wrong.

The toughest part of the whole frame is next you have to hold those two corners together and weld that one vertical leg.

Now you are ready to do any last minute tweaks to get them to sit level and square them up. If you measure diagonally and have one diagonal that is long just take a hammer and stand that diagonal vertical so you can "squish" that diagonal down a little which in turn pushes the other one out. Do this with one firm hit and then recheck it is real easy to go past square during this step.
Here they are all square and level.
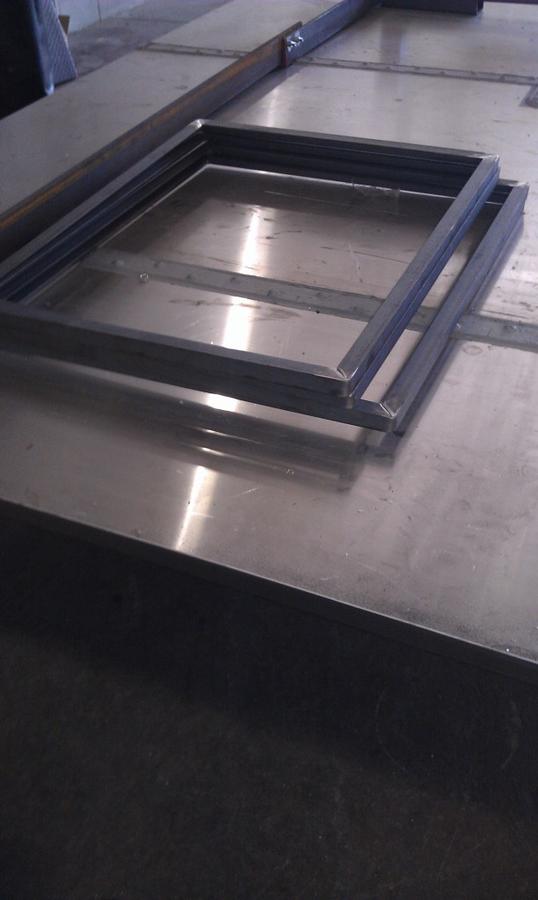
Once adjusted you are ready to weld in your grate metal I prefer to use #9 flat ground expanded metal myself. This leaves a very nice looking grate, that looks mitered, but without all the extra welds. I was able to make these (4) grate frames in 30 min this morning.
I hope at least one person finds this as helpful as I have found Ribwizzard's flange thread to be.


