Char-Griller Smokin Pro with firebox- Mods

  • Some of the links on this forum allow SMF, at no cost to you, to earn a small commission when you click through and make a purchase. Let me know if you have any questions about this.
SMF is reader-supported. When you buy through links on our site, we may earn an affiliate commission.
Wow really
im very new to smoking but my buddy thats showing me the ropes uses 2 water pans on the charcoal grate under the ribs
plz explain why they are not needed
Welcome!!!

Is he using the same smoker as you? Different smokers will perform different and need different setups...... When I was running my Chargriller Outlaw and Pro I tried to put water pans in and found that it affected my cooks in several ways.

Temp control: I was burning a ton of fuel just to keep it at 225. The water absorbs the heat first, and then it goes into the chamber. Also since you are not looking at the water pan often, when the water boils/evaporates out you can and will get big temp spikes.

Fuel Consumption: I found I would burn 2-3 times the amount of fuel with a water pan.

Bark Formation: You will not get as crisp of a bark with all of the moisture in the cook chamber.

Design: The offset smoker is not designed for a water pan like a vertical smoker is. In an offset you are cooking with indirect heat, so most of the heat is lost from the heat rising from the fire box. The air flow carries the smoke and some heat to the cook chamber to cook the meat. In a vertical smoker you need a heat sync to absorb some of the direct heat from sitting directly above the fire. That is why a water pan is designed to be above it. Some people are replacing the water with other food safe items like sand or even lava rocks.

Smoking meats is not an exact science. No 2 cooks are the same and no 2 cookers cook the same. So over time you will learn little tricks and the action/reaction effects. There are some basic guidelines to follow and the rest is up to experience. I have spoken with several people over the years about how they run their smoker and have seen over the short time I have participated on this forum that there are so many ways to run your smokes. You just need to be open to what others do, maybe try a few new ways and develop your way of running your smoker to get the results you want.

For the mods to this type of smoker they are all good and have purpose. I found the few that made the biggest difference for me was: charcoal basket, either flipping the ash pan in the cook chamber to be used as a tuning plate or installing tuning plates and accurate thermometers. The rest are nice and help, but those are the most important in my opinion.
 
  • Like
Reactions: gr8hntr
gr8hntr..........Thats my smoker got it at Wal-Mart on sale for $89.00 and thats where my buddy puts his water pans on his
I added the 2 temp gauges before I found this place lol
so I gotta move them


The position of the therms is OK......    They are for reference only anyway.....    Place a probe 2" next to the meat, check the therms you have installed.......    If the probe on the rack reads 250 and the installed probes read 290, just allow for that difference when smoking in the future...  inside a smoker, the temps are or can be different, everywhere...... 

Dave
 
Last edited:
From the way it looks in the cook chamber there is no pan under the charcoal grates. If that is the case tuning plates will be easy to make. You can cut 1 piece of metal the width of the smoker and 6"-8" wide. Lean it at an angle in front of the firebox opening on top of the charcoal grate. Then make one the same width and 10" wide, lay it ontop of the charcoal grate butting up to the first one. Make another couple of varying widths and lay them on the charcoal grate. Start with about 2" between each plate and leaving a 6" gap at the end. Dave is more of a design expert then myself and I agree with the therms being a guide. However if you do not have a remote thermometer to check the grate level temps. I would move them down to about 2" above grate level. If you have a therm you can read with the lid closed, don't move them. The other advantage to having them lower is a quick reference of the temp variance from side to side. Just a personal thing......, now if you don't have access to the metal or a way to cut it. You can fabricate the same thing with some foil and cutting an aluminum lid to create the same thing. You can use some heat safe tiles to form the heat sync element (wrap them in foil for easy cleaning).

So the water pans........I would not use them, but if you prefer you can experiment with them to see how they effect your heat control.

So the only other thing I did not see was a charcoal basket. They are so helpful in many was. Help with long cooks to keep the fuel out of the ash. If the fuel gets the ash you lose heat and burn more fuel........
 
Wow really
im very new to smoking but my buddy thats showing me the ropes uses 2 water pans on the charcoal grate under the ribs
plz explain why they are not needed
To Jarjar's point, there are a TON of variables.  I've been using this smoker for 2 years now and I've learned that I really need to stay on my toes.  Maybe it's the way I have my baffle and tuning plates, but my CGSP runs the most even when I have a water pan in it.  But it is tough to keep temps above 225 with the water pan because water boils at 210 F.  Personally I don't mind softening up my bark a little because it is often like extremely tough (and extremely tasty) jerky.  I'm not sure if the dry climate where I live has anything to do with that or not.  -The dew point in the summer is typically around 40.  

Another option for a medium in a pan is to use sand or pea gravel, as long as it's clean.  I did that with a turkey last Thanksgiving because I wanted to crisp up the skin as much as possible.  The jury is still out on that trick for me.  But since sand doesn't boil, it's easier to get to higher Q temps.  Anyway, just a thought.

The amount/size of pieces of meat  that you have in your chamber and their location on the grate can also have an enormous impact on temps across the grates.  Mine will run totally different based on where I put the meat.

My experience has been that I need to check in often (usually every 1.5 hrs through the night), and I need to be ready to respond to issues quickly.  

Bottom line for me is that reading up definitely helps, but only to a point.  At some point the only way to learn is to jump in and do it.  That's why starting with pork butts is probably a good idea.  They are much more forgiving than brisket.  And do some ABTs.  Super easy and big time crowd pleasers.
 
Last edited:
What  a cool thread , it just wont die.. Gotta be in the hall of fame one day...

Hi im new to the site and have been reading the posts in this thread for the past few nights after I get off work.. Seeing some good ideas put to use and a lot of DIY work..  Cool stuff keep it up..

  I have a CGP w/SFB and when I first fired it up with some bacon grease smeared all over it , the first thing I noticed was how it leaked on both sides and the rear.. Kinda felt like a idiot stuffing rags in it every time I fired it up lol... second thing I noticed was the solo therm wasn't worth 2 cents .. first thing I did was added 2 Brinkmann therms down low ,HUGE difference.. after the first smoke I turned the charcoal tray upside down,HUGE difference.. Yea im still stuffing rags in this baby at this time lol... I ran it like that all last year and got looking for a good solid solution to my rags.. That's how I found this site and all the good info on here... im going to get some RTV sealant and try it out..

1 thing I have been doing that you can try if your interested in reverse flow.. flip your charcoal basket up side down and run aluminum foil all the way down to the last few inches or so, then get you some 3'' flex and simply run it to the other end of the chamber.. this may help save time and money just to find out if you like RF or not.. I been playing around with it and as simple as it is with foil and flex pipe, it does work pretty good and temps are not far off from side to side.. I need to smoke more on it but if I keep getting good results, ill prolly just keep as is and save the bux for more pig...

nice to meet you all, keep it real and keep on smokin
 
I just picked one of these smokers, slightly modified, used from a friend of mine who moved up to a much larger Lang smoker. It has a little rust on the firebox top which I will scrape down and repaint with high temp paint in the spring. I have been using a UDS for about 7 years with direct heat and a water pan. I am really looking forward to more indirect cooking of meat and also for the grains for my one beer I make, I am also a homebrewer. I have been reading the thread for about an hour and have so many more things that I want "need" to do now to my smoker. I have the tires done and also the baffle although that is below my standards by all means so that will be redone. 

I am really excited to get to know you all here and maybe trading some secrets and beers during a smoke day!
 
Very insightful and informative thread,  thanks to all of you and they hard work you've put into your smokers. I've got a lot of ideas on improving my Char Griller
 
  • Like
Reactions: kdub420
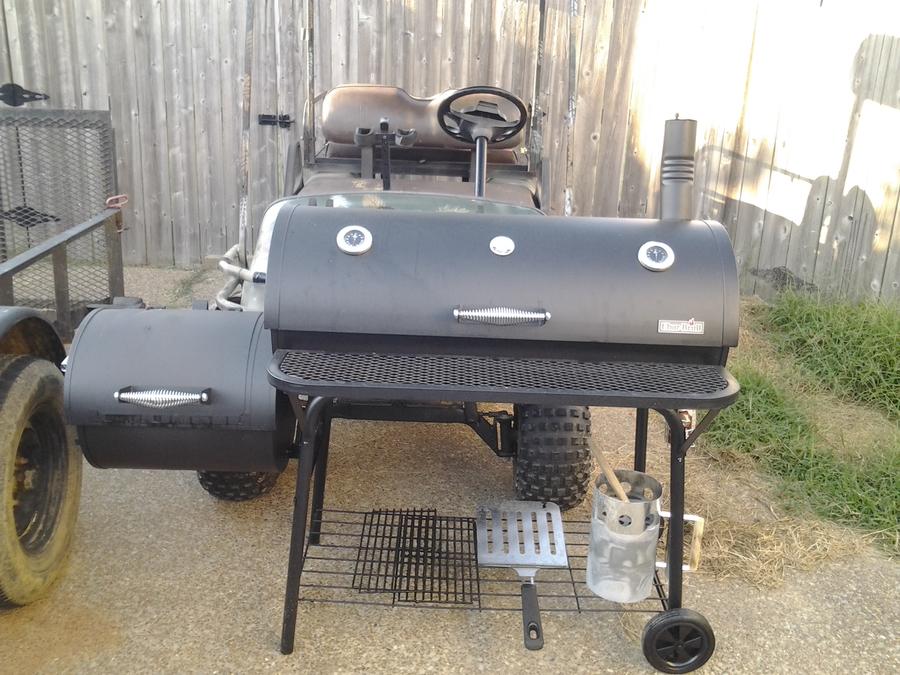
been a few months since this thread has something posted so don't mind if i do. i remained patient scouring craigslist for several months until i finally found something i could work with. found a lightly used chargriller smokin pro for $50 and promptly went to buy the add on fire box. after being freshly assembled i took it for a test run and discovered where the flaws are. here's the mods i've done so far:

got a buddy with access to a sheetmetal shop so i asked him to make me a new charcoal box, measures 12"x12"x6"


ran some all thread though it and here she is hanging in the sfb


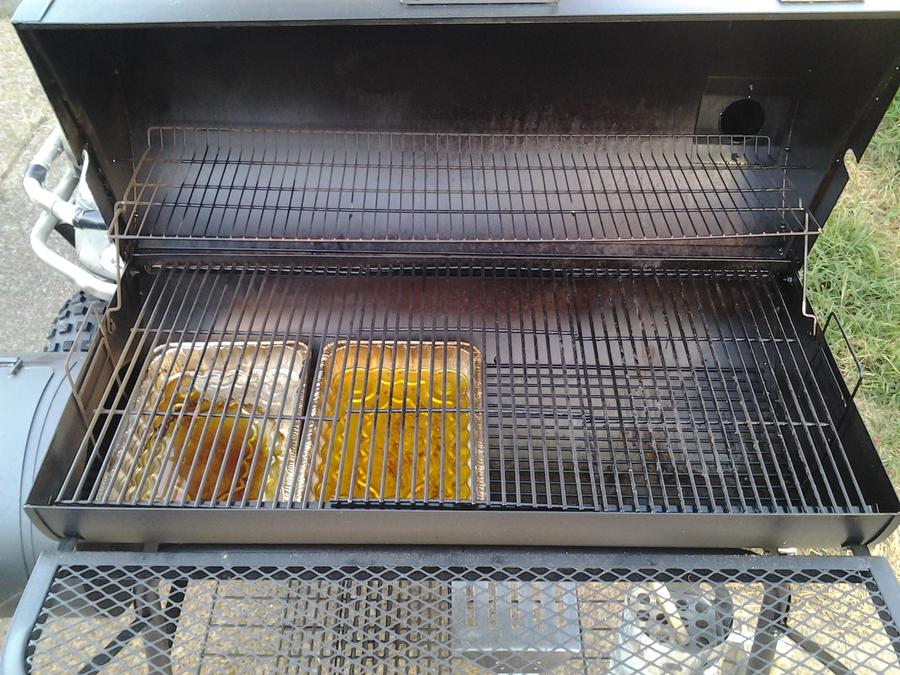
i asked the same buddy to also cut me 5 plates that are 13.5"x6" and bend a 45° bend 2" in on one of the plates, using these for tuning plates/baffles. i bolted some aluminum L brackets to the front and rear of the main chamber to set the plates on then bolted the baffle with the bend in it above the inlet from the sfb


riveted a 3/8" C channel down each side of the main chamber and stuffed some 1/2" fire rope in to the channels to seal up the sides


replace the worthless stock temp gauge with a steel piggy and then put a couple new temp gauges in the lower left and right portions of the lid near grate level. the temp gauges are http://www.homedepot.com/p/Brinkmann-Temperature-Gauge-812-7229-S/203016476 and though Brinkmann Support posted in the question/answer section saying that the gauge is not adjustable, they actually are


added some dryer vent tubing to the lid. just used some large channel locks and bent the flare in until i could slide the tubing on to it. it's bolted to the side of the lid


i've also used red rtv to seal up between the sfb and the main chamber (took the two apart, applied the rtv then bolted back together), used the rtv to seal up the plate behind the pig that replaced the stock temp gauge, also used the rtv to seal up around smoke stack. still to do is figure out how i plan to seal up the front and back of the main chamber, probably going to use a L bracket riveted to the front and using some rtv to lay down some flat fire rope to it. the back though???? maybe just lots of heavy duty foil for now. then on the sfb i'm planning on using some rtv to lay down some more flat fire rope around the main door and installing a hook latch to pull the door tight and keep it sealed
 
Looks great! I miss my CG.....

The HD foil will work for now. I have seen the front and back lip adapted to allow for a rope gasket to be applied.
 
Kbish;

Inspirational to say the least! Sounds like bending the flare in the stack was no biggie. I have an 3" adjustable elbow screwed in place on the inside of the stack as a quickie fix, but it looks shoddy. I'm using aluminum drip pans on the charcoal pan as baffles with some success...The thermometer that came with my 50/50 gas charcoal grill seems to be spot on. I have been using a couple of oven thermos to move around the grill for my dry test runs and so far have been able to balance the heat from one end to the other using the SFB. Your modifications are neat and clean and sure seem like just the ticket for me to follow as I continue to work on this grill...Thanks for the pictures. Your quality work shows.
 
I didn't bother messing with the flange at all.  I just snipped the flex vent and squeezed it over the flange.  Didn't even use hose clamp.  It stays on just fine for me.  And when you don't want it on, just tug and it's free.
 
Last edited:
On page 21 the use of a water pan was discussed. The WSM guys use one all the time as do I with my Lang.

Here's why it helps with the cook on my Lang stick burner or any stick burner. Water adds humidity to the cook chamber which helps keep the meat from drying out. Water helps stabilize the temp in the cooking chamber and minimizes fluctuations because the water absorbs heat plus the water takes longer to rise and fall than air. Water vapor mixes with the combustion gasses to improve flavor and the water vapor condenses on the meat to make it "sticky" allowing more smoke to adhere and create a nice even smoke ring. Water never rises above 212F and this helps keep a "low & slow" cook temp of 225F to 250F. Always start off with a pan of hot water and place it near the hottest part of you cooker.

To use or not use a water pan is up to the individual pitmaster and the type of cooker he's using.    
 
SmokingMeatForums.com is reader supported and as an Amazon Associate, we may earn commissions from qualifying purchases.
Clicky