vertical smoker with offset firebox

  • Some of the links on this forum allow SMF, at no cost to you, to earn a small commission when you click through and make a purchase. Let me know if you have any questions about this.
SMF is reader-supported. When you buy through links on our site, we may earn an affiliate commission.

cjohnson3006

Fire Starter
Original poster
Dec 19, 2010
60
19
Butler county kansas
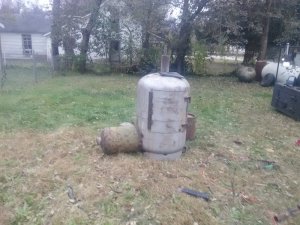
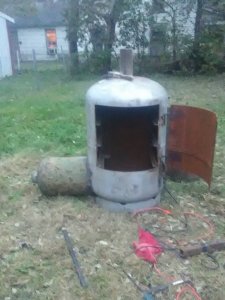
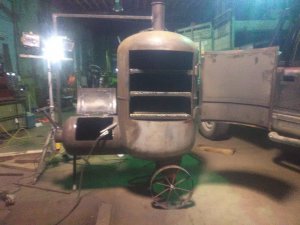
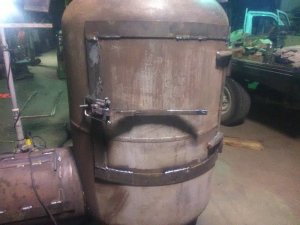
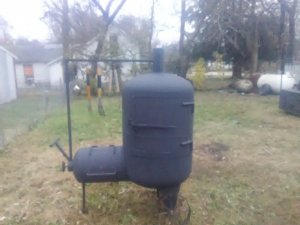
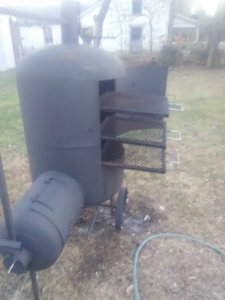
Thought I'd try a new design. Its sold already so hopefully all works right first time I fire it up. The 3 racks will be 20x20. Building spoke wheels to go on it as well.
 

Attachments

  • IMG_20171104_172436.jpg
    IMG_20171104_172436.jpg
    165.7 KB · Views: 186
  • IMG_20171104_182746.jpg
    IMG_20171104_182746.jpg
    137.7 KB · Views: 167
  • IMG_20171106_111101.jpg
    IMG_20171106_111101.jpg
    76.6 KB · Views: 179
I'm following. Looks good so far.

Chris
 
Wheels weren't hard. The outer ring is from the leftover part of firebox tank. The center bushing is 3/4" ID and 1" OD and are 2" wide as are the wheels. The spokes are 1/2" foundation anchor bolts I cut to length. As these are 8 spoke, I laid out the first 4 with a square tacking in place. I then took the remaining 4 and centered. Given the 1" bushing center and 1/2" spokes, they all touched when placed together so the fit up was perfect but I did chamfer the edges so I had a little room for the weld to penetrate easier. From start to finish including cutting the rings, the spokes and grinding chamfers on the spokes, took about an hour and a half to build them both. I did have one slightly wobbly after installation so I found the spot closest to smoker, heated 3 spokes cherry red next to bushing and pried slightly. Spun wheels and repeated a few times until rolled without a wobble
 
Made toggle latch/handle from a 5/16x6 u-bolt and some 3/4" solid square stock. Works like a champ and doesn't look as big or crude on the smoker as it does on the pic. Just washed it all out tonight and have fire going to dry it out quickly to inside doesn't rust. Will season interior tomorrow night with veggie oil then paint. I'll prob cook a slab of ribs and something else to "test it out" before I let it go! Lol
 

Attachments

  • IMG_20171111_152310.jpg
    IMG_20171111_152310.jpg
    100.7 KB · Views: 144
  • IMG_20171111_153025.jpg
    IMG_20171111_153025.jpg
    146.1 KB · Views: 139
Wheels weren't hard. The outer ring is from the leftover part of firebox tank. The center bushing is 3/4" ID and 1" OD and are 2" wide as are the wheels. The spokes are 1/2" foundation anchor bolts I cut to length. As these are 8 spoke, I laid out the first 4 with a square tacking in place. I then took the remaining 4 and centered. Given the 1" bushing center and 1/2" spokes, they all touched when placed together so the fit up was perfect but I did chamfer the edges so I had a little room for the weld to penetrate easier. From start to finish including cutting the rings, the spokes and grinding chamfers on the spokes, took about an hour and a half to build them both. I did have one slightly wobbly after installation so I found the spot closest to smoker, heated 3 spokes cherry red next to bushing and pried slightly. Spun wheels and repeated a few times until rolled without a wobble

Thanks for the info.
 
Seasoned the inside. Very efficient design. Takes less to heat and keep hot than expected. Temps very similar top to bottom. Slightly warmer up high
 
Built and installed handles on cooking grates. Almost forgot them! Lol
 

Attachments

  • IMG_20171119_170358.jpg
    IMG_20171119_170358.jpg
    98.7 KB · Views: 142
  • IMG_20171119_170428.jpg
    IMG_20171119_170428.jpg
    95.6 KB · Views: 130
SmokingMeatForums.com is reader supported and as an Amazon Associate, we may earn commissions from qualifying purchases.
Clicky