Need Help With A New Reverse Flow Build 275 gallon

  • Some of the links on this forum allow SMF, at no cost to you, to earn a small commission when you click through and make a purchase. Let me know if you have any questions about this.
SMF is reader-supported. When you buy through links on our site, we may earn an affiliate commission.
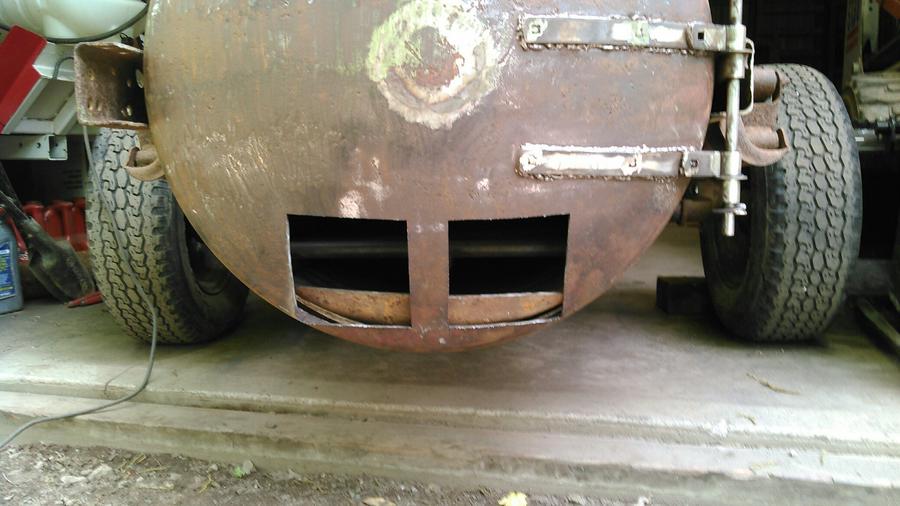
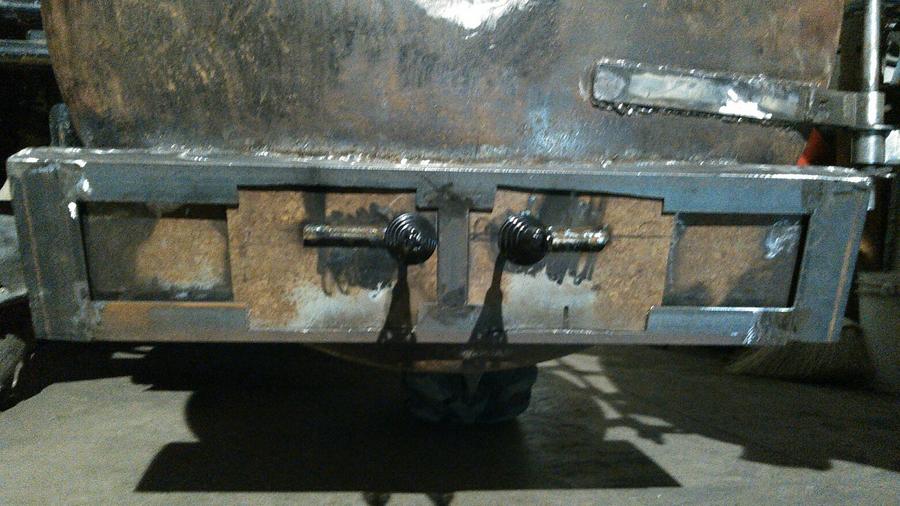
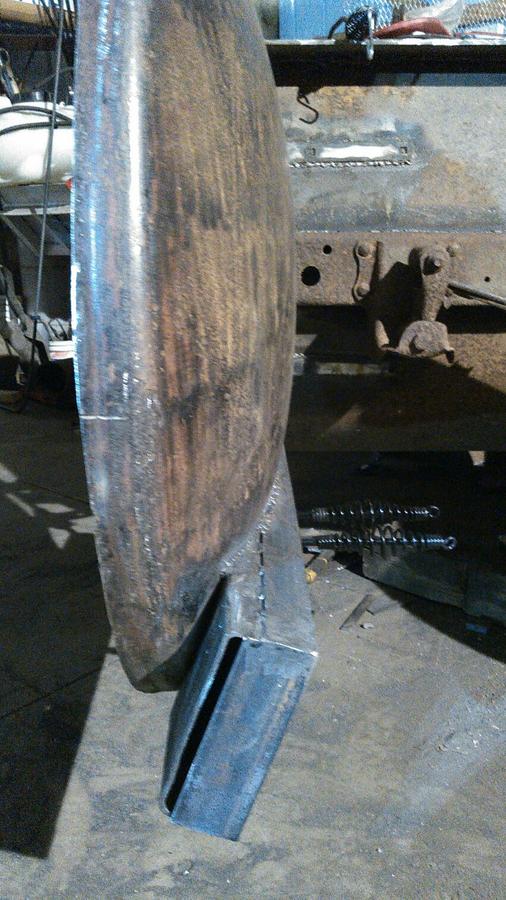
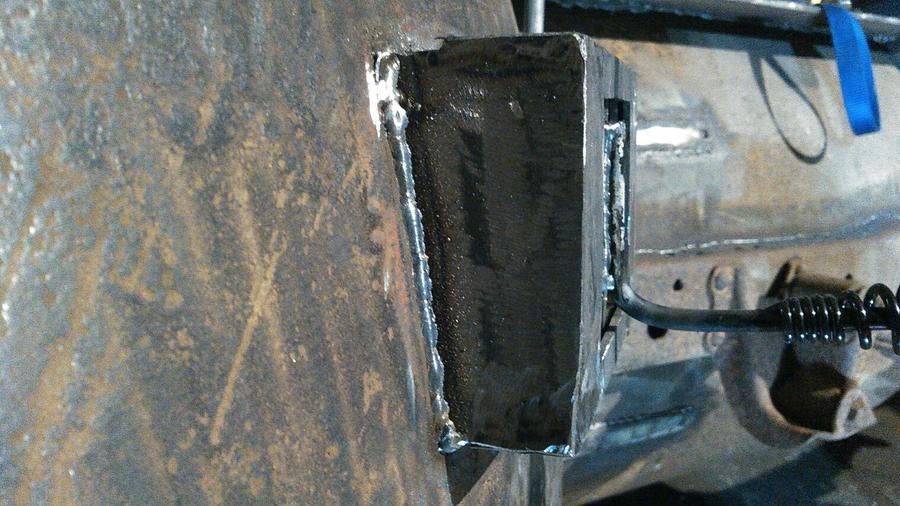
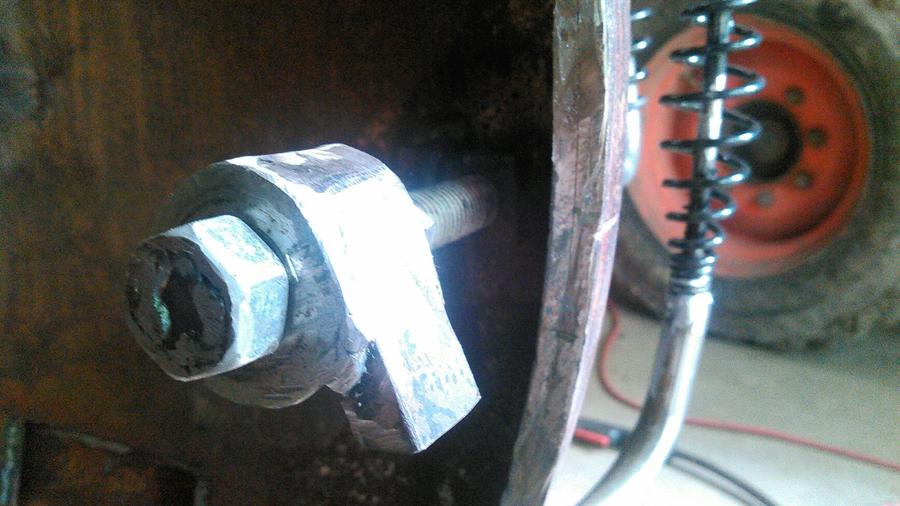
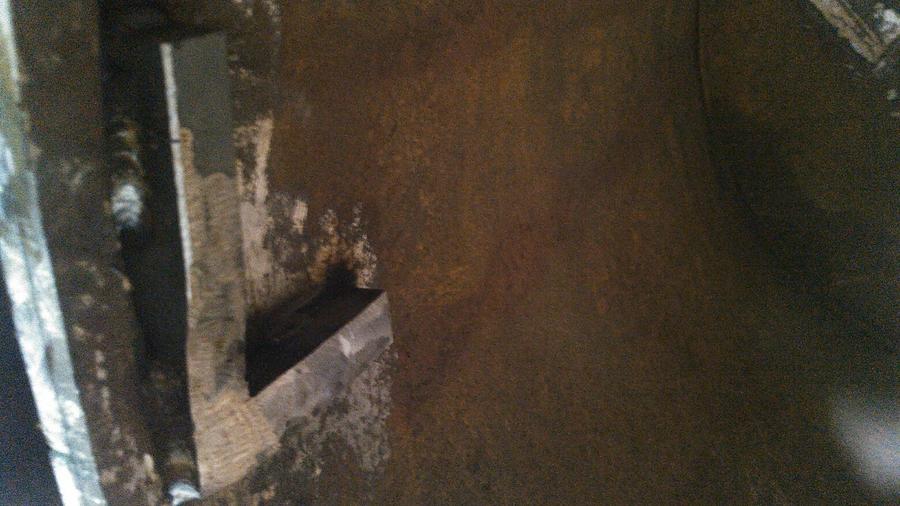
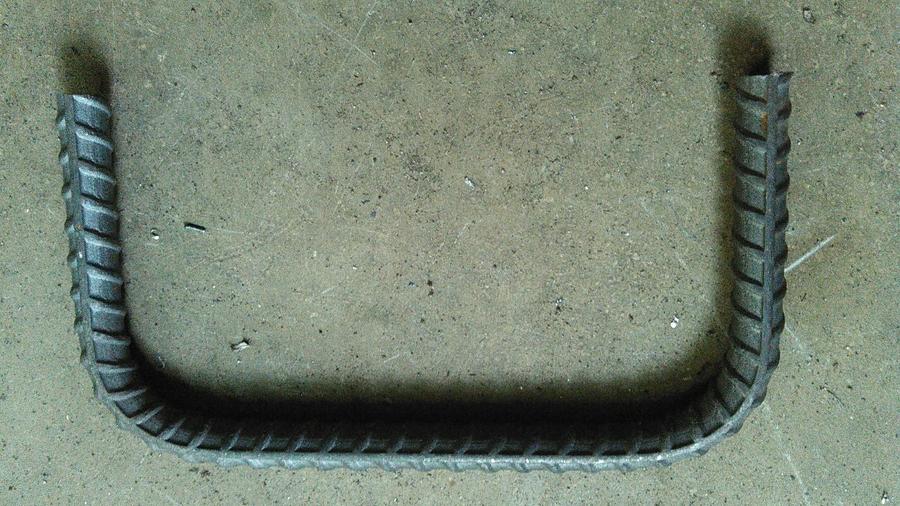
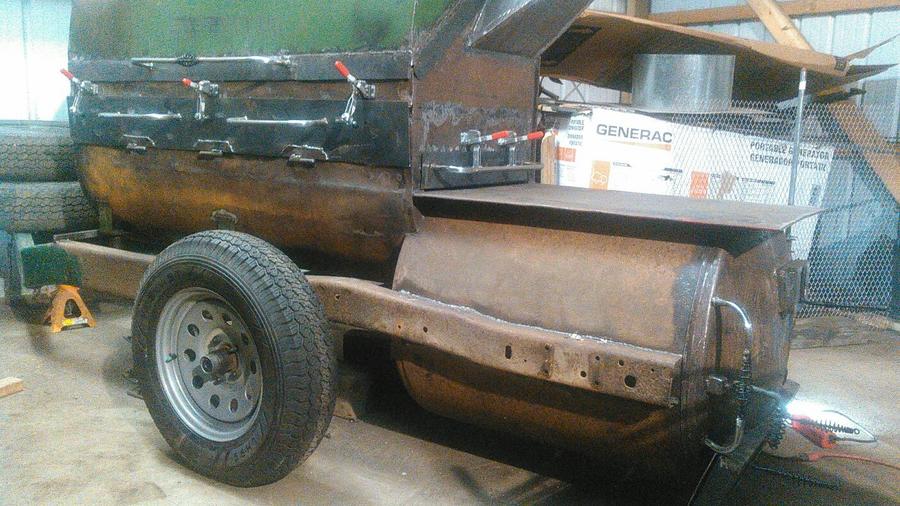
I am doing a lower and upper intake so I can have the best control over temps and air flow.  I started on a lower inlet before LenDecaturAL offered a suggestion, but my plan is similar.  The dome nature of the firebox door and the 6" x 2" metal I had means the lower inlet will be angled toward the ground instead of being perfectly vertical, but should work well.  I'll post some photos when some progress is made.  Thanks for the continued help.
 
That should work just fine, as for the crooked cut, we call those "character" and no one will notice. 
icon14.gif
 
  • Like
Reactions: tykenn28
I called my local butcher today to ask them to hold some pork fat for me so that I can use it to season the smoker when the time comes.  They said they would have to check and see if they still had any from a few pigs processed today or it had already been thrown away.  I know from experience that they charge a disposal fee to customers when processing.  Anyway, they agreed to hold some for me, but let me know it would cost $0.99 per pound.  While that is not a bad price, it got me thinking.  The butcher charges customers to dispose of the fat and throws it away, but if I want their trash, I have to pay for it.  Pretty good deal for them.   
 
I got two layers of expanded metal on the firebox grate, so its done.  The ash tray needs handles cut into it and then the firebox inside will be done, other than cleaning.

 
The counterweight setup needed some additional weight and I wanted a way that I could change the weight if needed in the future.  I had a bag of buck shot in the shop that had been torn and got wet, so I figured I could use it along with some 4" square tubing I had left from another project.  I capped the tubing and welded 1" nuts over 1" drilled holes.  After welding them on, I added some of the buck shot to each until I got the balance I wanted.  When I'm sure I have the weight correct, I'll tighten down the bolts, but can always remove them to make weight changes in the future. 


The firebox door handle and door latch are done.  I designed the door latch so that when the handle is turned counter-clock-wise it pulls the door tighter.  It may not have been needed, but the door is heavy, so I wanted a way to pull it tightly closed. I had a smaller 90 degree handle attached to the threaded rod, but it was too flimsy, so I cut it off and welded a 90 degree handle made out of threaded rod instead. The third photo shows the inside portion of the latch that contacts the "L" shaped striker area on the inside of the firebox shown in the fourth photo.  If I could do it again, I'd move the latch handle further from the side of the firebox as the current location was almost too close for the inside latch setup.


Back to the title that started this build, "Need Help With A New Reverse Flow Build 275 gallon". I am going to put three thermometers on the front of the smoker so I can keep track of the temps across the 60" wide cooking chamber.  My question is about where I should put them. The thermometers I'm using have 2.25" probes on them.  Should I put them low, just above the upper cooking grate, so that I have an accurate reading close to where the food is cooking or do I put them higher, near the middle of the smoking chamber?  I generally see them installed near the middle, but I wonder if that is just for appearance and not function. 
 
Put your therms where you want to know the temps. Only you can decide where that is. After some time using it and monitoring temps at other locations with a digital thermometer, you can get to know what the temps are everywhere based on the analog dials.
 
I wanted to bend rebar to form handles for the two racks.  I made a few attempts to do so with a bench vice and a straight bar, but my handles were turning out more like half circles than the rectangle I was looking for.  I decided to spend the big bucks ($15 at Menards) to buy a rebar bending bar for this project and since I've got some foundation work in the future also.  I was able to easily bend ten matching handles in less than half an hour, including cutting them to length. 


The lower rack gets four handles.  The top rack got six handles.  Several times, I've had the pleasure of two guys trying to lift and balance a 200lbs hog on a rack with two narrow handles poorly placed at the ends of the rack.  I decided that wouldn't be an issue on my smoker, especially since I plan to do some whole hogs.

 
I've been busy doing all the stuff I have to do instead of the stuff I want to do, like working on this smoker.  I've made a little progress, but not as much as I'd like.

I got the Ford 9" rear end that was being used as the axle out along with the big and very worn out 1964 F100 leaf springs.  I shortened and welded in a used torsion axle.  I moved the axle forward because it had a lot of tongue weight and I wanted it to be more balanced.  As planned, the axle change lowered it about five inches.


Last edited:
The front portion of the trailer will be wood storage area.  I started on the framework, but still need to add expanded metal all around and two more side supports after the expanded metal.  If my schedule and the weather cooperate, I'd like to start sandblasting it sometime this week. 

 
I still plan to add a removable grill over the firebox on top of the RF plate, but am trying to locate a grill grate that will work.  My local metal supplier only has flat expanded metal in 4 'x 4' or 4' x 8' sheets,  Both are more than I want to spend for what will be less than a 27" x 27" grill when done.  Other than that future addition, I'm done with fabrication!  This point has been slowly approaching, so I'm happy to be here.  Now I am just waiting on the weather and my schedule to cooperate so I can sandblast and paint it.  After that is seasoning, gaskets, and the point of this whole process....SMOKING.


You may want to consider firing it up before you sandblast and paint to make sure you don't need to make any changes. It will be much easier to make tweeks now if they are needed.
 
You make a good point LenDecaturAL. As this project was started by someone other than myself, I don't know what prior burn out was done and see some type of plaster that fell in a few spots on one of the cooking grates.  I'm considering sandblasting the inside and seasoning it before I blast and paint the outside. That way I know its clean inside and I can make any adjustments or repairs needed before painting the outside.  Speaking of seasoning, I've read a lot of varying information about how to do it.  I'm open to suggestions, but so far plan to coat the inside with pork lard after sandblasting it.  I planned to then do a slow burn up to 250 degrees for a few hours before taking it much hotter, perhaps closer to 400 degrees or so if it will do so.  I hope to then drop it back to around 250 degrees for a few more hours.  This will give me a little experience managing the temperature with the two firebox air inlets.  If I can locate enough, I'd like to use apple wood for the burn to help with the flavoring.  Suggestions?         
 
SmokingMeatForums.com is reader supported and as an Amazon Associate, we may earn commissions from qualifying purchases.

Hot Threads

Clicky