I am the proud papa of a new smoke house. I finally have my smoke house finished (well almost) and cold smoking some bacon. So it seemed like a good time to post some pictures. The beginning of the build is in another post. The smoker turned out as nice as I imagined it. I really want to thank the members that gave me ideas and answered my questions.
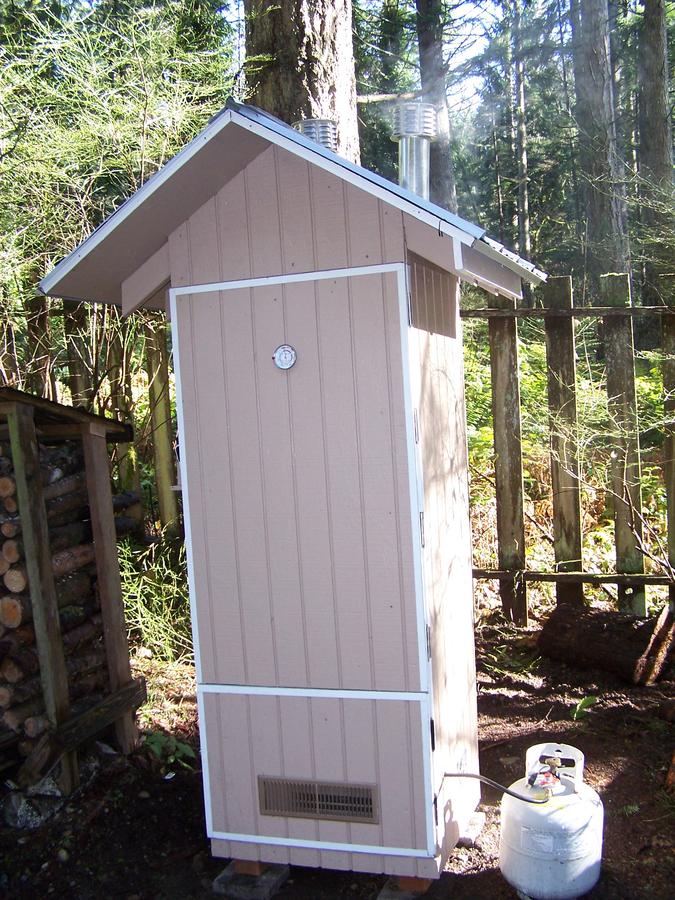
The smoker is basically 4' x 2' x 22" deep in the smoke camber. It is lined with aluminum over Hardie backer board with 1 1/2" of insulation. The fire box is lined with ceramic tile. I did fire it up for about 6 hours to start seasoning it and to play with the burner, vents, and dampers before starting the cold smoke for my belly bacon today. The outside temperature was about 55 degrees and with the small ring lit and everything open it will run in the 115 to 120 range. That will be perfect for the first part of sausage smoking. I did not have any problem getting it up to the mid 250's with both the big and small burner. So I am confident that I have the range the I was looking for. I am still waiting for my second external dial thermometer to arrive but my Maverick ET-732 worked great for the test run. The double stack worked pretty well but it did take quite a bit of adjusting to get the temperature balanced from top to bottom in the smoker. The good news is that I could make that happen. I am really looking forward to playing with it a lot in the up coming months.
Here are some pictures.
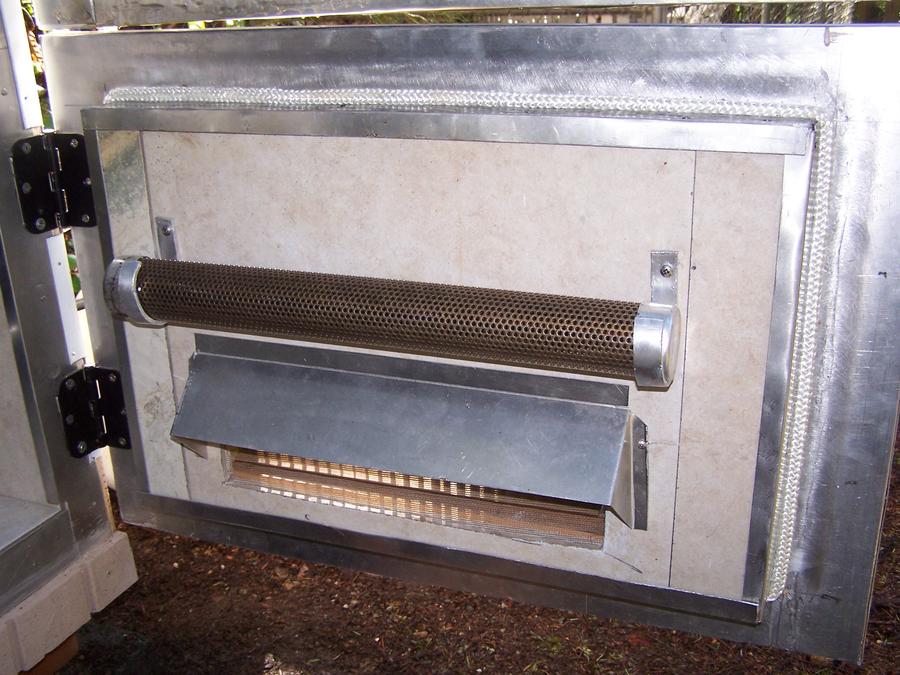
I am using the always popular Northern Tools burner and I have an 18" A -Maze-N-Tube-Smoker for cold smoking for adding other smoke as needed. I put in a full sized 2 1/2" deep stainless steamer pan for a water pan or drip pan as needed. I am planning on using the water pan mostly when smoking salmon or some types of sausage. r
I hung the AMTS on the door for easy access when I am using it. I put the deflector on the vent to help keep some of the fresh air directly away for the AMTS and to also deflect any breezes from blowing out the burner when it is on low. As it turns out it is nice for keeping any ash from the AMTS away from the vent. When I cold smoked my very first belly bacon today, the AMTS worked great and gave me a little over 6 hours of smoke per load.
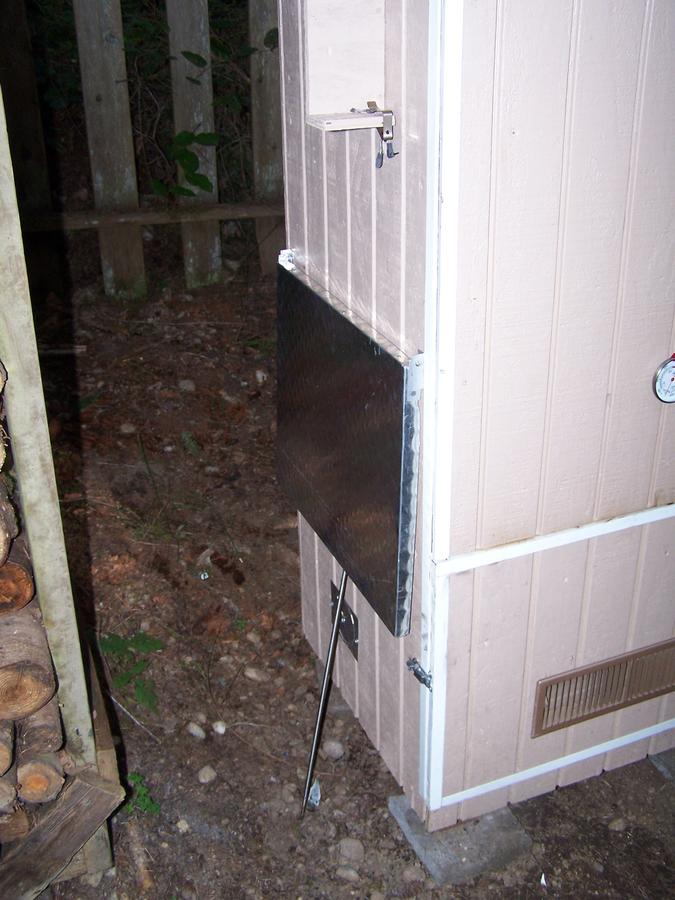
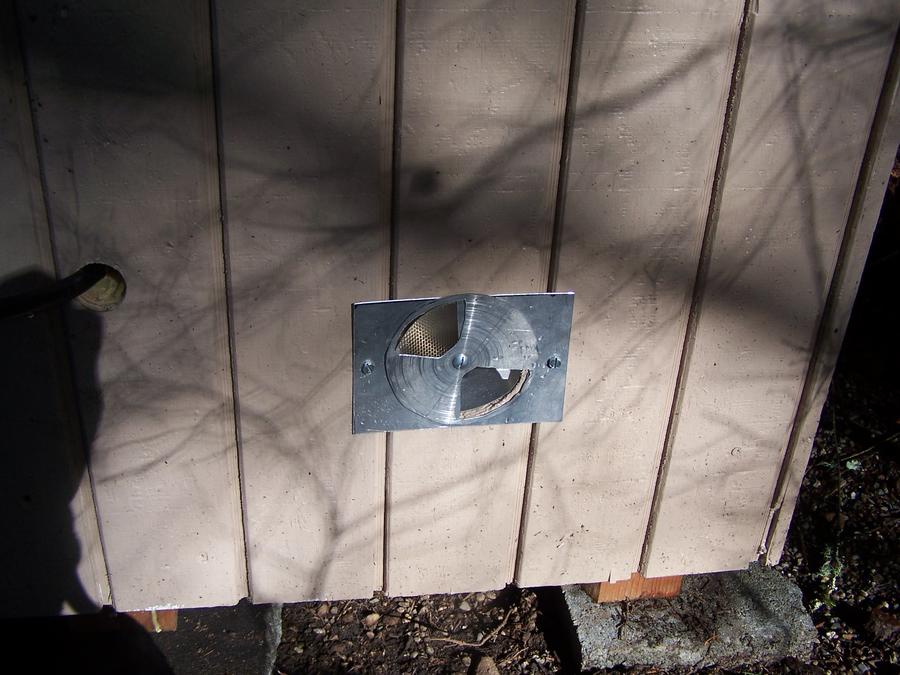
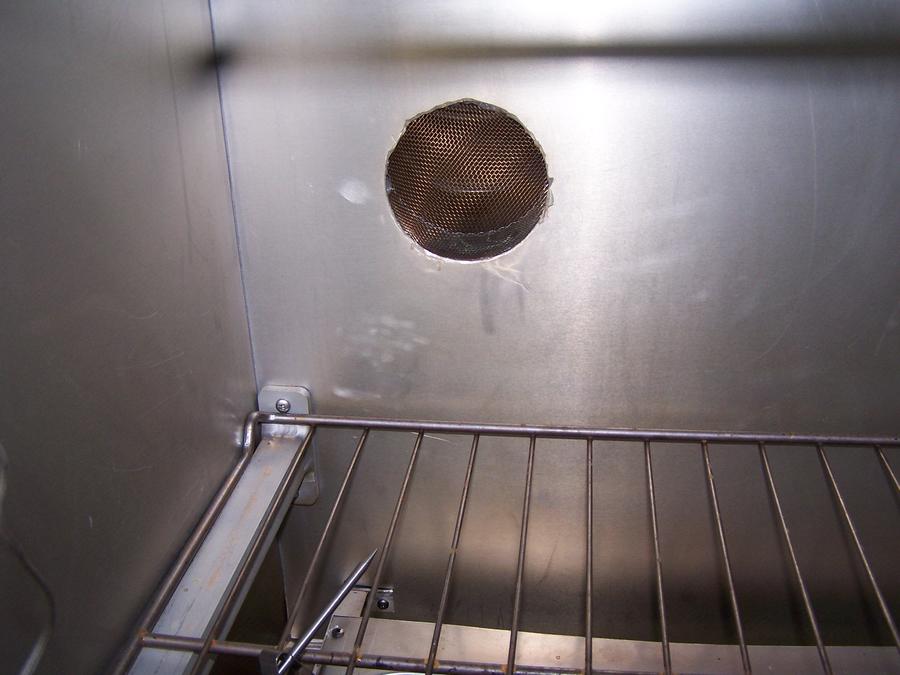
I also put on side vents to try to help add cool air to keep the temperature down for sausage and jerky. I put deflectors on both of those to protect the flame also. I do have brass screen on all of the vents and the stacks to keep critters and bugs out of the smoker. The 12' cast frying pan was a hand-me-down that was sitting in the garage. It makes a nice heat deflector and is great for smoking wood chunks. I am thinking about getting a lid for it to slow down the wood smoke a bit.
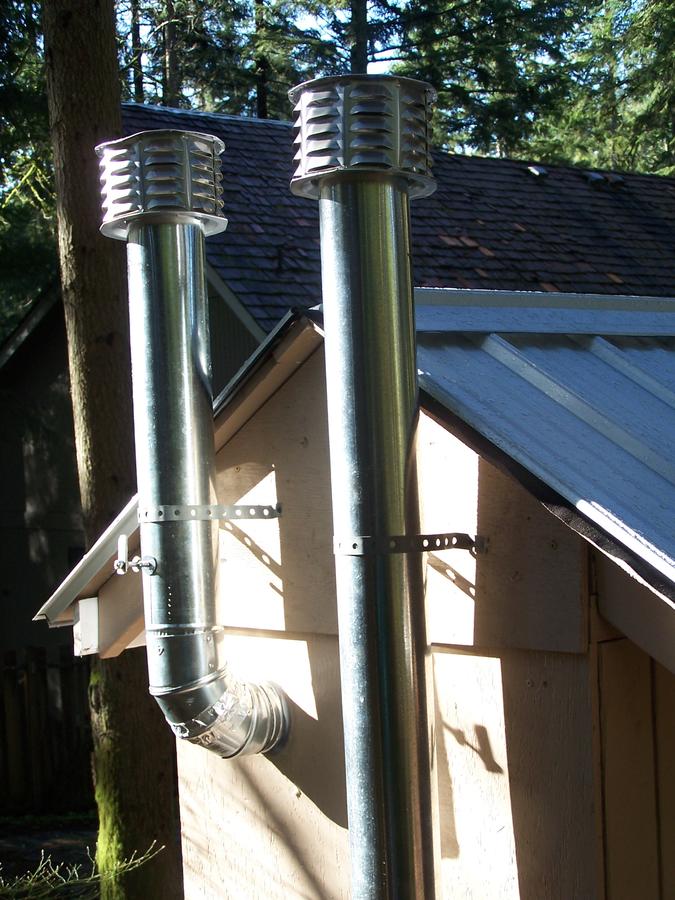
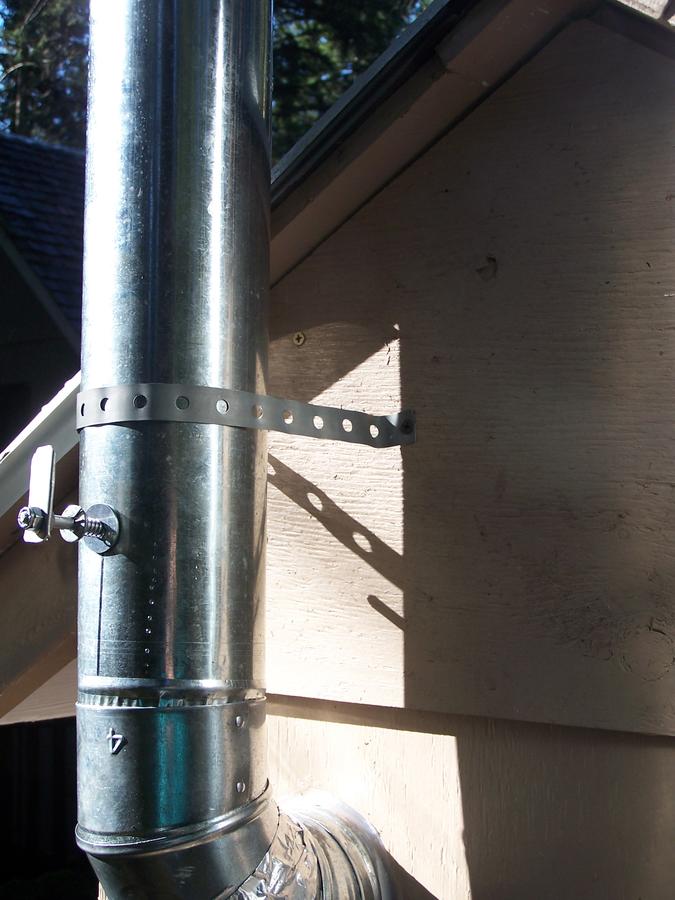
I have dual 4" stacks on the back. I could not find 4" damper so I had to build dampers for control. They worked well for the 6 hour burn-in. This picture also shows the metal roofing that I put on. We live in the trees so this will help shed the pine needles. That is also why I used a peaked roof rather than a sloped flat roof.
Finally after several weeks of designing, tinkering, and fabricating I have TBS. BabySmokologist was completely right when he told me to enjoy the build. It was a lot of fun with a lot of satisfaction.
The smoker is basically 4' x 2' x 22" deep in the smoke camber. It is lined with aluminum over Hardie backer board with 1 1/2" of insulation. The fire box is lined with ceramic tile. I did fire it up for about 6 hours to start seasoning it and to play with the burner, vents, and dampers before starting the cold smoke for my belly bacon today. The outside temperature was about 55 degrees and with the small ring lit and everything open it will run in the 115 to 120 range. That will be perfect for the first part of sausage smoking. I did not have any problem getting it up to the mid 250's with both the big and small burner. So I am confident that I have the range the I was looking for. I am still waiting for my second external dial thermometer to arrive but my Maverick ET-732 worked great for the test run. The double stack worked pretty well but it did take quite a bit of adjusting to get the temperature balanced from top to bottom in the smoker. The good news is that I could make that happen. I am really looking forward to playing with it a lot in the up coming months.
Here are some pictures.


I am using the always popular Northern Tools burner and I have an 18" A -Maze-N-Tube-Smoker for cold smoking for adding other smoke as needed. I put in a full sized 2 1/2" deep stainless steamer pan for a water pan or drip pan as needed. I am planning on using the water pan mostly when smoking salmon or some types of sausage. r

I hung the AMTS on the door for easy access when I am using it. I put the deflector on the vent to help keep some of the fresh air directly away for the AMTS and to also deflect any breezes from blowing out the burner when it is on low. As it turns out it is nice for keeping any ash from the AMTS away from the vent. When I cold smoked my very first belly bacon today, the AMTS worked great and gave me a little over 6 hours of smoke per load.
I also put on side vents to try to help add cool air to keep the temperature down for sausage and jerky. I put deflectors on both of those to protect the flame also. I do have brass screen on all of the vents and the stacks to keep critters and bugs out of the smoker. The 12' cast frying pan was a hand-me-down that was sitting in the garage. It makes a nice heat deflector and is great for smoking wood chunks. I am thinking about getting a lid for it to slow down the wood smoke a bit.

I have dual 4" stacks on the back. I could not find 4" damper so I had to build dampers for control. They worked well for the 6 hour burn-in. This picture also shows the metal roofing that I put on. We live in the trees so this will help shed the pine needles. That is also why I used a peaked roof rather than a sloped flat roof.
Finally after several weeks of designing, tinkering, and fabricating I have TBS. BabySmokologist was completely right when he told me to enjoy the build. It was a lot of fun with a lot of satisfaction.