Hello. I KNEW this question was coming!! I have been meaning to post this for a VERY long time but I wanted to have pictures to go along. I just haven't got around to it so I'll do my best to explain. IF you have questions please feel free to PM me or ask on this thread. This is gonna be a long read but must be so that I can explain all.
The long axis seam SHOULD be straight but let’s not assume that. Besides you don't want a seam top, bottom or 90 degrees.
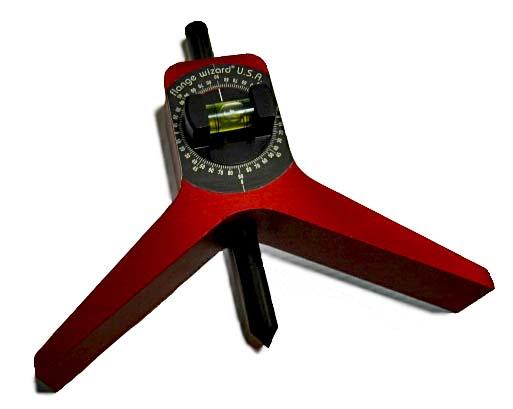
There is a welder’s tool that will make this simple but as it is expensive to buy, we'll do this the hard way. You will need a builders square, 2' level, torpedo level, flat blade 25’, 50’, or 100’ tape measure and more than 2 hands.
Your tank MUST be level along the long axis and chocked so that it can not roll. I would put the welded seam at 135, 225 or some obscure angle around there.
With you standing facing either end of your tank: place the builders square near the end of the tank or just on the tank side of the cap weld with the long side of the square running down the side of the tank to your left or right and the short side running horizontal to the top of the tank. Now place the torpedo level on top of the short side of the builders square and move the square around the tank to get the short side level. KEEP BOTH SIDES OF THE BUILDERS SQUARE TOUCHING THE TANK! In other words both sides of the “L” shaped builders square are touching the tanks at all times.
NOW. Put the 2’ level on the long side of the builders square. Now roll the square around the tank so that both levels are as perfectly level as possible. Take note IF either bubble in just slightly off to one side and remember which side. IF it is a larger thinner tank with no end caps it MAY be egg shaped.
The square MUST be touching both the top and side of the tank on the inside of the “L”. The long side of the square MUST be hanging straight down ( think plumb bob ).
NOW that you have all things in place and as close to level both ways as possible, place a mark on the top of the tank at 1” on the short side of the level ( can be 2”, 4”, whatever is closest ( close counts here ) to top dead center.
Now move to facing the other end. Follow the same steps. REMEMBER if one level was bit off and remember off which way. Set the square so that it is exactly the same as the original end ( off to the left on the first end, off to the right the other ).
Place your mark at exactly 1”, 2”,4”, whatever you did on the first end.
NOW you should have a straight level line to start with. Snap a line between the marks with a chalk line.
Using your flat tape measure, measure the circumference of the tank. You MUST make sure the tape is as straight as possible. Holding both ends of tape measure work it back and forth so that the tape is as straight up and down as possible to achieve a true measurement. Once finding the circumference, divide by 4 and the mark the quarters.
If I left anything out let me know.
Danny


