GE Monitor Top Fridge Build

  • Some of the links on this forum allow SMF, at no cost to you, to earn a small commission when you click through and make a purchase. Let me know if you have any questions about this.
SMF is reader-supported. When you buy through links on our site, we may earn an affiliate commission.

marcgyver77

Newbie
Original poster
Aug 6, 2017
7
10
Middle Georgia


New member, regular visitor.....

After spending hours reading many posts about Fridge/Freezer Builds, I decided to do a Monitor Top Fridge Build due to it being about the same in size as our Stumps smoker, which had been stolen the previous year. Although I could not find a post on a monitor top build, there was enough information posted on SMF to give it a try. 

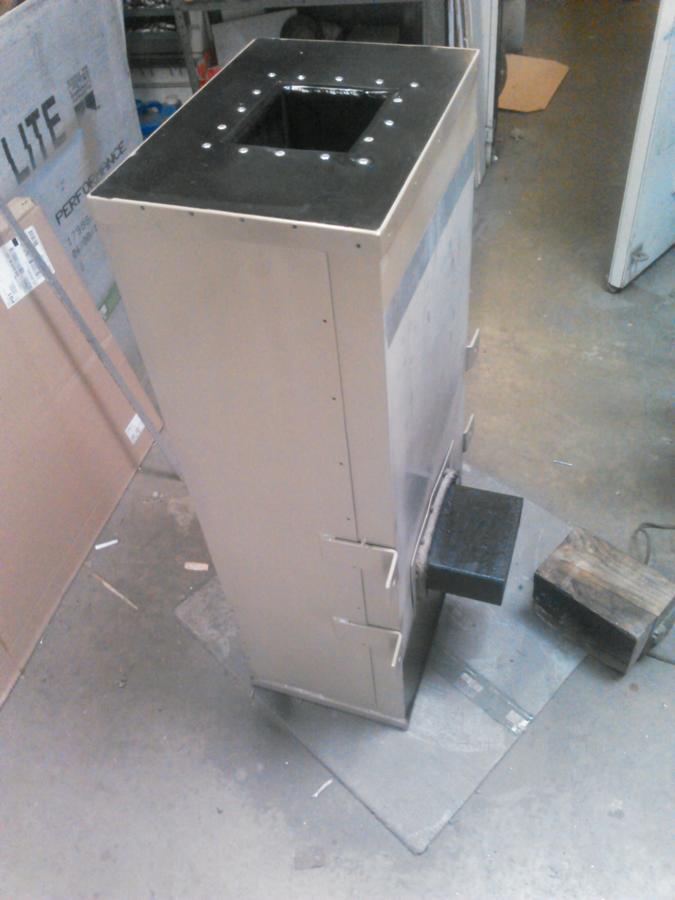
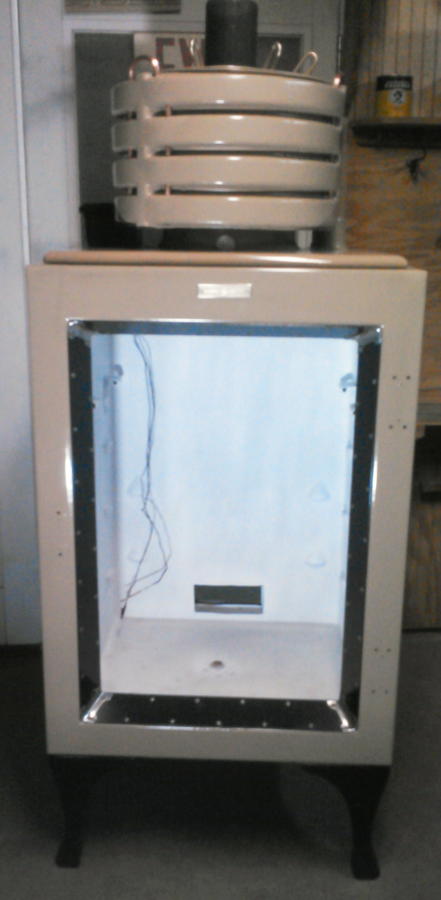
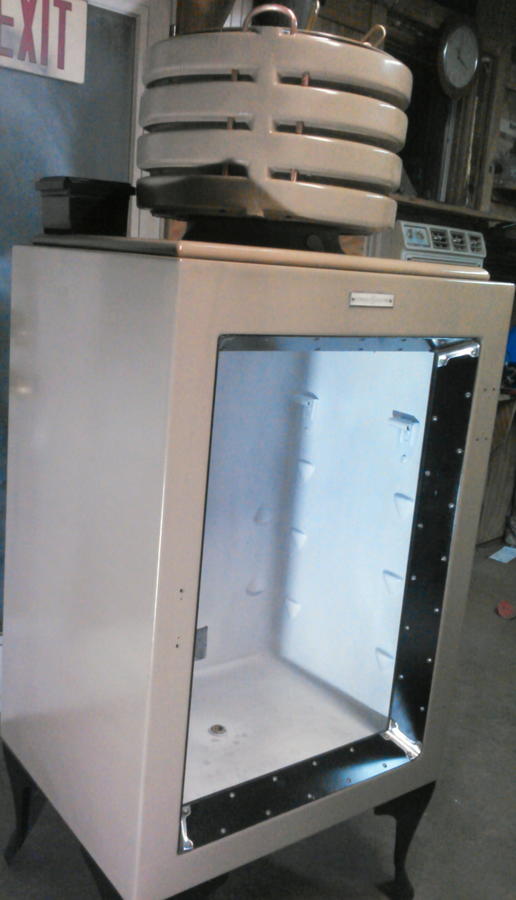
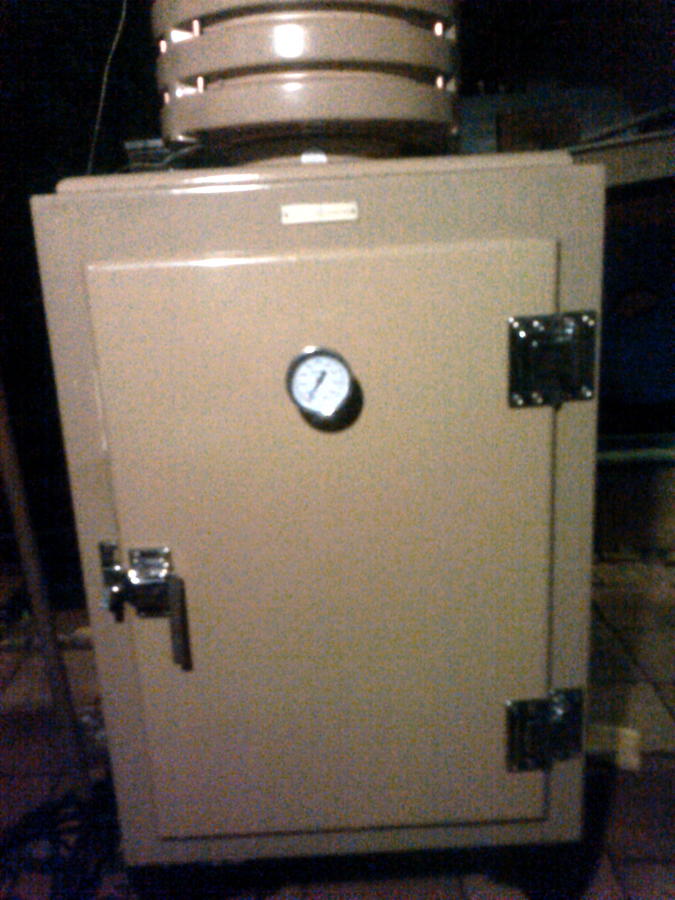
It took me a couple of months to find one within my budget (Prices ranged from over a thousand down to two fifty for the one I bought). The next problem was the weight of it. The top part had the compressor on it that was about eighty plus pounds. I really wanted to keep the monitor top look but the heavy compressor had to go. I found a plastic corrugated 12" pipe coupling at Lowes that was about the same size as the original monitor top. 

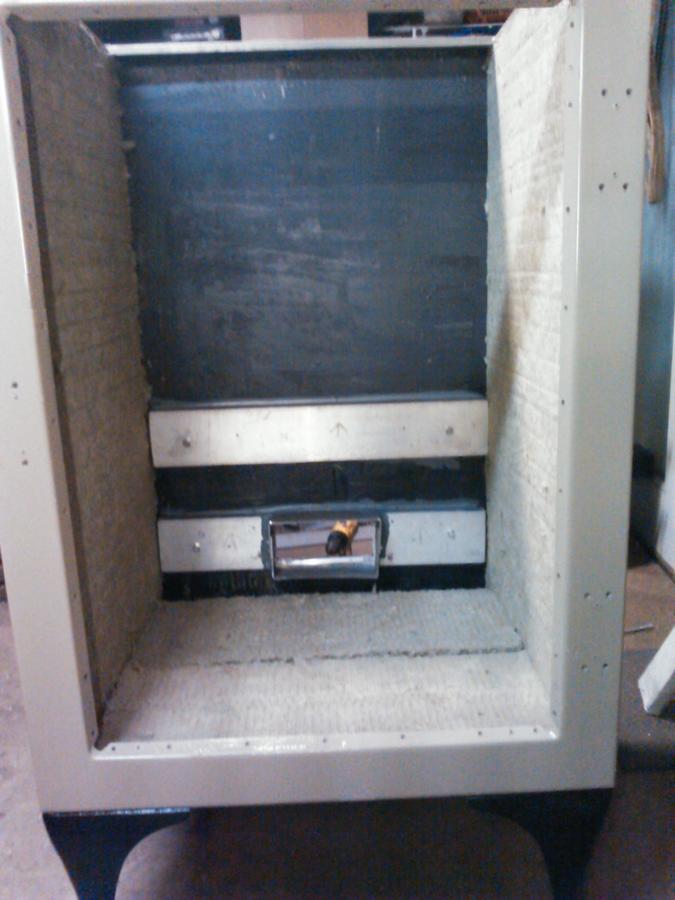
The next problem was that the sides of the door opening and the door were made of plastic. I found a seller on eBay with some 1/8 sheet metal for sale, who agreed to sheering it down to two inch strips, to replace the plastic parts. 

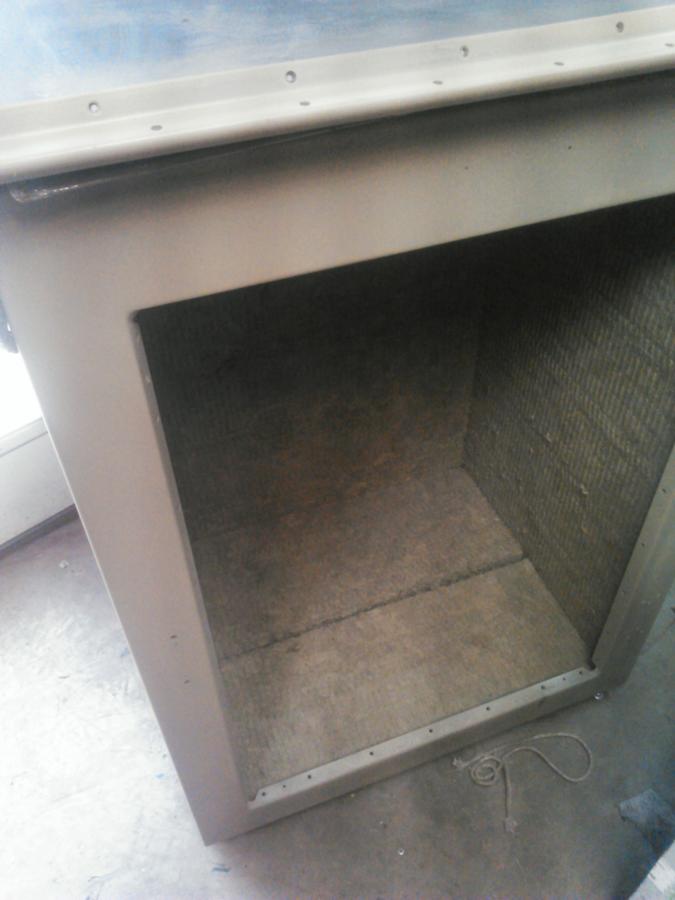
I replaced the wax covered cardboard insulation with Rock-wool (As recommended for its 1200 degree rating). I used six 2' x 4' sheets.

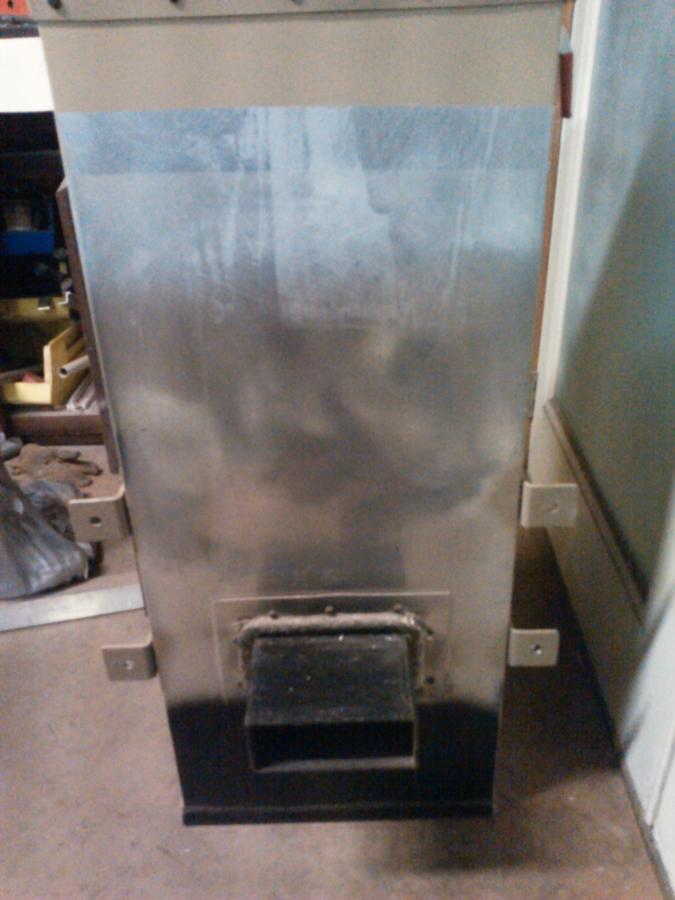
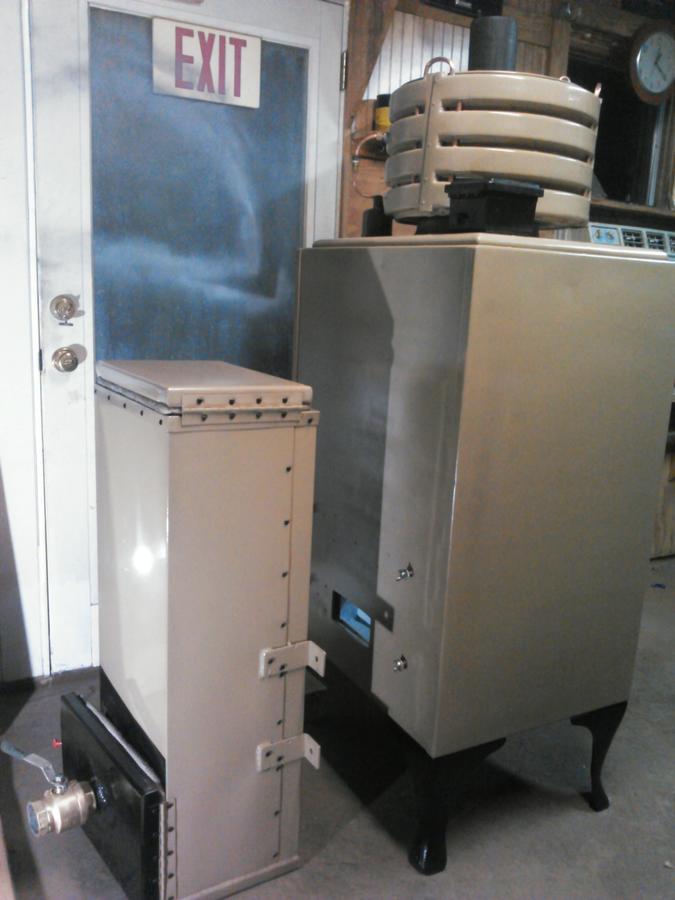
I built a gravity fed charcoal firebox similar to the one that was on the Stumps smoker and mounted it on the back side. Made removable for transporting the smoker.

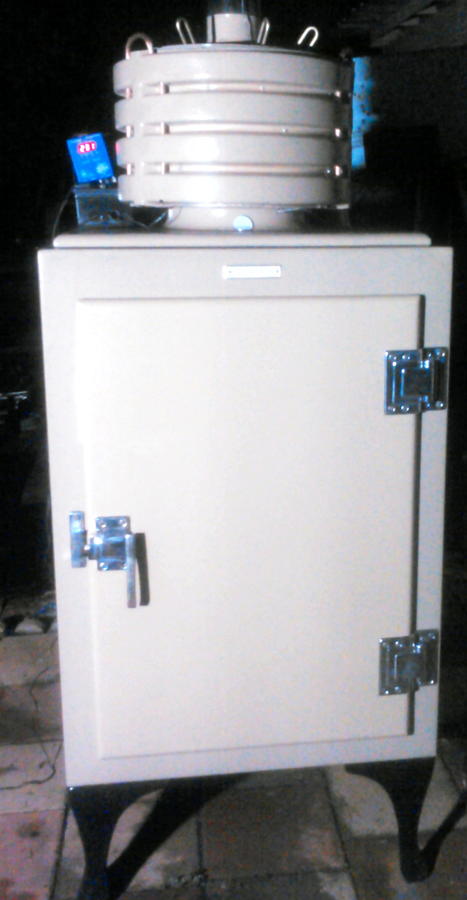
I used the Rust-Oleum  High Heat Ultra paint on the insides and the Dupli-Color engine enamel (primer, top coat and clear coat) on the outsides.

I used a 4" pipe for the smokestack with a 6" vent pipe, packed with Rock-wool, around it to protect the plastic "monitor top" from melting. To also keep the original look, I mounted an electrical box in the same location. I then ran the power cord and leads for the BBQ Guru into it. The "pit" temp and "food" temp leads now drop down through the top of the smoker now instead of down through the smokestack as before.

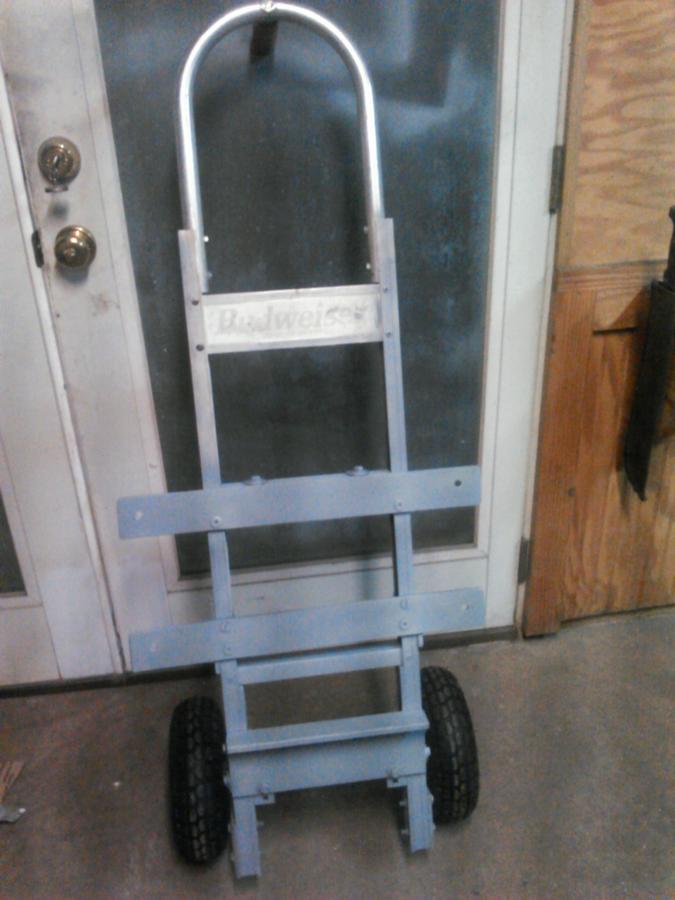
To be able to transport the smoker (mainly just to get it out of the garage to use it), I used an old dolly and added lift points (where the firebox attachments were located) to attach it to the smoker.

Once outside, I filled the firebox up with lump charcoal and fired it up. I started at 200 degrees and up'd the temp by 50 degrees every thirty minutes to break it in and burn off any residuals. The hottest any of the outside parts reached was 150 degrees when I took it to a high of 400 degrees (internal) temperature.

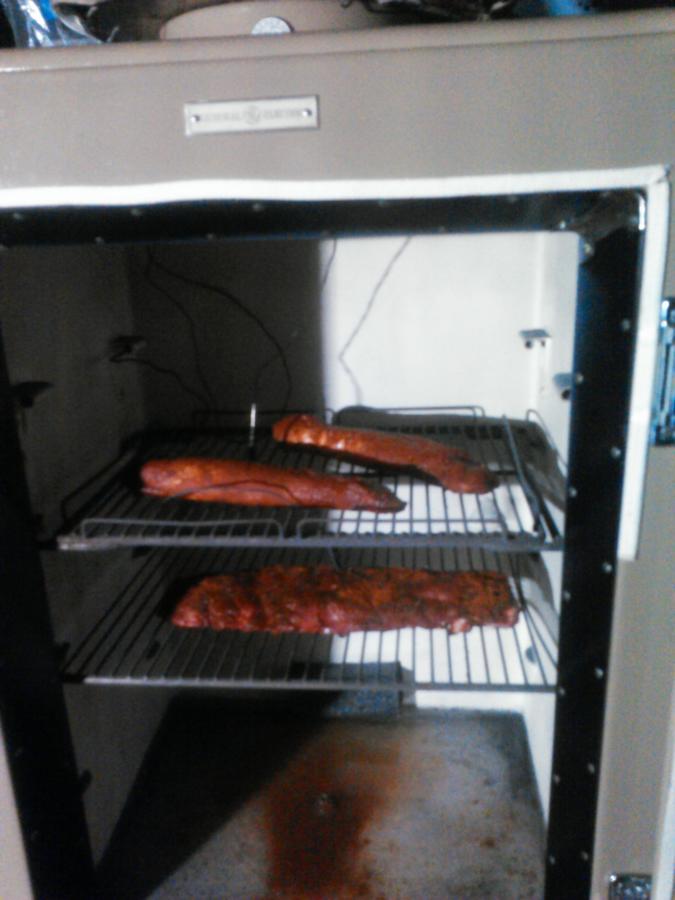
I then lowered it down to 225 degrees, filled the bottom with water, added some wood chips and put in a rack of baby backs & two pork loins, previously prepared in anticipation, to smoke. (They turned out great)

Thanks to the SMF members postings in this forum (And for all the tip and information posted in the other forums that helped bring my smoking up a few notches), our cooking team has a smoker that is as good, or better, as the Stumps smoker we use to have.

P.S. Have ordered Jeff's book "Smoking Meats...."  to up our smoking a few more notches. 
 
That is truly a thing of beauty. Congratulations.
 
I put at least 5 coats of Dupli-Color engine clear coat (maybe more in places I messed up... Lol), wet sanded with 1500 paper and buffed it with rubbing compound. The problem I had with the engine enamel was the primer, top coat and clear coat had to be applied within one hour and had to wait seven days to fully cure before you could re-coat.it. That added a couple of weeks to this build...
 
What was the size of the chute that you used?
I want to convert an old fridge that I found to a gravity feed smoker, but the only dimensions I can find for the Chute/firebox are 8x8/10x10 which seems way to large for the internal area of my fridge (15x23x41")
 
Please tell me the Monitor Top compressor was no longer functional when you decided to do this conversion? Working units are becoming very rare and have become quite valuable, and non-functioning fridges can be found dirt cheap because most use Sulfur Dioxide refrigerant that is very dangerous. I had asked a friend about this refrigerant who is an HVAC tech and he had just two words for me "ball cancer". lol. Working units that use the safer Methyl Formate refrigerant (like mine) typically sell for about $300-500, but fully restored can fetch $3000-$4000.

Don't get me wrong, i do love your smoker. When i got my 1934 Monitor Top, thats the first thing i considered doing with it if restoring it was not an option. Luckily the compressor ran great, so i restored it. If i find a non-functioning fridge in the future though... it will become a smoker.

Here is a before and after (just prior to having all the hardware triple chrome plated). One things for certain... boy do they weigh a TON. Compressor up top is about 190lbs and the cabinet approx 300lbs.
GE_MTop_CA-1-B16_zpskhzurydt.JPG Assembled_zpsx8jovpoe.JPG
 
Sorry for taking so long to reply. No, this was not a working fridge. That was why I got it for only $250.
Yours look great. It's amazing that so many of them still are running.

I am very satisfied with it as a smoker. With the gravity feed and a GURU, I get six hours at 225 degrees per fill up of lump charcoal. Cooks just as good or maybe a little better than the Stumps smoker I used to have.
Getting ready for this years Big Pig Jig cooking competition in Vienna, Ga the first weekend in November. Hard for a backyard cooker to compete with the big boys that run the circuit. Got thirteenth three years ago. This will be my 24th year. It's mostly about going to see old friends, meeting new ones and just having a good time...well, I was told I had a good time, Lol.
 
SmokingMeatForums.com is reader supported and as an Amazon Associate, we may earn commissions from qualifying purchases.

Latest posts

Hot Threads

Clicky