First RF Build. Excited!

  • Some of the links on this forum allow SMF, at no cost to you, to earn a small commission when you click through and make a purchase. Let me know if you have any questions about this.
SMF is reader-supported. When you buy through links on our site, we may earn an affiliate commission.
Thanks, Dave. I think I will be ok. The hinges are about 1" away from the gap, and my trim piece is only 1", so that should leave me 1/2" clear on each side. The hinges open up and away, but let me know if I am not envisioning it right. When building for the first time, it is sometimes difficult to see in my mind what someone else sees. Regardless, I won't fully weld the hinges until the trim is on.

And the trim would be on if the weather would cooperate. I shouldn't complain, because it's cold up north, but our average temps should be in the 60's right now (that's why I live here, dang it!) and we hit 41 today with wind.

I got the notches cut out for the door trim yesterday, but the new plasma cutter was acting up, so I didn't get much else done. Maybe tomorrow. It didn't take long to make some weld notches though when it was working right. I still need to clean up some slag with the grinder from when I cut out the doors.


Open the CC door about 2-3"..... place a straight edge on the door... slide it toward the CC... You will see it hits the CC....
On a hinge, the part that opens, opens up..... the other side of the pivot has to open downward.. that's geometry...
That's the reason for placing the pivot point beyond anything fastened to the "swing side"......

Dave
 
Last edited:
Thanks Dave. I will try this tomorrow. The flange should be on tomorrow and I will post pics.

And to all of you who visit these forums, HAPPY NEW YEAR to y'all, from Texas!!
 
Dang it Dave; you've got me thinking that what you are saying is correct; again...haha. I'll be dreaming of this all night long. So tomorrow if I try and put the flange on and it hits, did you say to move the hinge that is welded to the cc to the outside of the door seal? Or the one on the door to the outer edge of the door seal? I'm just having a hard time with that geometry. I took that in school, but I've slept a couple times since then...
 
Move the hinge that is on the CC so the pivot point is "past" the end of the door flange.... then when you open the door, the flange will move upward.... That's a common mistake... then folks wonder why the door flange hits the CC and gets bent upward, or, it doesn't bend and the flange hits the CC and you can't close the door.... either way, understanding what will happen and fixing it now, you will sleep better.....

Dave
 
Thanks, jarjarchef. And you too Dave, you are helping me sleep like warm milk, or better yet, some hot chocolate.. So if I have to move that hinge on the door side enough to get it past that pivot point, and it runs into the flange, should I just notch that flange out for the hinge? I guess I could; it's only 1/4" wide. Thanks again.
 
Greetings Buda.... Dave had warned me of the same problem and I thought about it so much I made the change at 2AM He was correct and the change worked perfectly. I also like the way you notched the CC door. Keep up the good work and how about more photos. Happy New Year to you and yours... Jerome
 
I'd notch the flange..... you want the hinge welded to something substantial....

I wish I knew about the hinge pin and geometry stuff before I had to re weld my hinges... At least it wasn't a mistake... I learned from it..... and remembered that lesson long enough, to help others.......


There are no mistakes..... only valuable learning experiences....
 
Dave, you were right again. The flange would hit the cc if I left them where I had them. They have been change so that the pivot point is on the cooking chamber side, and they work great. That information was invaluable, and I used it for the firebox hinges as well.

Here is the start of installing the flanges. Thanks Ribwizzard for the tutorial!


Pictures of the hinges in the CORRECT location. I'm so glad I hadn't welded them permanent.


More pics of flanges being installed


And then on to the door for the firebox. The new plasma is not working so back to the grinder to make notches for the flange. Pictures of the door installed.


Installing guide/supports for the cooking grates. The last pictures show a piece of angle that I put on to keep the Q from falling to the ground!


This is the start of the stand. I used galvanized tubing; had it in the yard.


And finally, some handles to open the doors. The list of things to do is getting shorter. Getting really close to blue smoke. I miscalculated on the amount of steel that I need for the cooking grates so need to pick up some more or they would have been done today as well. Happy New Year to ya'll!!


Does anyone know if they make different colored hi-temp paint, and if so, where to buy? A paint store? I have an idea for a paint job and the wife is an awesome painter. Not looking for fancy colors; perhaps red and green.
 
Yes they do. You can get it online or at automotive stores. Basically it is the paint for headers and manifolds. I would do a search for high heat paint with your prefered search engine.
 
Update, with pics.

Was able to do a little more work on Saturday, as the weather was a little warmer.

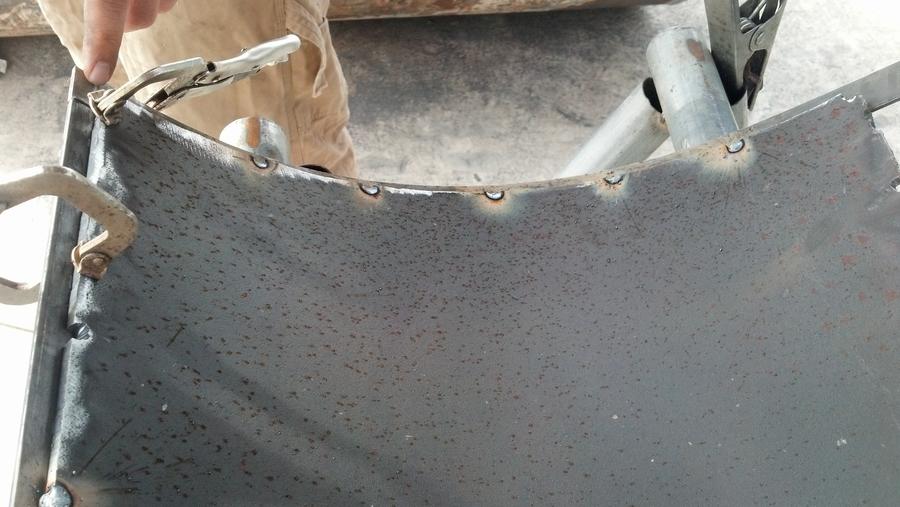
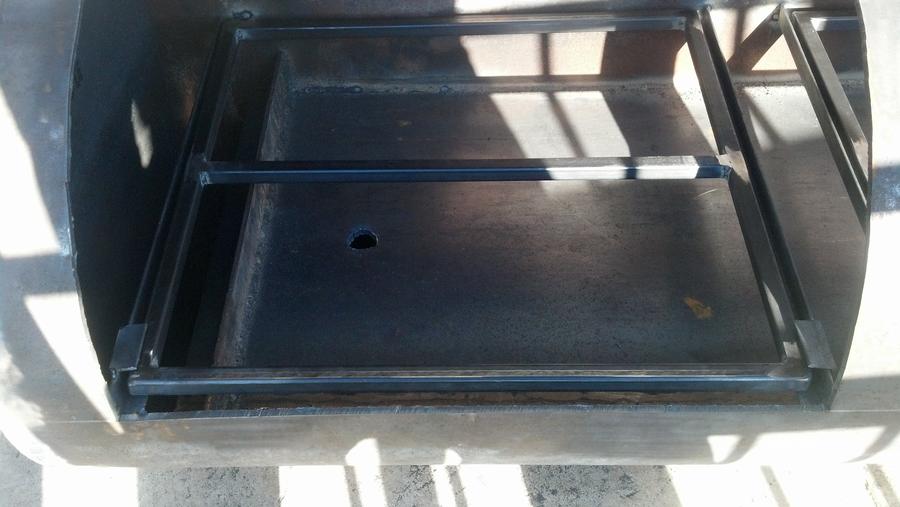
Completed the cooking grates.


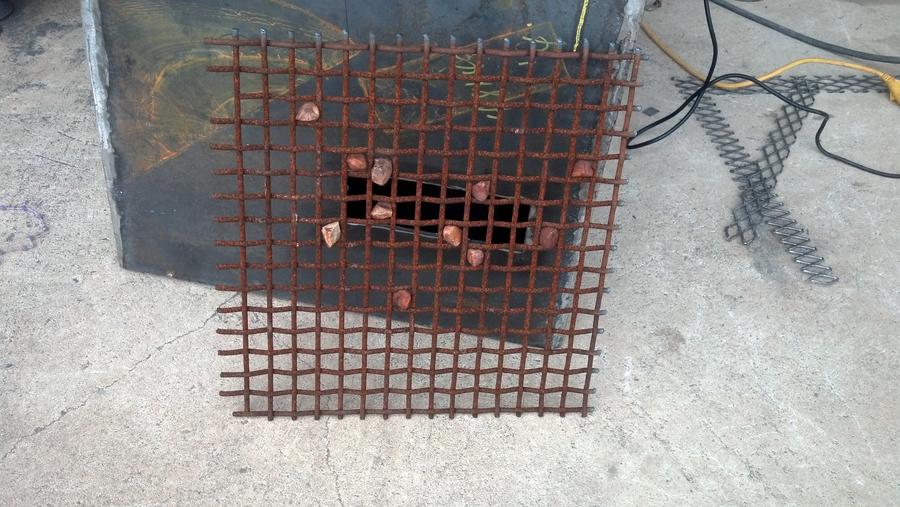
I scored a piece of "shaker grate" from a good friend. These are used in gravel pits to sort out rocks. The rocks came included! This will be incorporated into the firebox grating.


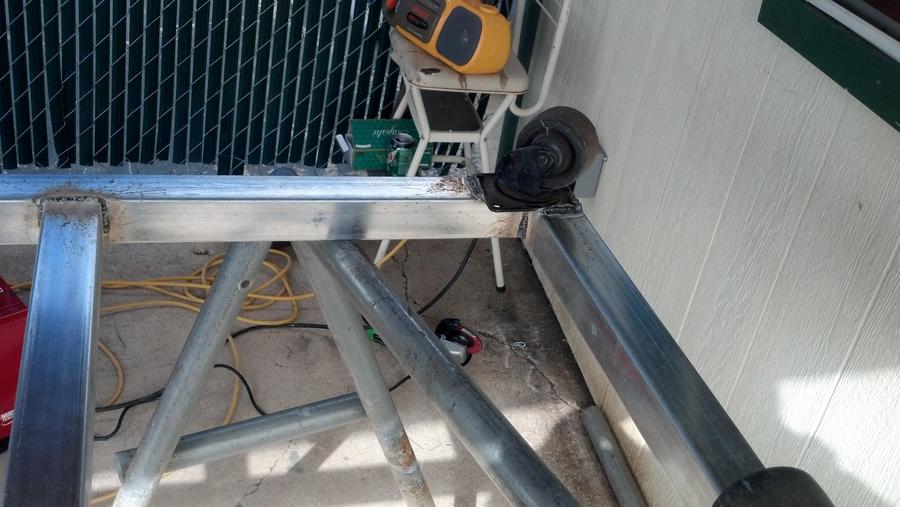
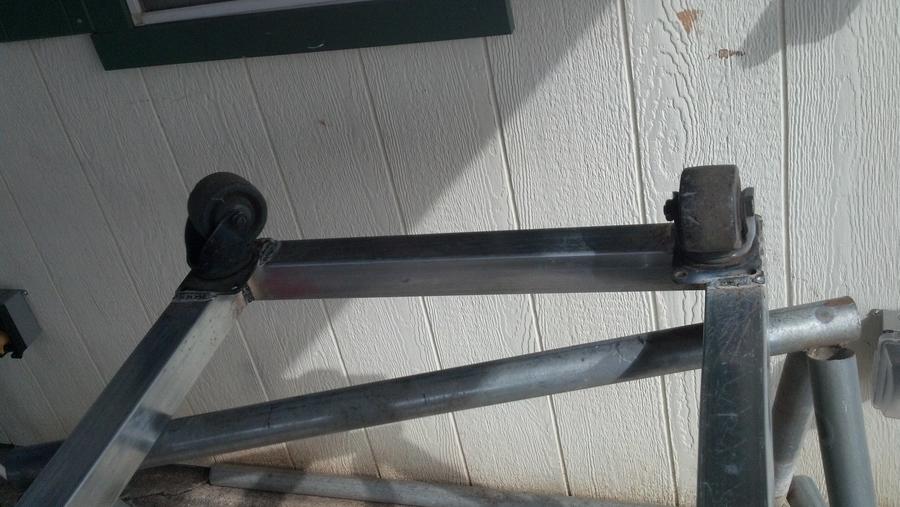
I also scored some used but heavy duty caster wheels for the pit from another good friend. It sure is nice to have good friends.


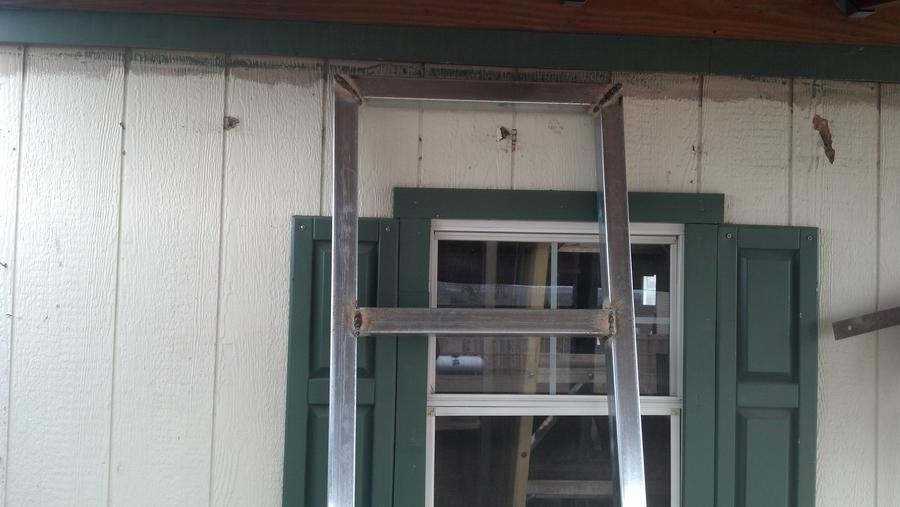
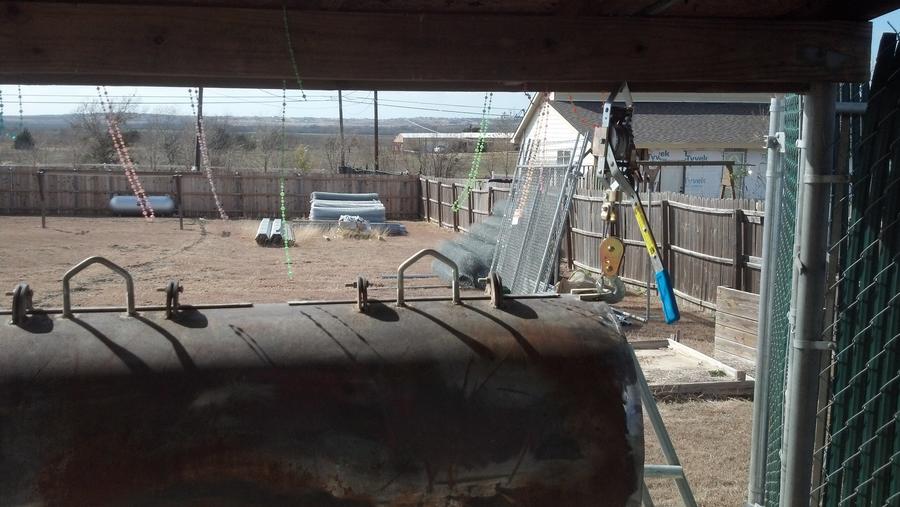
And then came the dilemma; I had planned on using my skid-steer loader to lift up the pit to install legs and get it mounted to the frame. However, it is in the shop and will be there for a few weeks. So, we had to improvise. We rigged 2 cum-a-longs to the frame of my lean-to to lift it up using the u-bolts that were installed for this and future purposes. However, we could not lift it quite high enough; we were lacking 4 inches. So we welded some steel to one side of the pit and the other to the rf plate and started lifting. The pit was rolling on us and I knew that I needed it top-center level. We then added temporary u-bolts to the top end centers of the chamber and were able to lift it to height. I know that a lot of people use car engine cherry pickers, but I don't know anyone who has one. I haven't seen much posting about lifting the barrel to put it on the stand, so I was really winging it.


I ran into the true learning curve; how to get the darn legs onto the pit and onto the stand, and have it all fit right with the right angles and such. Most of the posts I've seen show the beginning of the stand and then the pit is on the stand. It took a long time, a LONG time! But, finally figured it out and it will be so much easier next time.


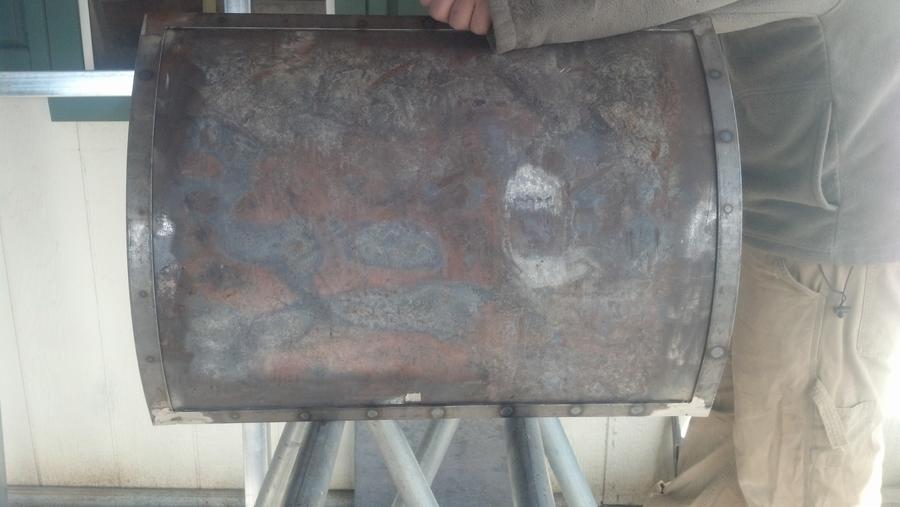
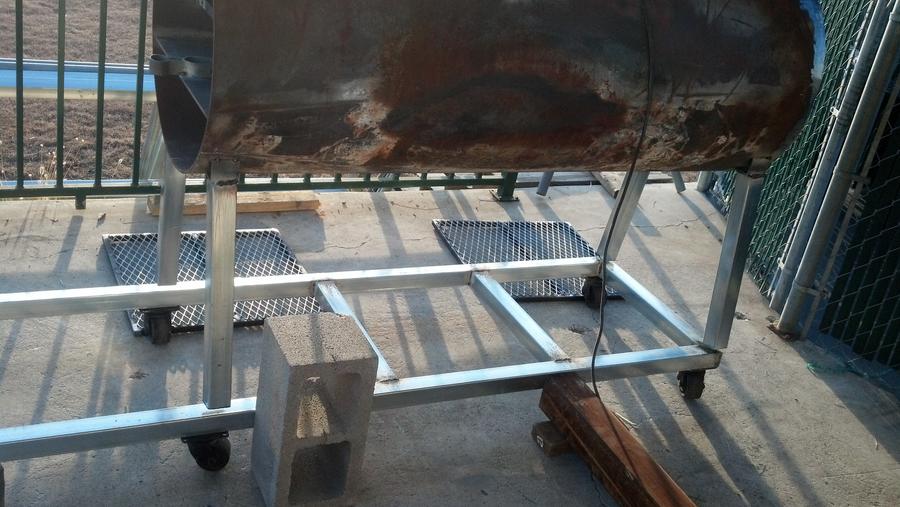
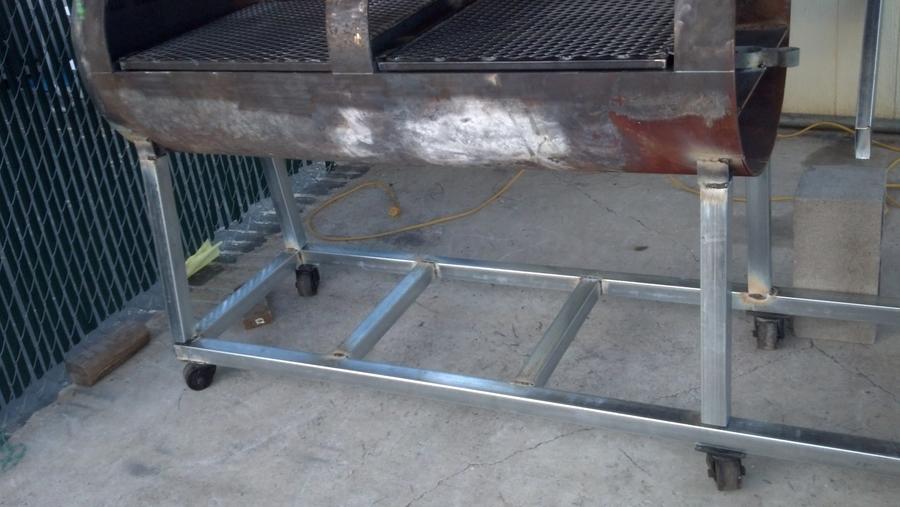
So, finally I have a pit on wheels.

You can see that I extended the stand to go under the firebox. I had thought I would mount the firebox to the pit at the rf plate and then put legs under the fb to the stand. There would be no structural support intended and no wheels under that section. So I think I will cut it back and cap the ends. It is not necessary and I think that long stand looks too much like a sled. Also, I plan to use a floor jack to lift that heavy fb box up to weld and the stand would be in the way for that.

Can someone please help answer a chimney stack volume question? I am thinking about installing the chimney on the end cap, above the firebox so that it doesn't get in the way of the doors. I am probably not going to use a plenum unless I have to, so I thought that I would come out of the side of the wall horizontally for 3-4 inches, have it cut at 90 degrees, and then turn upwards to the required height. So the question; does that horizontal part count as volume? It will take up about 40+ inches of volume. And doing it that way, is the vertical part the calculation, or is it once it gets up above the cc? Any help would be appreciated. Thanks

Keith
 
I am probably not going to use a plenum unless I have to, so I thought that I would come out of the side of the wall horizontally for 3-4 inches, have it cut at 90 degrees, and then turn upwards to the required height. So the question; does that horizontal part count as volume? It will take up about 40+ inches of volume. And doing it that way, is the vertical part the calculation, or is it once it gets up above the cc? Any help would be appreciated. Thanks

Keith, morning.... Smoker is looking good.... About the plenum... if you choose not to build and install one, the 90 deg in the stack will be a BIG area of friction/choke point, restricting the air/smoke/heat flow..
The stack volume in the calculator is figured "above the CC"...
 
Thanks, Dave. So I will either build a plenum or vent through the top. If I use a plenum, I would guess based on your reply, that neither the plenum nor the stack below the top of the cc count towards exhaust volume?
 
I'm not a big believer in exhaust " volume" but more concerned with the orifice size. But Dave is right about the friction....instead of a 90, you could just do a 45 and swap it around for better flow, or just step up the size of the pipe.
 
SmokingMeatForums.com is reader supported and as an Amazon Associate, we may earn commissions from qualifying purchases.

Latest posts

Hot Threads

Clicky