Brinkmann Trailmaster Limted Edition - mods

  • Some of the links on this forum allow SMF, at no cost to you, to earn a small commission when you click through and make a purchase. Let me know if you have any questions about this.
SMF is reader-supported. When you buy through links on our site, we may earn an affiliate commission.
Took me a year to get my pit equal from one side to the other.. Horizon convection ,plate firebricks and two 8x16 steel plates did the trick
 
Where did you get your plates from? How thick are they in gauges? This will be great if I can get a 5* difference.
 
Last edited:
A couple of questions as I have been considering buying either the TMLEV or the TMLEH if I opted for the horizontal version could i put 1/4" thick tuning plates along the length of the cooker and move the stack to the firebox side and wind up with a decent reverse flow smoker?  Also would the horizontal or vertical be better for brisket, pork shoulder, ribs etc? 

Thanks,

Chris
 
I have he horizontal version. Very easy to use. Temp regulates easily. I don't see the need to move he stack It works fine just where it is. I added tuning plates (1/8in) and a charcoal basket. So many people are concerned about a wisp of smoke coming out the lid!

I often use the firebox for grilling. I think it would be cumbersome with the vertical set up.

Juicy Brisket


Last edited:
  • Like
Reactions: gary s
icon14.gif


Gary
 
Nice job on the mods ! Looks great!

Edited- replied before noticing there were 5 more pages, so deleted comments.
 
Last edited:
Smokey

I'm kinda new at offset cookers. I know the concept of a reverse flow pretty well I think. It was just all those ppl who had the tuning plates all pushed together until the very end and then a exhaust extension coming down to the cooking grate kinda had me confused. What you are saying though is that the gaps are supposed to be all along the length to evenly distribute heat and smoke?
 
You need to use a couple of good pit thermometers and you adjust the gaps between the plates until you find the configuration that gives the most even heat across the chamber...thus tuning plates.
 
Smokey

I'm kinda new at offset cookers. I know the concept of a reverse flow pretty well I think. It was just all those ppl who had the tuning plates all pushed together until the very end and then a exhaust extension coming down to the cooking grate kinda had me confused. What you are saying though is that the gaps are supposed to be all along the length to evenly distribute heat and smoke?
I space mine, smallest gap at the firebox and then I spread them out as they get toward the opposite end. I didn't bother with the stack extension to the grate, felt there was no need. I also never needed any gasket or clamps for the cook chamber, if anything only a wisp of smoke is released. My temps are pretty even, even enough for me and if the firebox end is a little hotter, you can use it to your advantage by moving food around if you need to.

Get some wood and some meat and get cooking! It will all come together
 

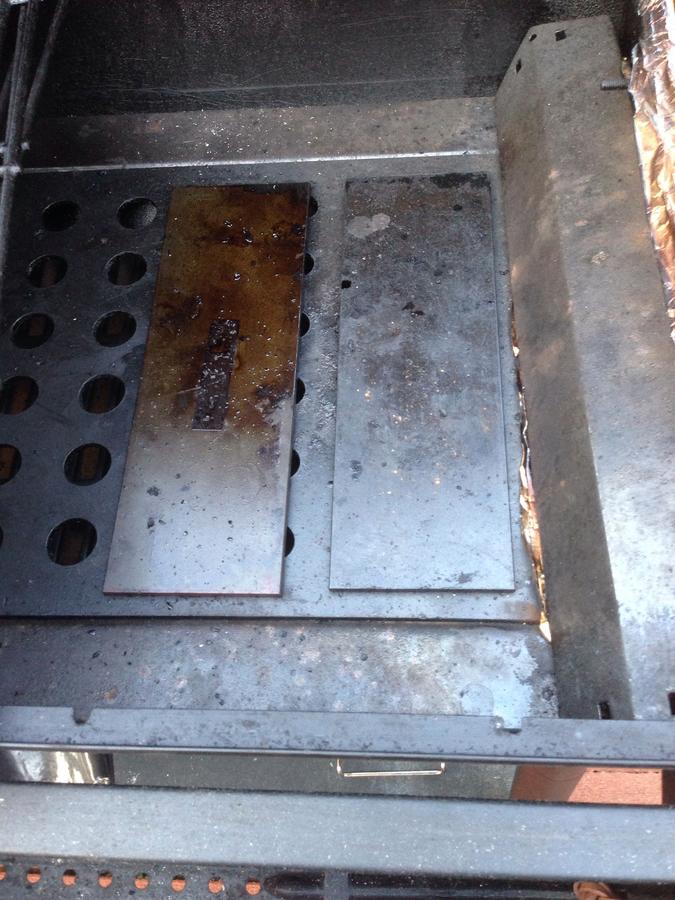
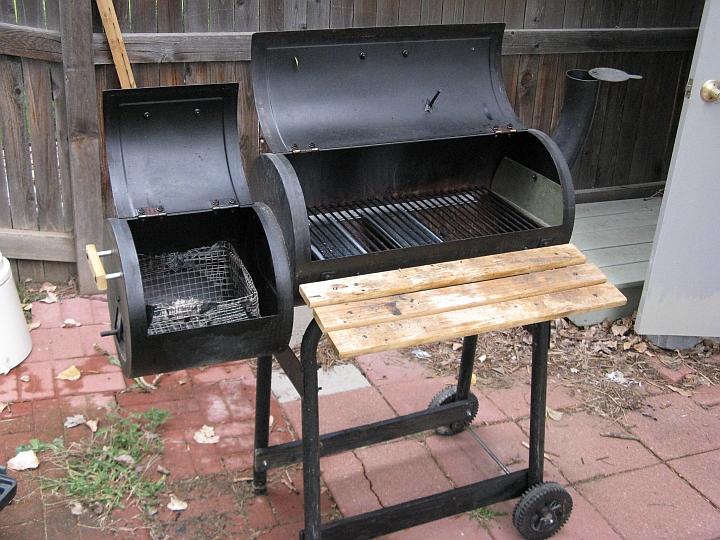
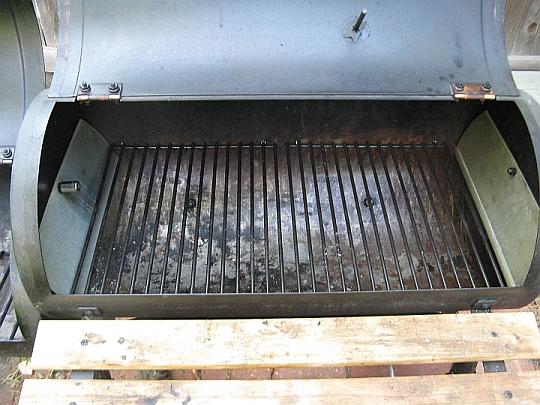
Sure wish I had found your thread earlier.  However, I have made very similar modifications to a New Braunfels offset smoker that is similar to the Brinkman, but made before Brinkman bought them.  My unit is much smaller with a 12" x 24" grill, but cooks plenty of food for my wife, me, two middle aged kids, and four grand kids.  It does require a supplemental rack that site over the grill though. Photos are the original unmodified, the smoke baffles, the tuning plates, and the final insulated smoker (missing the stack). 

Differences between yours and mine are mainly: 

1.  I insulated mine with 2.5 inches of house insulation.  See the picture.  I painted all surfaces under the insulation with high temperature grill paint, covered the insulation with aluminum, but left the ends open for ventilation and to avoid moisture accumulation.  I cover it when not using it. 

2.  I bolted two 1/2" angle iron sections front and back about 1.5 inches under the cooking grill to hold the baffles "tuning plates".  This leaves me room to put a water pan on top of the charcoal grates, under the baffles, and at the entrance from the firebox.  This works very well. 

3.  I put on a 36" stack extension to overcome the extra resistance of the tuning plates and to give better temperature management. 

4.  I drilled four 1/8" holes in the lip of the lid and three in the top of the cooking chamber to monitor the temperature with temperature probes. 

Results are that I use about 1/3 of the charcoal I used to, reduced temperature variations top to bottom and side to side inside the cooking chamber to about 30 F (down from 130 F). 

Anyway, yours is better but mine works real well for us.  I am a real fan of the insulation  It minimizes the effects of temperature changes, rain, etc. and minimizes ash buildup.  It can maintain at least 325 F for 4 to 4 hours with a single fill of charcoal and very little attention using the Minion method. 

I would like io hear experiences of others on these offset smokers.  I really like the flexibility of adding smoke, adding a bunch of lighted charcoal to get a post sear on foods, etc. 


I used red Permatex rtw gasket material.  I got it at ACE for about $8.00.  Muffler shops have this too.  It is good to 650 °F.   I cleaned the inside of the door with paint thinner, dish soap, steel wool, and finally clear water.  I dried it well.  I covered the edge of the smoker with wax paper or Saran, I don't remember which.  I then ran a 1/4 inch bead of the permatex around the inside of the cover and carefully closed it against the smoker.  I did not press down very hard as I wanted a seam to seal.  The Permatex cures in about a day and makes a nice flexible seal.  Mine does not leak now.  

Mine leaked a lot after sealing with JBWeld since the door warped upon heating.  I wanted something flexible.  

I put the Permatex on the door thinking it would be a little cooler than the smoker.  It should not ever approach 650 °F.  It has stood up well over this summer, but the red is kind of ugly.  

Other makers offer a food grade rtw.  Right or wrong, my thought is that they may be the same product but the regulations making a food grade product, constant cleaning the equipment, and much smaller sales volume would raise the price.  There should be no way the food would ever contact the seal, and after curing there should not be any fumes.  

If anybody has more information, I am all ears to hear it.  

There are several food grade makers out there. One is the Rutalands RTV black silicone sealant a member, http://www.smokingmeatforums.comhttps://smokingmeatforums.com/members/26318"color:rgb(24, 24, 24)">  in his coffee roasters. It was what all the coffee geeks were recommending at that time. You know it never said it was food grade but most silicone sealants just emit acetic acid while curing.

Here are some that say they are food grade
http://www.emisupply.com/catalog/su5...ge-p-2283.html

http://www.etundra.com/Red_High_Temp...one-P1573.html

http://www.google.com/products?sourc...ed=0CE8QrQQwAg

Send me an e-mail if you would like.  [email protected]  Hope this helps.  

Cliff
 
Hey DrPHX81,

First off congrats on your mods.  The smoker looks great. I was doing research on my smoker and ran across this post.  I just bought the same model and had a few questions for you.

1.  How is the smoker performing now after 2 years since this post?

2.  Did you guy the gasket and toggle latch combo?

3.  Did you buy a gasket for the cooking chamber door and for the fire box? 

4.  Did you get the fire place bricks and where did you place them?  Your post mentioned on top of the tuning plates but I have heard of people placing them below the tuning plates. 

Thanks!
 
SmokingMeatForums.com is reader supported and as an Amazon Associate, we may earn commissions from qualifying purchases.

Latest posts

Hot Threads

Clicky