Brinkmann Trailmaster Limited Edition

  • Some of the links on this forum allow SMF, at no cost to you, to earn a small commission when you click through and make a purchase. Let me know if you have any questions about this.
SMF is reader-supported. When you buy through links on our site, we may earn an affiliate commission.
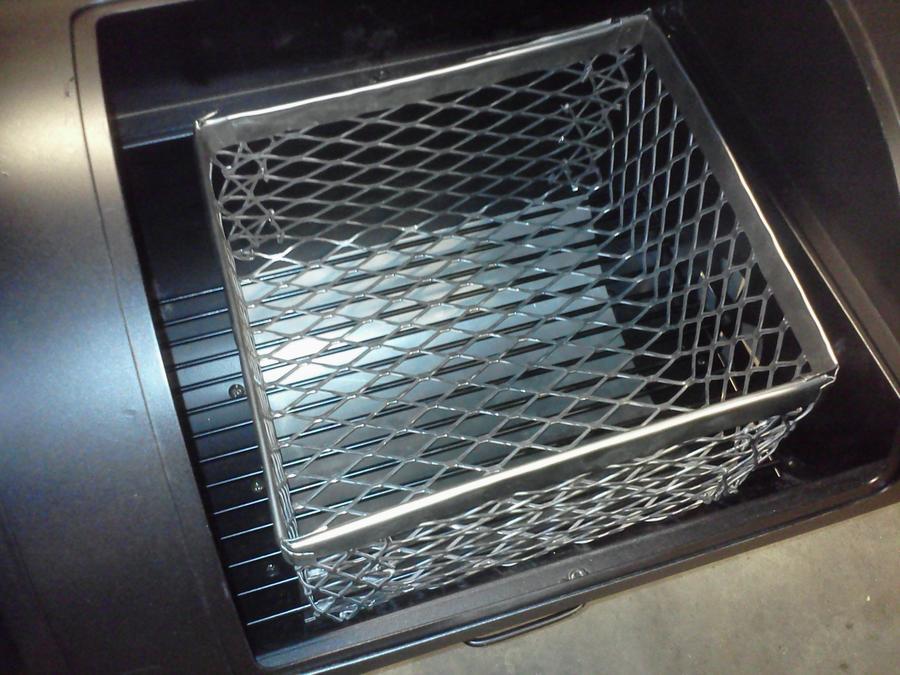
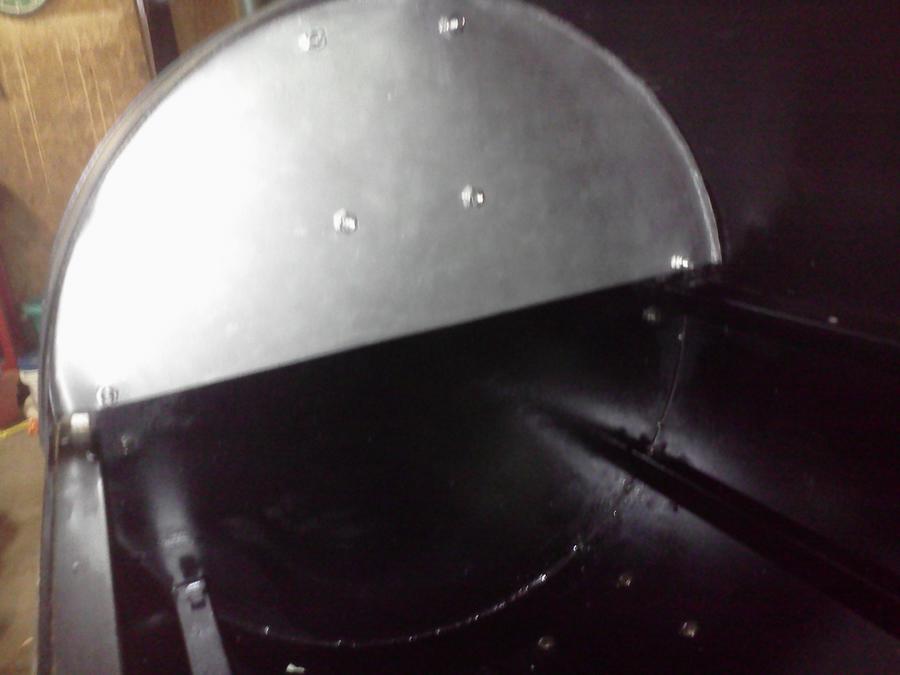
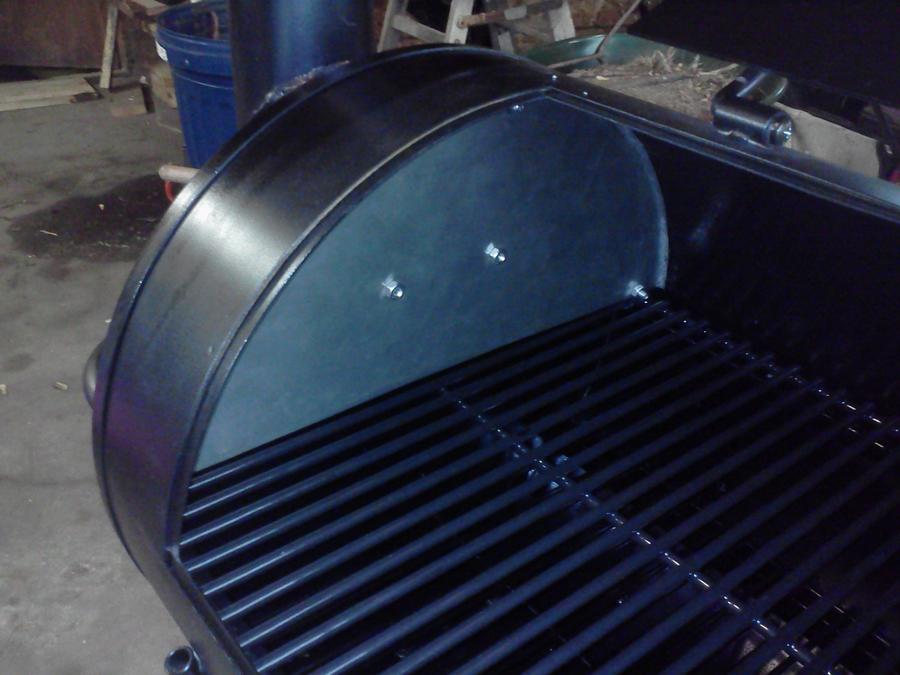
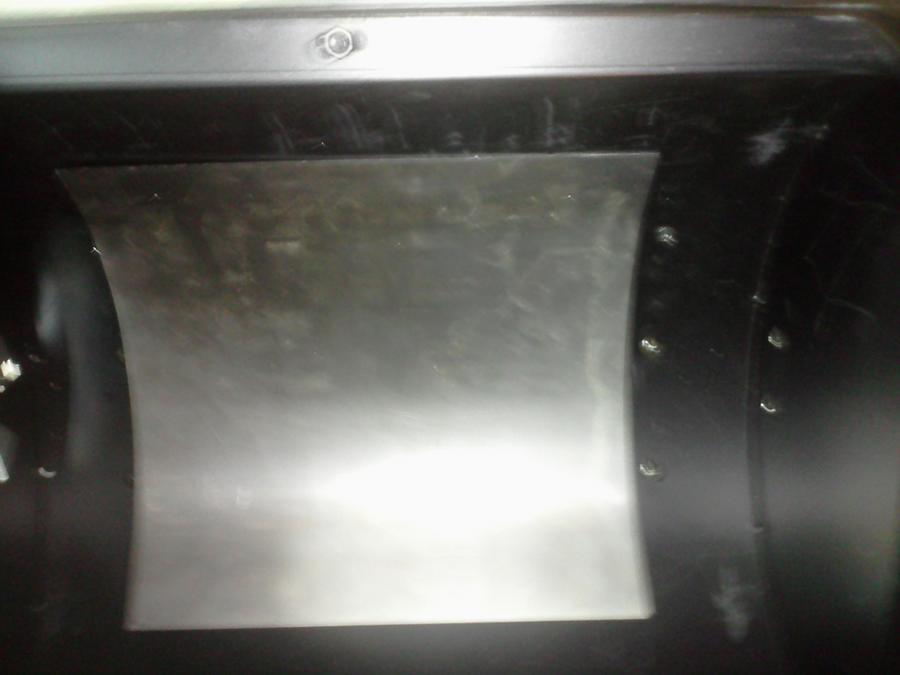
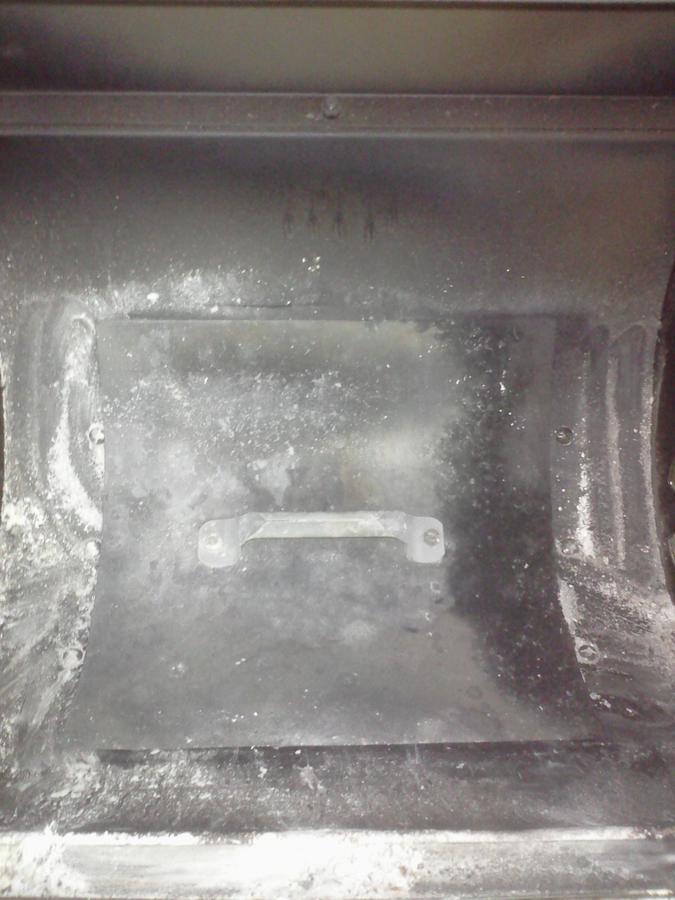
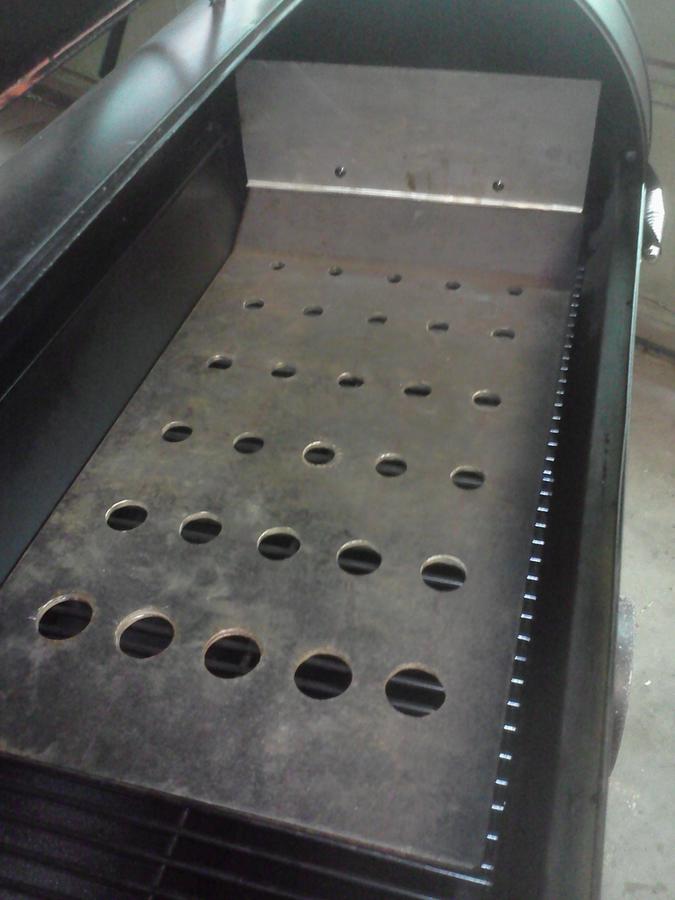
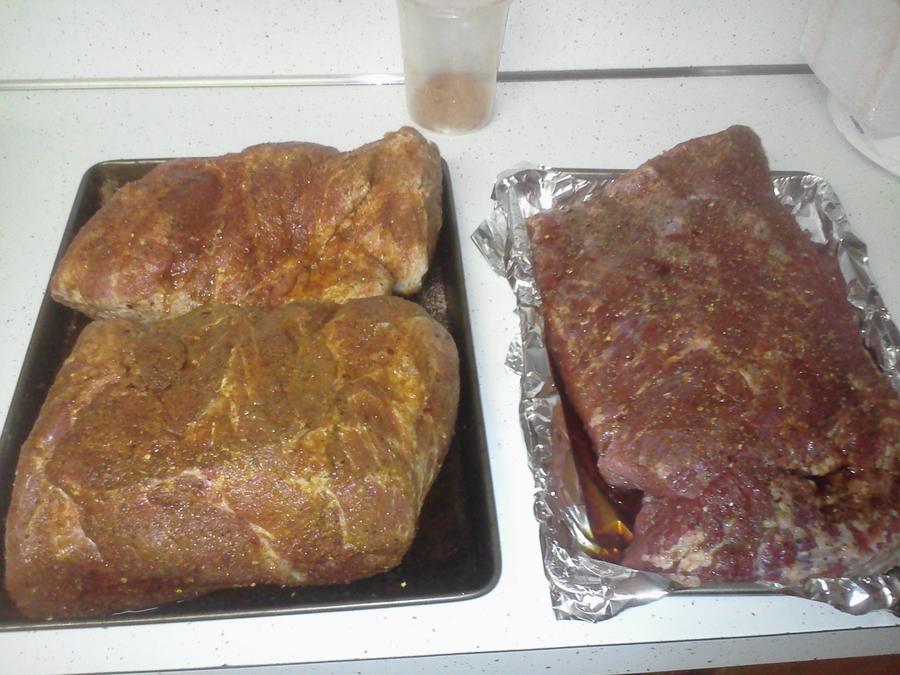
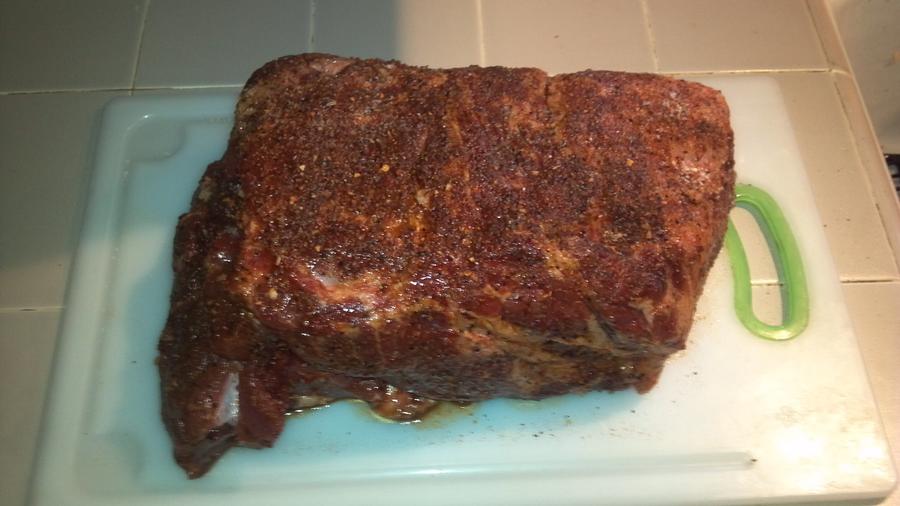
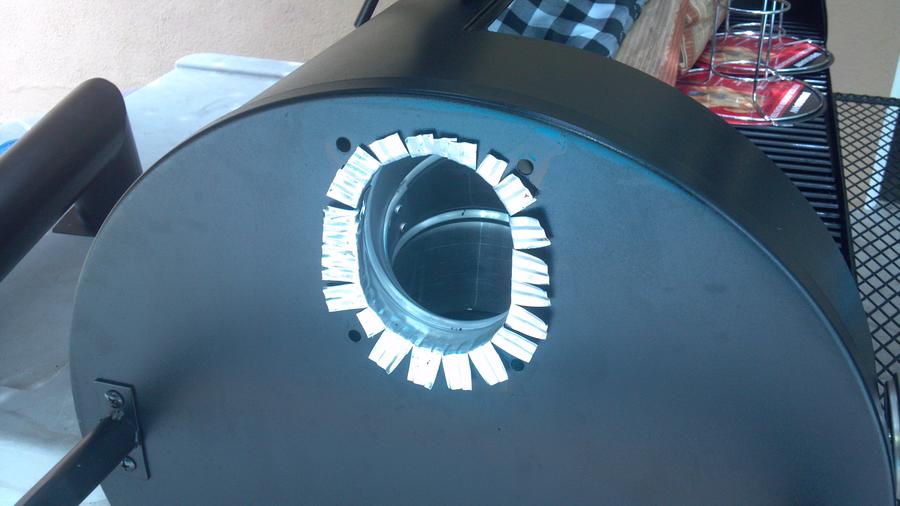
Just got my trailmaster in today and plan on putting together this weekend. Does anyone know if I can get that Rutlands silicone in Home Depot or lowes? Also I might néed some more pics on that deflector shield and bottom plates that have been mentioned. Also how do you season this grill.
 
I couldn't find rutlands at home depot or lowes, Amazon has it though.

As far as the tuning plates, I used cookie sheets that were some what heavy gauge that fit on the bottom racks. I bent one to deflect the heat from the fire box under them.

To season, wipe the whole inside of the grill down with your favorite oil, (veggie, peanut, what ever) and then burn some wood in it as if you were cooking something. this will also give you an idea on how it cooks and how the temps are in your unit before you do cook.
 
 
  • Like
Reactions: fighting irish
Only place I've found Rutlands in-store was at a local Ace Hardware. Otherwise, I order from Amazon.

I don't use tuning plates. Personally, I think they're overrated. A deflector shield is a must, but I think the tuning plates only add thermal mass, which can be accomplished much easier with fire brick or lava rock. But, some people swear by them, so to each their own.
 
  • Like
Reactions: nvv522
Here are a few mods I made to my Trailmaster LE. I can't say how they'll perform because I'v only done the initial curing process. I'll break her in a brisket and pork butt early tomorrow morning. 

Charcoal box as everyone has suggested


Baffle on stack side. I shaped a piece of sheet metal to the curvature of the main chamber above grates. There's about a 2" to 3" space from side wall


Here's a pic with the grates inserted


The removable ash pan was drafty so I closed the opening with a removable piece of sheet metal.


Here's a pic with a handle attached to the piece of sheet metal. I just pull out the sheet metal so the ashes fall into the ash pan


Here's a tuning plate made out of 1/4" steel. The holes start at 1/2" and go up to 1 1/2" inches plus a baffle over the opening to the firebox. This should force the heat under the tuning plate to keep it evenly dispersed.  I'll probably still add some fire bricks to help hold the heat even though the 1/4 tuning plate should hold the heat pretty well. 


Thanks for looking I hope to post some qview soon 
 
  • Like
Reactions: nvv522
donger22, nice informative post. I'm putting together a Trailmaster for my son and want to get it right, so I hope you can oblige me with some info.

1) Did you use carbon expanded steel for the charcoal basket? I have been waffling between the stuff they sell at the Home Depot for $19.99 or Stainless Steel from a steel place which sells for $70+ for a 24"x24" sheet.

2) Did you use 1/4" steel for both the tuning plate and the baffle?

3) Are the baffle and tuning plate welded into one large sheet, with a 45deg angle or is the baffle made out of different stock?

4) What thickness sheet metal did you use on the stack end?

5) Can you provide dimensions and hole sizes for the tuning plate.

Thanks

Joe 
 
I ordered one roll of grill felt it is adhesive backed and I put it on the lid side. I havent added the clamps that some people have added. I am guessing that some of these smokers have fitment issues I have no smoke coming out of lis now that I added the felt. The felt is Bayou Classic Replacement Felt I have had installed for about a month with no issues if it fails I will be using the silicon method.
 
Hello Joe

1. All home depot stock for charcoal basket and all sheet metal. Tuning plate was custom from welding shop. 

2. Both baffles made from sheet metal purchased at home depot.

3. Baffle and tuning plate are two separate pieces. Tuning plate  is 1/4" steel with the bend. Baffle has a small lip to rest securely on tuning plate. (used screws attaching firebox to secure)

4. Holes started at 1/2" increasing an 1/8" increments up to 1 1/2". Don't recall dims of plate offhand. (basically the length of the bottom two grates in the main chamber) 

I did my first food cook (yesterday) and the jury is still out on some of the mods. I had problems getting up to temp after adding in the baffle on the firebox side. I think I might be restricting too much airflow, Not sure, so back to the drawing boards. I'll need some help on adjusting mods to determine if I should remove some to help air flow. Don't want to spend the money on a bbq guru (just yet lol) 

I cooked a 10lb brisket and two 10 lb. butts. Cook time was 16 hours and about 45 lbs or charcoal (ouch...hence airflow problem)

Any suggestions or advice from the panel would be much appreciated. 

thanks

Mike
 
Thanks Mike,

I found some sheet metal in the garage left over from my Brinkmann Pittmaster which bit the dust this season. I will make a baffle form this material and run it about 6" under the grates, which has worked in the past. It seems like you used sheet metal for the stack side deflector, how did you space it from the side wall and was it effective?

Joe
 
 
Just bought the trailmaster Friday, did most of the mods or a version of them before I cured and did final smoke. I have to say it was easier to keep temp than I thought it would be. I've used a propane smoker for years bit always wanted to try stick smokin.

I used a fire resistant caulk when assembling at all areas that would have a chance of leaking. Put up a baffle and some tuning plates; couldn't find thick steel but found some 22 gauge steel at home depo and it worked great. Built the firebox with expanded metal and caulked doors with the heat resistant silicone. I also put the drier vent elbow extended from the chimney

Used lump charcoal I bought at BJs along with hickory logs. Fire box was 9×12×10 and held plenty of charcoal to keep it going for a few hours before I had to add more hickory.

Put pork on and kept it 225-250 with only one flare up that got up to 300 but with closing whist and intake it quickly came back down.

9 hours later I had to foil it as family was hungry and I knew I didn't start early enough to do it all without wrapping. 2 hours later it hit 205 so I untapped and put back in smoker to crisp back up, worked pretty good


5 hours in.

Before foil

Finished product.


Pulled it after sitting an hour and was amazing. Got way more bark than I normally did on propane smoker. Can't wait to try a different meat!


  • Like
Reactions: nvv522
Nice pics Jimmy. I am beginning to believe that simple is best. My past Brinkmann units have always had sheet metal baffles and flashing material to extend the stack to grate level, never had silicone or tuning plates, but always had great Q.

I found an ACE hardware that sells the Rutland silicone and the gasket kit. I will use left over sheet metal for the baffle and a dryer vent pipe to extend the stack. Tuning plates, if used will be 1/4" steel spaced. Walmart used to sell BBQ thermometers, which I will add at grate level.

What size dryer stack did you use?

Joe
 
 
I removed the stack and used those holes to attach the baffle (made of sheet metal)  using longer 4" bolts w/ three nuts per bolt (one nut to re-attach the stack, one for inside wall of baffle eye balled for spacing, one securing outside wall of baffle...all stainless steel) 

I ended up removing the upper baffle on the firebox side which solved my problem with heat transfer. 

Mike
 
Here a couple pics breaking her in for the first cook. 


I forgot to take pics when they first came off, but I must say the pork and brisket looked pretty sexy. The sides are cole slaw and a macaroni salad with BACON...yummm. By the time I remembered to take pics I was down to scraps. 


The brisket didn't stand a chance, but there was quite a bit of pork leftover. I threw some in with scrambled eggs and cheese in the morning for breakfast. Then made some pork nachos for an appetizer and had a few more people over to help out with leftovers. There's still some left that will make lunch for a couple of the guys at the office. 


All in all, I was quite pleased with the final product. 
 
  • Like
Reactions: nvv522
Donger, was your baffle flush/close to flush on the firebox side? If so, you probably choked your air flow too much. Typically, you want about a 45 degree angle on the plate. Too sharp of a bend creates a choke point and too much turbulance for good air flow.
 
New member here!

Some pics of the trial run with a 7lb+ pork shoulder (Boston butt).

You can see how I fashioned a damper over the firebox intake by wrapping one of the cook chamber's charcoal grates with heavy-duty foil and suspending it with wire from the top rack. Punched a few holes in it towards the bottom. Also wrapped the other two grates and punched holes in them as well. There was a 4-5" gap at the cold end of the chamber. Didn't have accurate chamber thermos at the time, so I can't say how successful the rigging was.


Since then, I have added two additional thermos, and have the RTV for the doors and firebox, the 4" 90 degree vent for the exhaust port was installed, and will be trying the addition of 4 firebricks on the lower grates as heat sinks. Got some Ozark Oak lump on the way as well.


Last edited:
I used 4" drier elbow.  I put it through the hole on the inside then cut slits in the end so i could bend it back to the side of the grill.  Then put the chimney on there over top of the tabs. 
 
I had limited time today, attached the legs and bottom tray to the sons Trailmaster.

I visited the metal distributor, bought a sheet of 10 gauge steel, to cut into 14'" x 6" deflector plates and a 4' x 4' sheet of expanded steel enough to make a couple of charcoal baskets. Then went to ACE hardware to buy two tubes of the Rutland high temp silicone and a gasket kit. The label on the Rutland gasket kit described the product as being saturate with graphite and not suitable for contact with food, so I was weary and only got the silicone.

I would like to use a 4" dryer elbow to extend the stack to grate level, but I am worried about that piece being made of galvanized material.

can anyone provide info on the type of dryer vent used.

Thanks

Joe
 
 
SmokingMeatForums.com is reader supported and as an Amazon Associate, we may earn commissions from qualifying purchases.

Hot Threads

Clicky