GM Frigidaire Build

  • Some of the links on this forum allow SMF, at no cost to you, to earn a small commission when you click through and make a purchase. Let me know if you have any questions about this.
SMF is reader-supported. When you buy through links on our site, we may earn an affiliate commission.

usaftrevor87

Smoke Blower
Original poster
Feb 22, 2015
82
11
Update with Tips Below

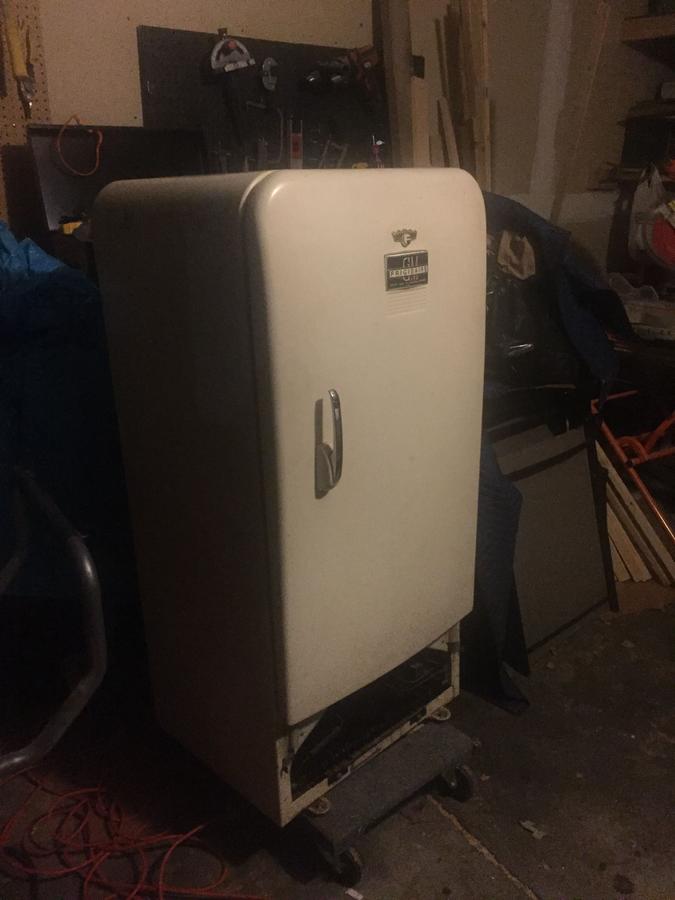
Responded to an ad on Craigslist list & initially turned him down because I thought it was to small. Well he contacted me at the beginning of the week saying that his wife wanted it gone & he would give it to me for free. How could I say no?? So I picked it up on my way to an estate sale.
From what I can garner in my quick research online, it is a 1948 GM Frigidaire. I ordered an Auber PID, Brinkmann 1500 watt element. I also picked up a 3" exhaust with rain cap, some stainless steel rivets.
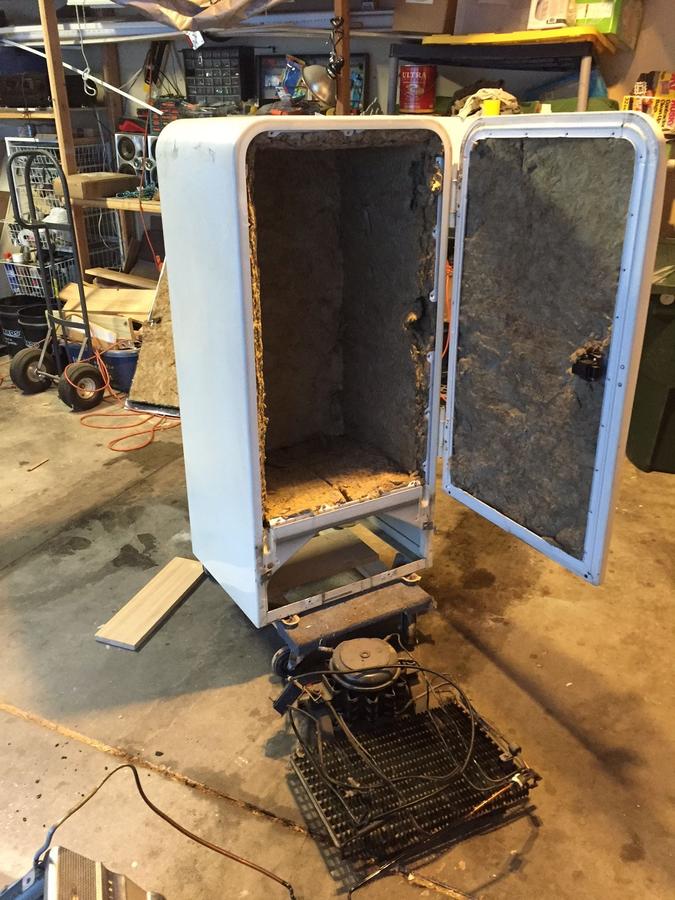
I'm wondering if I plan to do 1" steel intake into a AMPS ammo box, will that be enough of air intake? There isn't a damper on the exhaust, figured I would add a 2nd intake with damper if i needed more control, but figured the auber would take care of that.
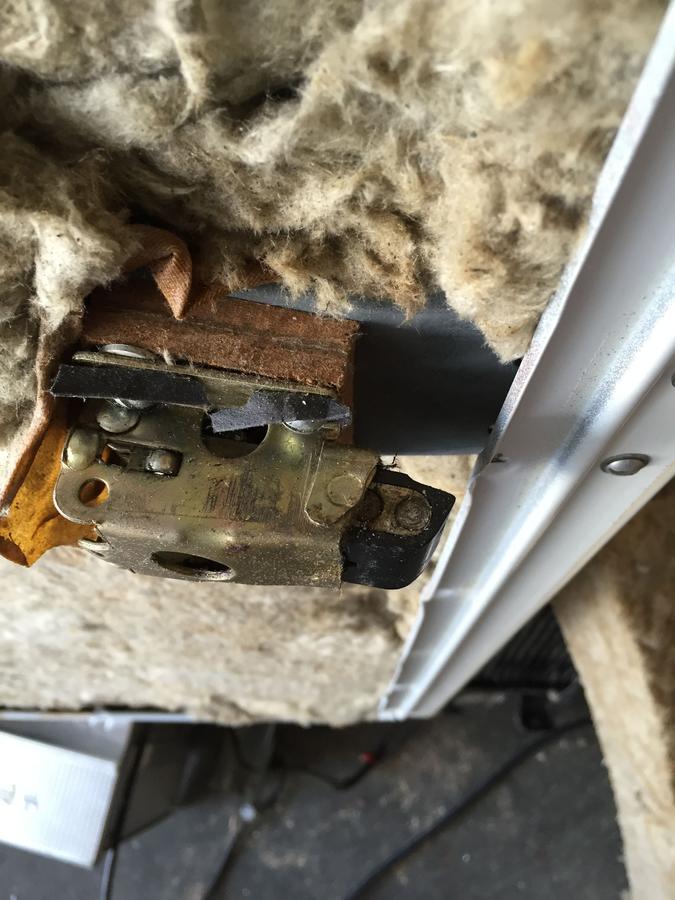
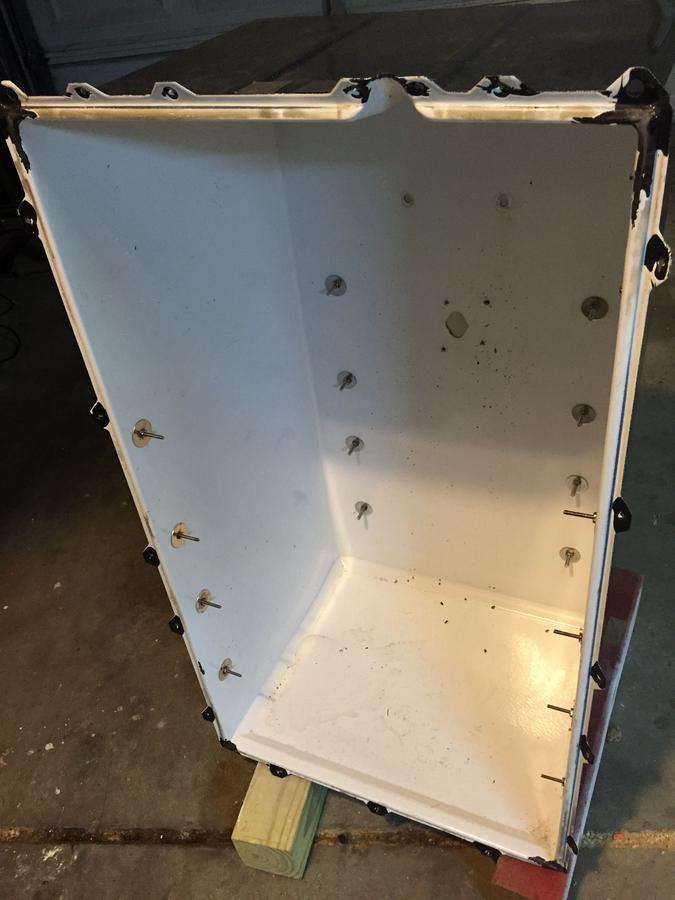
I think i lucked out on the door, it looks like its all steel except for the rubber gasket, so I plan to just take the gasket off, make sure it is all sealed and add a BBQ gasket.
Also I have the the lower part of the fridge hiding the compressor and plan to make some sort of hinge & door for it.
Thanks to everyone here for being so awesome & willing to share advice and insights.
GALLERY]


So it is finally finished! The Ugly Piglet made her maiden voyage. Here are just some quick thoughts or tips on if I had to do this again what I would do differently.

I will change any of these tips if I run into issues, and they are just my opinions.

1. Splurge on the Auber! Mine was the WSD-1500 model. You don't have to; especially if your budge is tight, but if you are going electric it is SOOO nice to have.
2. Rutland's 500F (or they make a higher one too) is AWESOME stuff. You can use it in -30F weather and still have it set right. Since this was my winter project, I needed that flexibility.
3. When you are cutting the holes with a hole saw, get some oil to lube the teeth and go nice and slow. If you try to force it the saw will sometimes walk and you'll have issues.
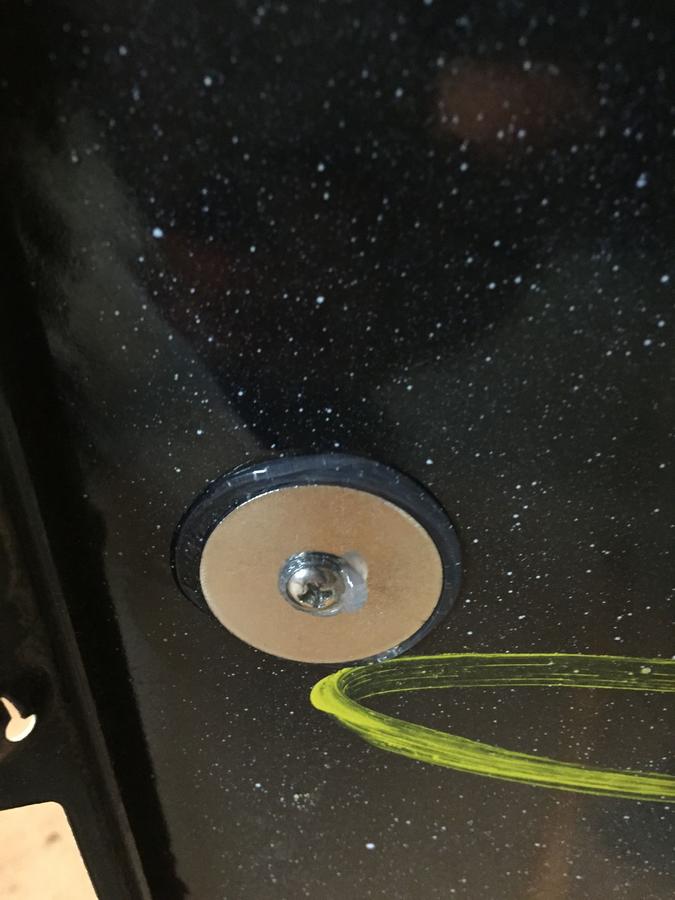
4. Intake and smoker's box; I used the AMPS and an ammo can. My intake (and only intake on the build) is only 1 1/2" diameter and it seems to be working great. If that changes I will update this tip, but I don't see why you need so many or large intakes for an electric build.
5. Used a 3" exhaust with no damper, just don't see the need in a damper, but it probably personal preference.
6. The black tarry cement that came with the gasket I thought was garbage. Didn't work right, but that maybe due to the 30 degree weather too.. Used the Rutlands silicone and it works great!
7. Was not able to use the original door latch so I bought on amazon a Uxcell Toolbox Toggle Latch. This thing is serious!! bigger than I thought and works great!
8. Get a Strip fin heater, again if budget allows. It is a little more work to wire it up, but probably would be better than the 1500 watt replacement element I have. Not that the element is bad, because it isn't; infact in 30 F weather I heated to 225 in 40 minutes… that is pretty good in my book. The Stripped fin heaters from Grainger just have a smaller foot print and I think would've been easier to install.
9. Have fun! Be patient and read read read
 
Last edited:
Cool fridge, going to be an even cooler smoker! Haven't built one, so can't offer advice. Check out the fridge build forum here, you'll find lots of info there. Good luck, David.
 
Well, had the day off, so I took a screw driver to the fridge. My initial assessment without a magnet was wrong... It does have a plastic lined door. Which is fine, I will have to just get a thin steel piece cut out for it. Other than that, it couldn't have been better!!
Here is my plan from here & I have some questions if anyone could lend any advice. 

- I plan to keep the original insulation... I know, I know Roxul is better, since you have it tore apart just get some, etc etc. But I took a MAPP torch to the original insulation and I was surprised how long it took to start smoldering. Obviously a MAPP torch is overkill, but wanted to make sure. This smoker will max out at 325 for the meat I do. So I just can not justify $50 for a roll of Roxul, that I'll barely use any of. And I splurged on the PID, so I figured I wouldn't replace it.

- I will also probably use aluminum flashing to cover the gap between the inside and the shell, and screw in place with stainless steel screws.

- Then to fill the holes in the inside liner, I will use Aluminum flashing with SS rivets, and sealed with Rutlands oven sealed.

- For the rack holes, I plan on using those same holes holding the smoking racks. So I think I am going to get SS fender washers, bolts, and nuts and install them in the pre-existing holes. That way it seals the hole and the rest of the screw protruding inside will act as a shelf rack. Don't have to spend the money or time cutting and installin L brackets.

So my questions are this...
1. Still plan to do a 1.5" inlet pipe for a AMPS Ammo Box Mod. Do you think that will be enough airflow for an electric smoker?

I tend to think so, but then I see some people on here putting 3 inch inlets and 6-2" inlets with ball valves, just seems like overkill.

2. Does anyone know what the original racks are made of?

I would think they wouldn't be galvanized metal and probably aluminum?? But I have no idea, was going to reuse them, but probably best to just replace them... Better safe than sorry

Check out the pics below. Thanks in advance!


Nice looking fridge! You are well on your way. In regards to the racks, put a magnet to them, if they are non ferrous, probably stainless, but take a razor blade to it. If it's aluminum you can easily scrape some metal off. Stainless you will just clean it. Which pid did you buy? What's your plan for heat? I built a similar fridge a month or 2 ago, used a double burner set up, works pretty good. There is a post on this site on how to properly sheet a fridge door, using string to for an x across the door. You will definitely want to follow that guide, or you will be sorry. (Uneven door gaps and poor seal) you can check out my build for some ideas. Feel free to ask questions.

J

Thanks for the tips on the racks. I will have to check that out.
I dud the Auber dual probe. Forgot the model number WSD-1500 i think? I also ordered a 1500 watt Brinkmann to heat with. It's a smaller sized fridge so I think it will be more than enough.

Maybe you can help me again haha like a Dumby I forgot to take pictures of the latch for the door. I need a little help getting it put back together. I did a mock up on a piece of scrap wood. Is this right?
 
I was actually hoping to see what the other latch mech. That adjoins to the one in your pic looks like, I'm guessing the handle on the fridge door has a moving mechanism that locks into that piece? Also, I looked for the post on how to properly sheet your door and I couldn't find it, so I will do my best to give you the instructions.

Lay your door flat on the ground open side up. I placed mine on a blanket so as not to scratch it. Place small screws in each corner. Take a thin string and carefully tie across corners forming an x in the middle. It is important that the string be tied the same distance above the door in each corner. For example 1/4 above door in all 4 corners. Where the string comes together at the x it should be just barely touching. If not, take shims and gently raise the corner that is low to bring it together. Note, you will probably need to shim all 4 corners so that to adjust one doesn't just shift the others. It seems like a lot of work, but it's very important.

My door looked straight so I didn't do it, now I get to drill all the rivets and start over.

I'm sure I wasn't as clear as the original description, but I hope you can get the point. If not I'm happy to further explain.

How were your racks?

I have had many racks that looked like they were rusted, in actuality it was food gunk from previous use as a fridge. I took a stainless wire wheel to them and they cleaned right up. Make sure to only use stainless on stainless, a iron wheel will impregnate into stainless and make them rust. Basically ruining a good stainless rack.
 
Racks update:
a magnet definitely stuck & was able to scrape it pretty good with a razor. I'm assuming it is aluminum, it's fairly light. They didn't used galvanized back then did they?

Door:
I know the post you are talking about. Credit to Dave (i think his name was) i will definitely do that! Saw it in a lot of these build posts

Drilling:
How are you drilling your holes? bimetal hole saw? I used that & it's strange. Worked well on the top back of the liner and then didn't work well on the bottom. Teeth didn't look too worn down, but ended up using a drill 1/2" drill bit and dremel to cut out what was left.
I then use JB Weld steel stick to fill in any holes & clean it up a bit. I did a little searching and regular JB Weld (stick or other epoxy) is good up to 500F and is food safe when cured. Also microwaveable if need be lol

Latch:
Here is the other latch. Sorry about that haha mis understood your post lol
 
Sealing:

I actually used SS fender washers and machine screws for the rack holders. It was really easy and i got a pack of 8 screws, washers, & nuts for like $3.00 so it was pretty cheap. Also didn't have to buy the L bracket steel & try to cut it all down and go through that hassle. Turned out great.

It's gonna be chilly the next few days, so work will be slower but hoping to finish the ammo box mod tomorrow, along with exhaust & liner/shell skinning. We shall see though.
 
Ok, if the magnet stuck it's not aluminum. I have seen galvanized racks, and also chrome. Would stay away from either one.

Ok, it looks like the two flathead screws will point to the inside of your fridge to hook the rubber latch. You are going to want to nail the location perfectly otherwise the latch will stick. And it gets worse as they heat up.

Yes, I used bimetal holesaws. The baked enamel coating is very very tough, and it is thickest in the bottom it will ruin drill bits for sure. If it is possible to drill from the back side that is a lot easier than enamel side first. High pressure and low speed are best for the bits, and cutting oil always helps. Wear safety glasses, when under pressure the enamel not only chips but also bursts away from the teeth.

Hope that helps, I'm no expert, just what my experience has been in the last 2 builds
 
Oh duhhhh haha I'm just gonna probably pick up some expanded steel & just call it good.
Why stay away from chrome? A lot of grill racks are chrome finish?
I marked the location where the latch was before, just forgot to do it fully assembled haha
I will do drill from now on from the backside. The only thing left I have to do is drill the spot where the element cord will come through.
Got the PID in the mail yesterday. Will have to mess with it tomorrow though. Playoff games are today, so I'm basically booked for 7 hours haha
Thank you for all your help. It is greatly appreciated.

Trevor
 
Chrome will work fine you are right about most racks being chrome. It has the tendency to chip or peel after time which can be a pain, that's all.

I like your shelf supports good idea.

May I suggest another row of bolts about 6 or 8 " behind the front set. This will enable you to slide your rack out say to move a temp proben or turn a piece of meat. Just a thought.

J

Thats a good call, i just might do that! I'll check how many bolts I have left lol
 
SmokingMeatForums.com is reader supported and as an Amazon Associate, we may earn commissions from qualifying purchases.

Latest posts

Hot Threads

Clicky